Accessing School Event Logs
To view the School Event Logs dashboard: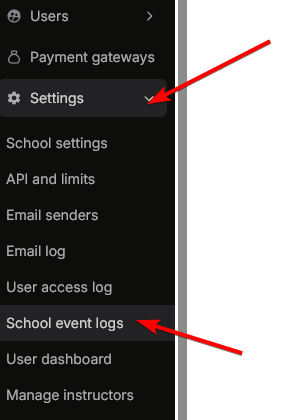
Understanding the Event Logs Dashboard
The School Event Logs dashboard displays a comprehensive table of all events that have occurred in your school. Each log entry includes detailed information about the action, the resource affected, and who performed it.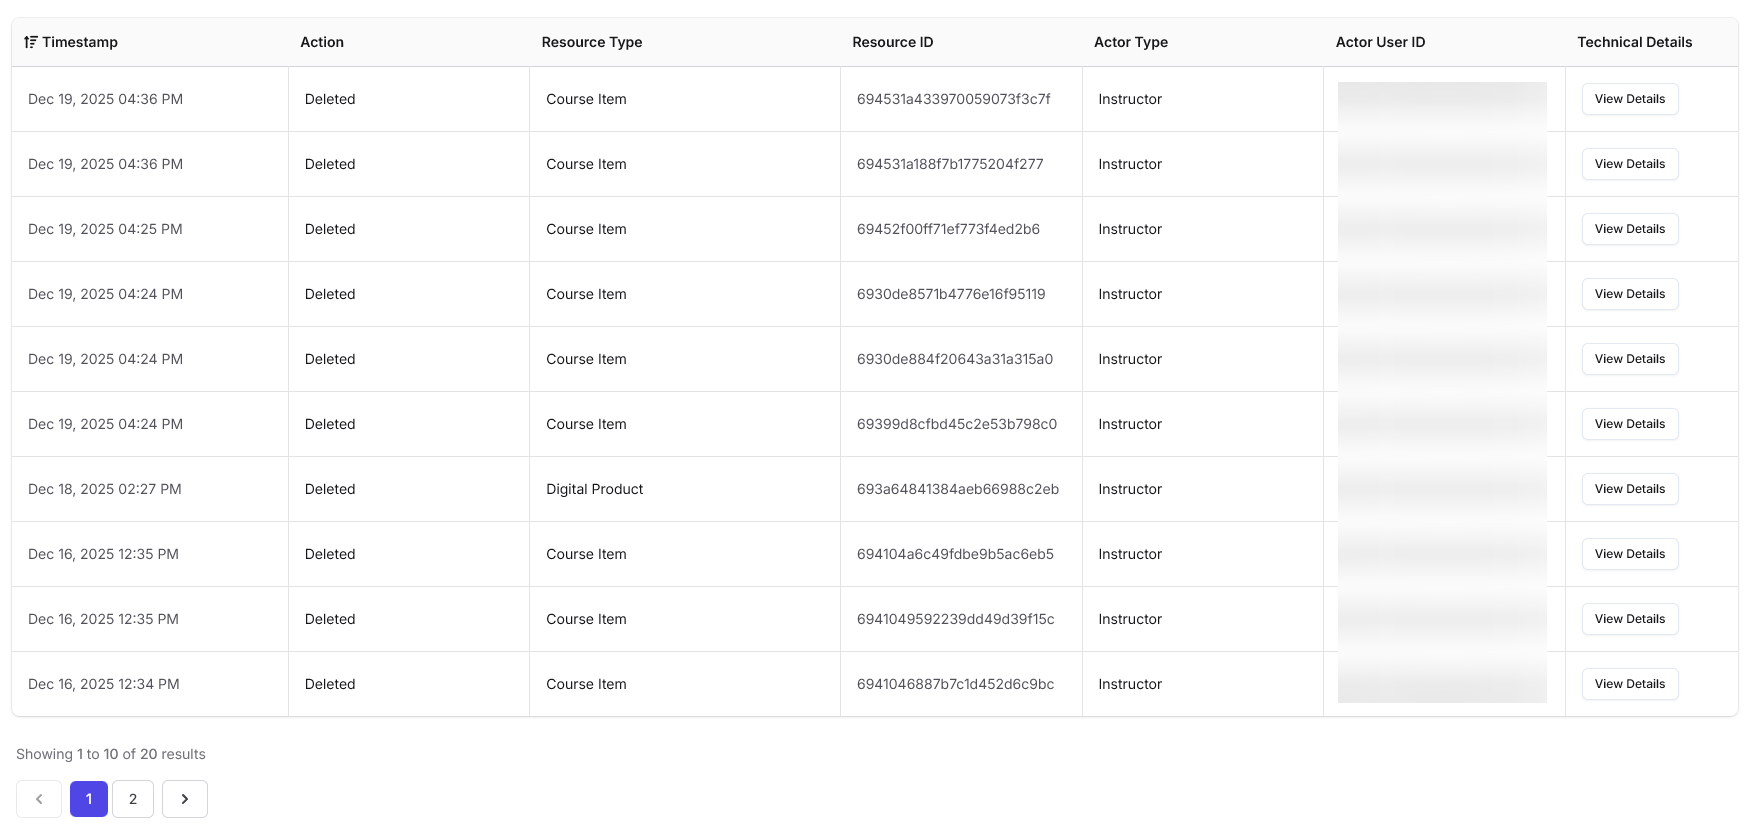
Event Log Columns
The dashboard displays the following information for each event:- Timestamp: The date and time when the event occurred. You can filter logs by timestamp using the filter icon in the column header.
- Action: The specific action that was performed (e.g., “Deleted”, “Updated”, “Created”).
- Resource Type: The type of resource that was affected by the action (e.g., “Course Item”, “Digital Product”, “Video”, “Live Event Session”, “Payment Gateway”).
- Resource ID: A unique identifier for the specific resource that was acted upon.
- Actor Type: The role of the user who performed the action (e.g., “Instructor”, “User”, “API”).
- Actor User ID: The unique identifier of the user who performed the action.
- Technical Details: A “View Details” button that provides additional technical information about the event.
Filtering Event Logs
You can filter the event logs using two main filters to narrow down the results:Resource Type Filter
The Resource Type filter allows you to view events for specific types of resources: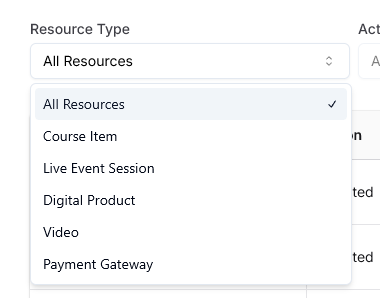 Available resource types include:
- All Resources: Shows events for all resource types (default)
- Course Item: Events related to course items
- Live Event Session: Events related to live class sessions
- Digital Product: Events related to digital products
- Video: Events related to videos
- Payment Gateway: Events related to payment gateways
Actor Type Filter
The Actor Type filter allows you to view events performed by specific types of users: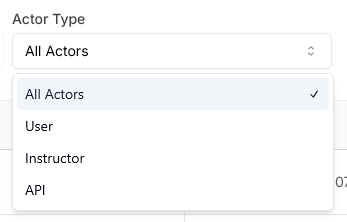 Available actor types include:
- All Actors: Shows events from all actor types (default)
- User: Events performed by regular users/students
- Instructor: Events performed by instructors
- API: Events performed through API calls
Viewing Technical Details
For any event log entry, click the View Details button to access in-depth technical information about that specific event. The technical details panel displays: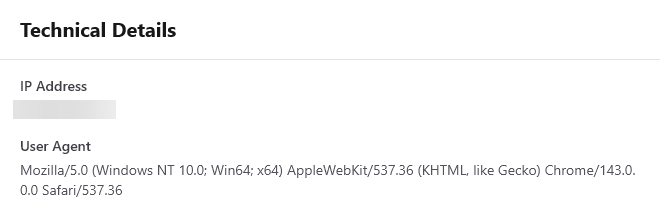 Here you’ll find:
- IP Address: The IP address from which the action was performed (masked in UI for privacy).
- User Agent: Detailed information about the browser and device used to perform the action.
Why Event Logs Are Important
School event logs provide instructors with complete visibility into all activities within their school. This helps:- Accountability: Track who performed what action and when
- Troubleshooting: Identify issues by reviewing event history
- Security: Monitor for suspicious or unauthorized activities
- Compliance: Maintain an audit trail for regulatory requirements
- Transparency: Ensure all actions are logged and traceable
Next Steps
User Access Log
Monitor all logged-in sessions and maintain account security.
School Analytics
Gain insights into your school’s analytics and track feature usage.