Live event email reminders
By default, all system-generated emails are sent from a Fermion-associated email address. If you want to use your own domain as the email sender, please refer to the Email Sender Configuration documentation to learn how to verify and connect your domain.
1
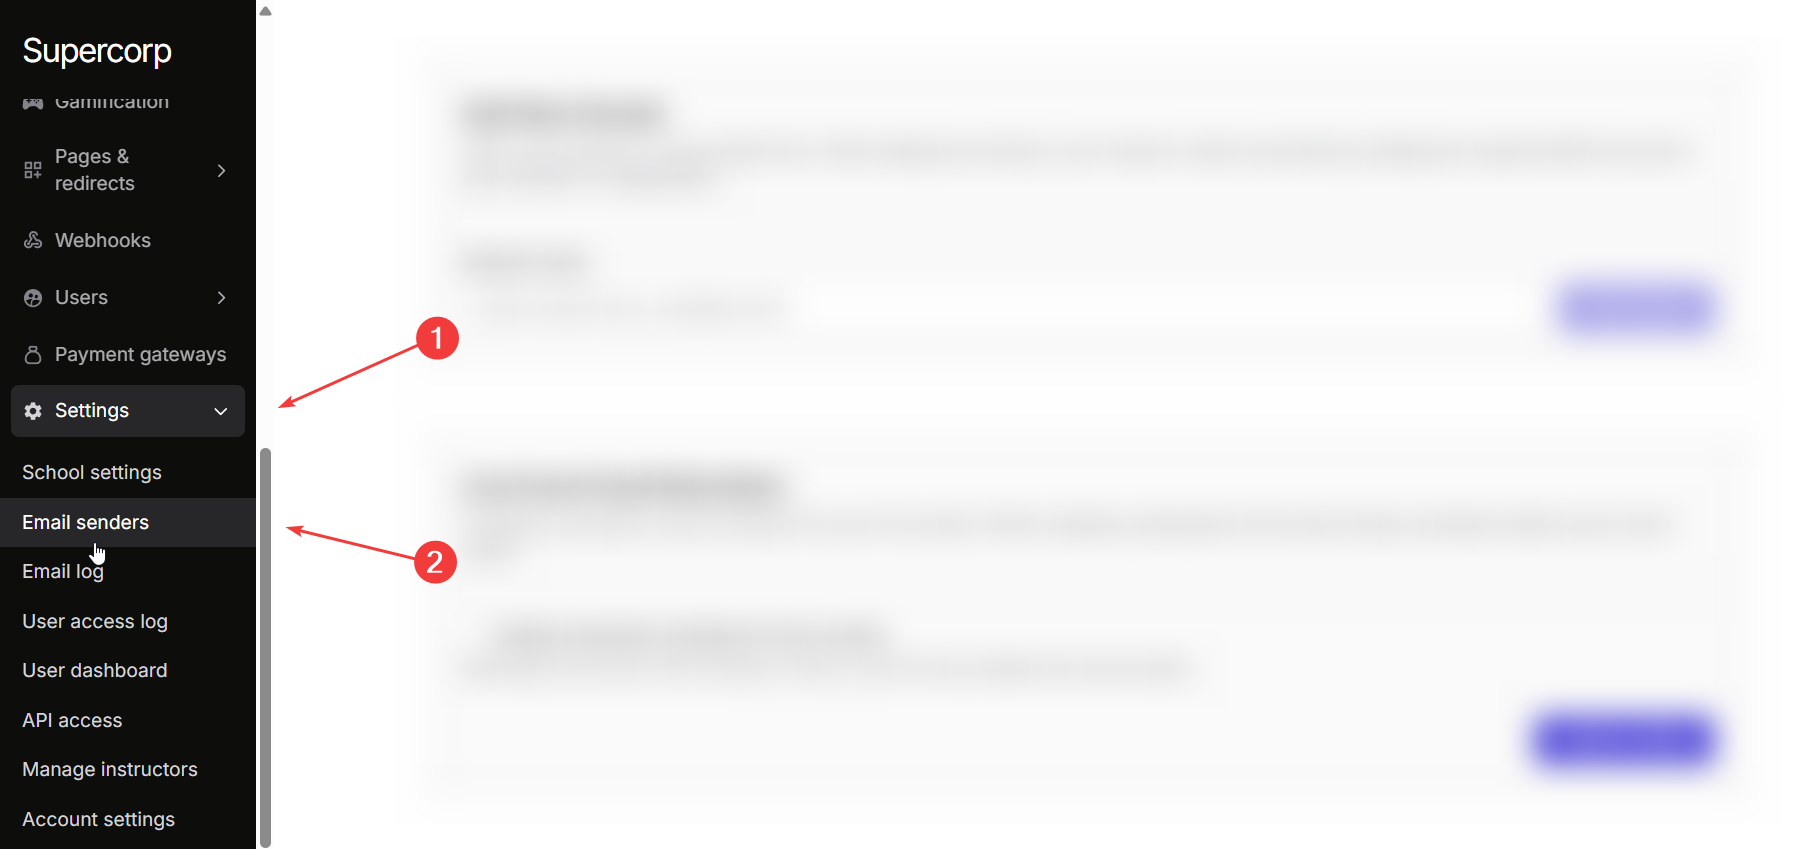
Open email sender
Navigate to your instructor dashboard → Settings → Email sender.
2
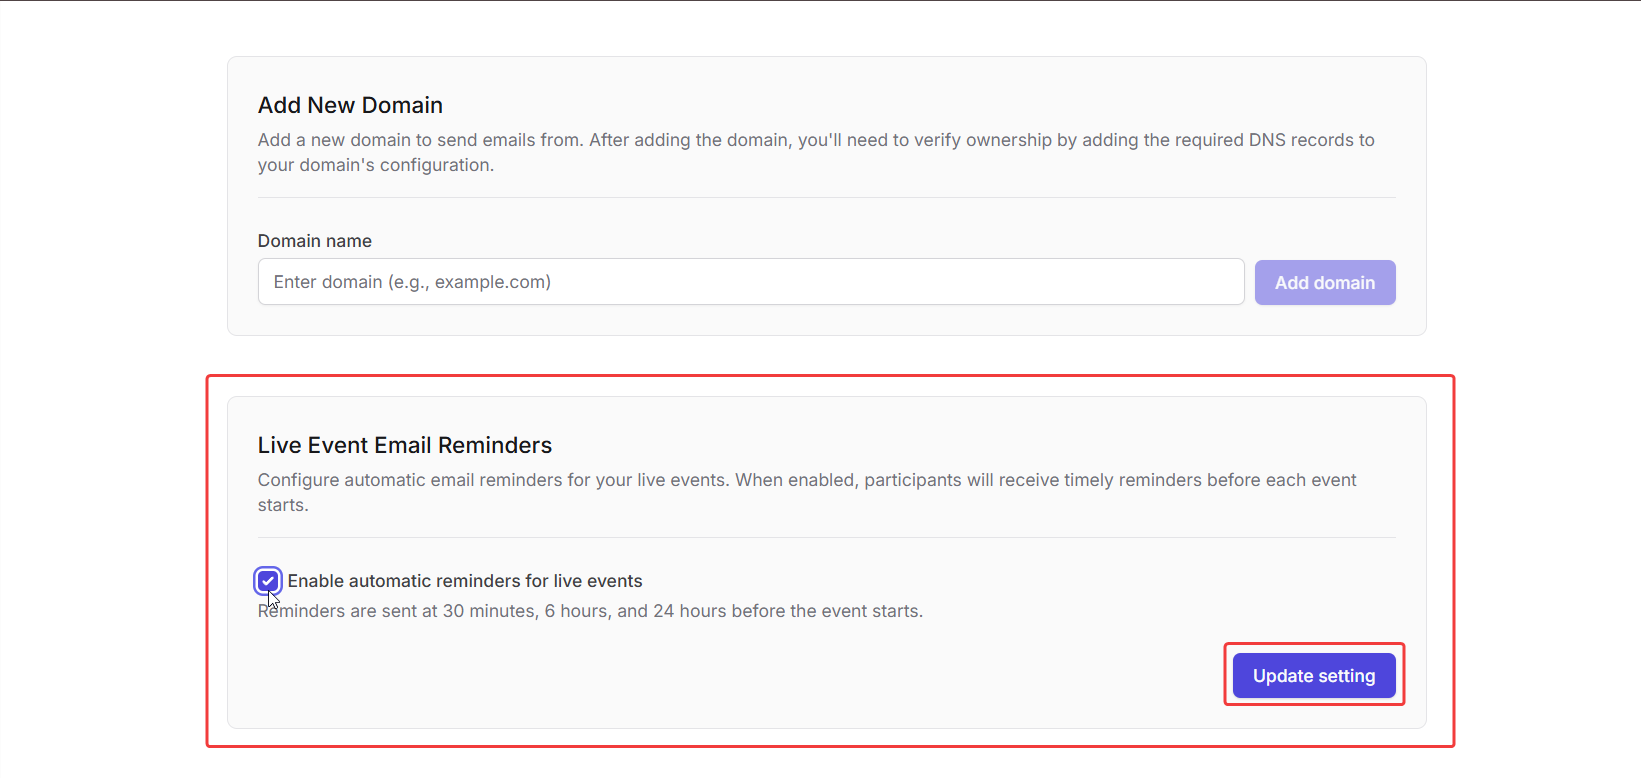
Locate “Live event email reminders”
Scroll to the section labeled Live Event Email Reminders.
3
Enable automatic reminders
Turn on the toggle and click Update setting to start sending reminder emails to all registered participants.
4
Understand the schedule
Once enabled, live session reminders are automatically sent 30 minutes, 6 hours, and 24 hours before the event begins.
Email templates
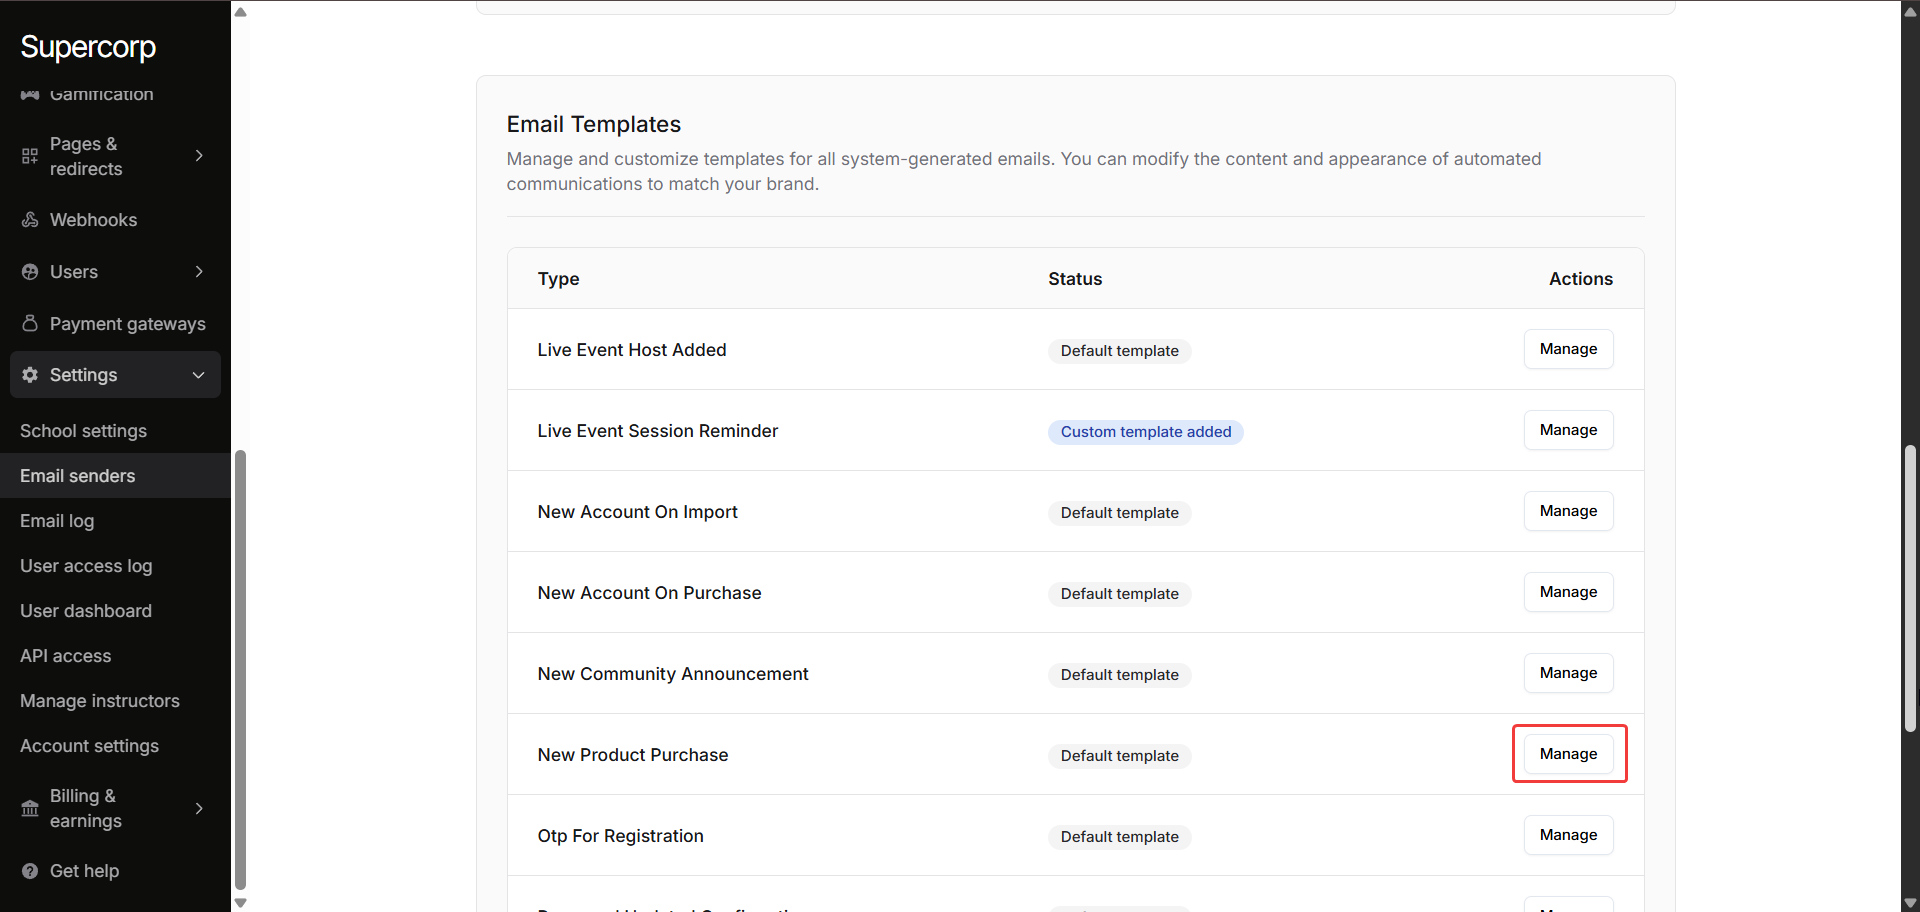
Fermion includes a library of predefined system-generated email templates that handle various automated communications, such as account creation, password resets, purchases, and event notifications. You can customize the content, layout, and appearance of these templates to reflect your branding and tone of voice. The Email Templates section lists all available templates along with their current status : whether using the default template or a custom version you’ve edited. The following default templates are available at Fermion and you can edit all of these templates as per your requirements.Editing an email template
You can also choose to edit these pre-defined templates and edit them according to your requirements with the help of the following steps:1
Navigate to Email Templates
Go to Settings → Email senders → Email Templates.
2
Select a Template
Choose a system template from the list and click Manage.
3
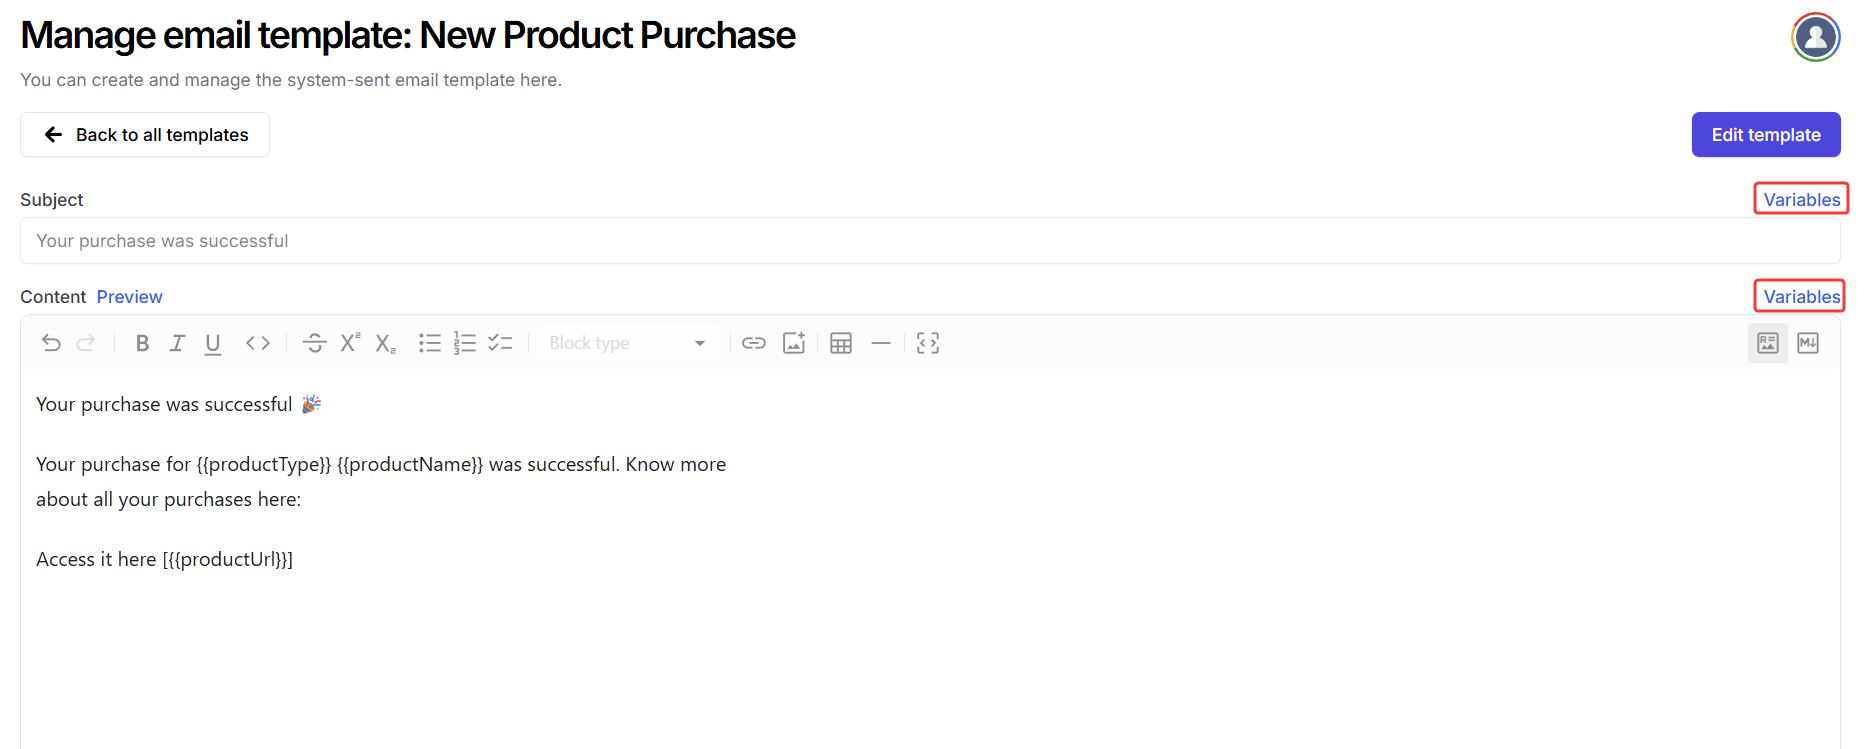
Edit content
You can customize the subject line and the body text to align with your brand’s tone.
4
Add dynamic variables
You can use template variables to personalize each message dynamically at the time of sending.
Available template variables
Available template variables
When customizing your email templates, you can use the following variables to dynamically insert user, school, and product data.
These placeholders are replaced automatically when the email is sent.
These placeholders are replaced automatically when the email is sent.
5
Preview and Save
Review your edits using the built-in preview, then click Save changes to apply your changes.
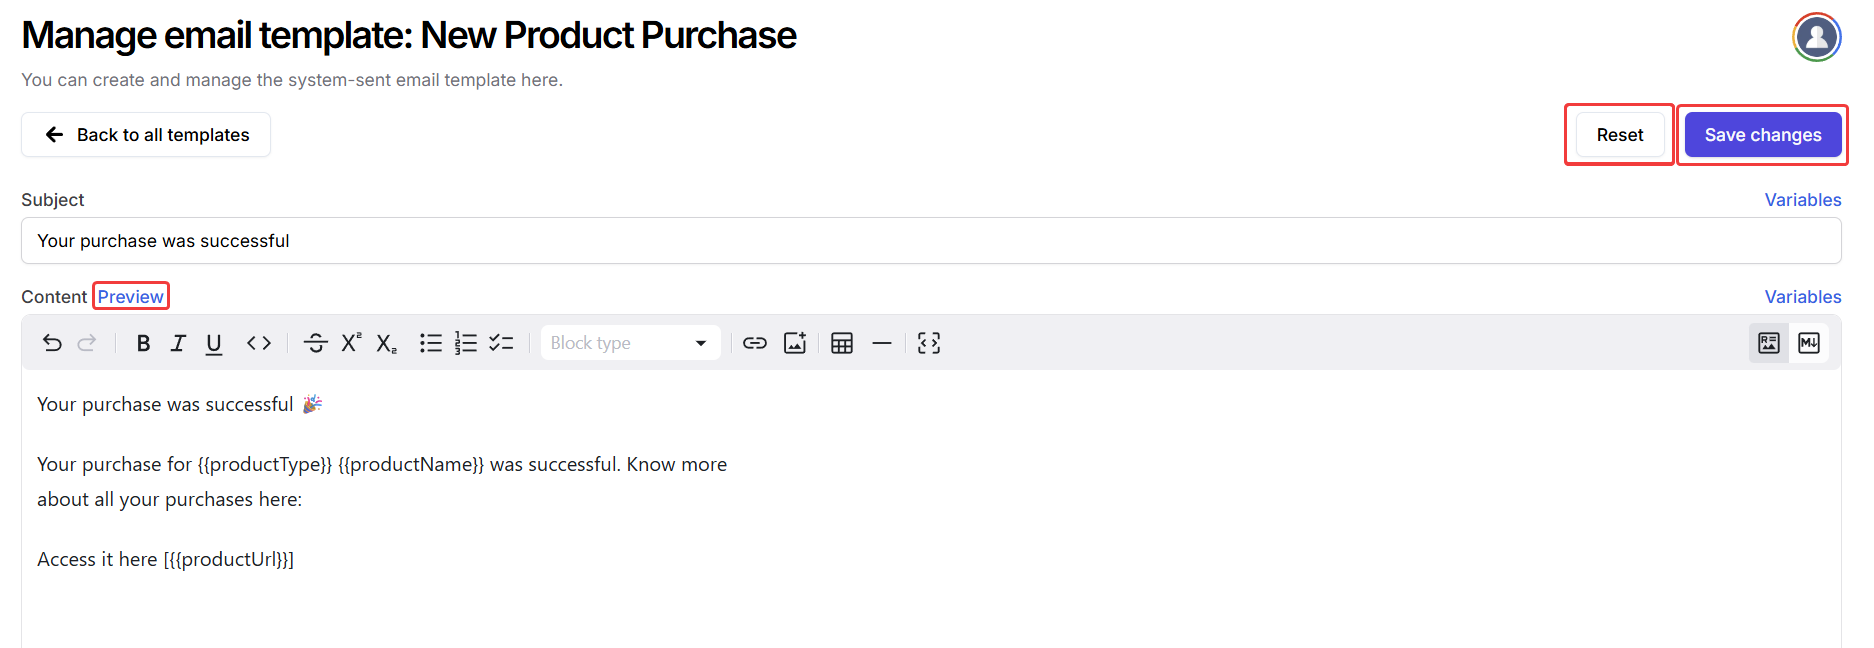
All customized templates override the system defaults. You can restore the default content anytime by selecting Reset from the Manage Template view.
Next steps
Email Marketing
Learn how to create campaigns, track performance, and reach your users effectively via email.
WhatsApp Marketing
Discover how to send messages and notifications to users via WhatsApp.