Getting Started
Setting up forms for your school is a simple process at Fermion. Perform the following steps to create elegant multi-step forms to collect data from your students:
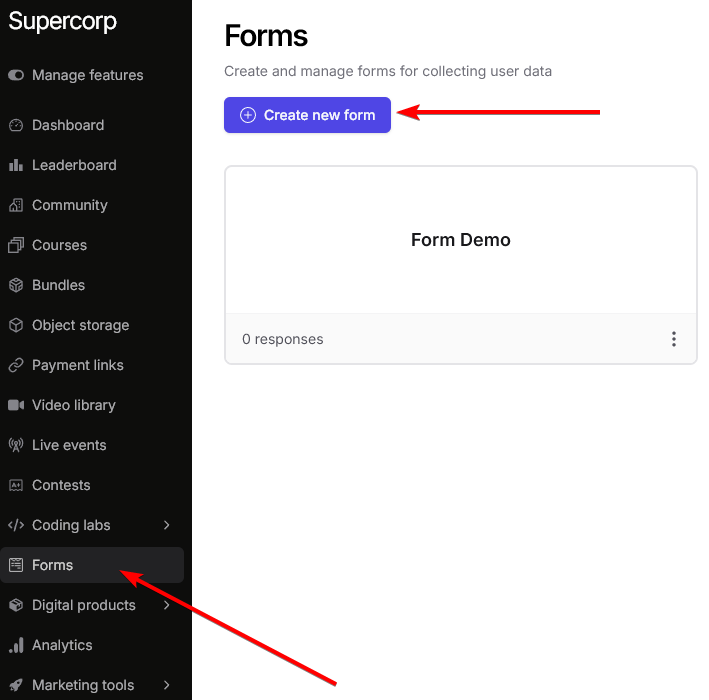
Step 2: Navigate to Forms Page
Click on the ‘Forms’ page from your instructor dashboard’s sidebar, then click on ‘Create new form’ button.
Step 3: Form Editor Panes
Now, you will see the form editor page, consisting of 3 ‘Panes’: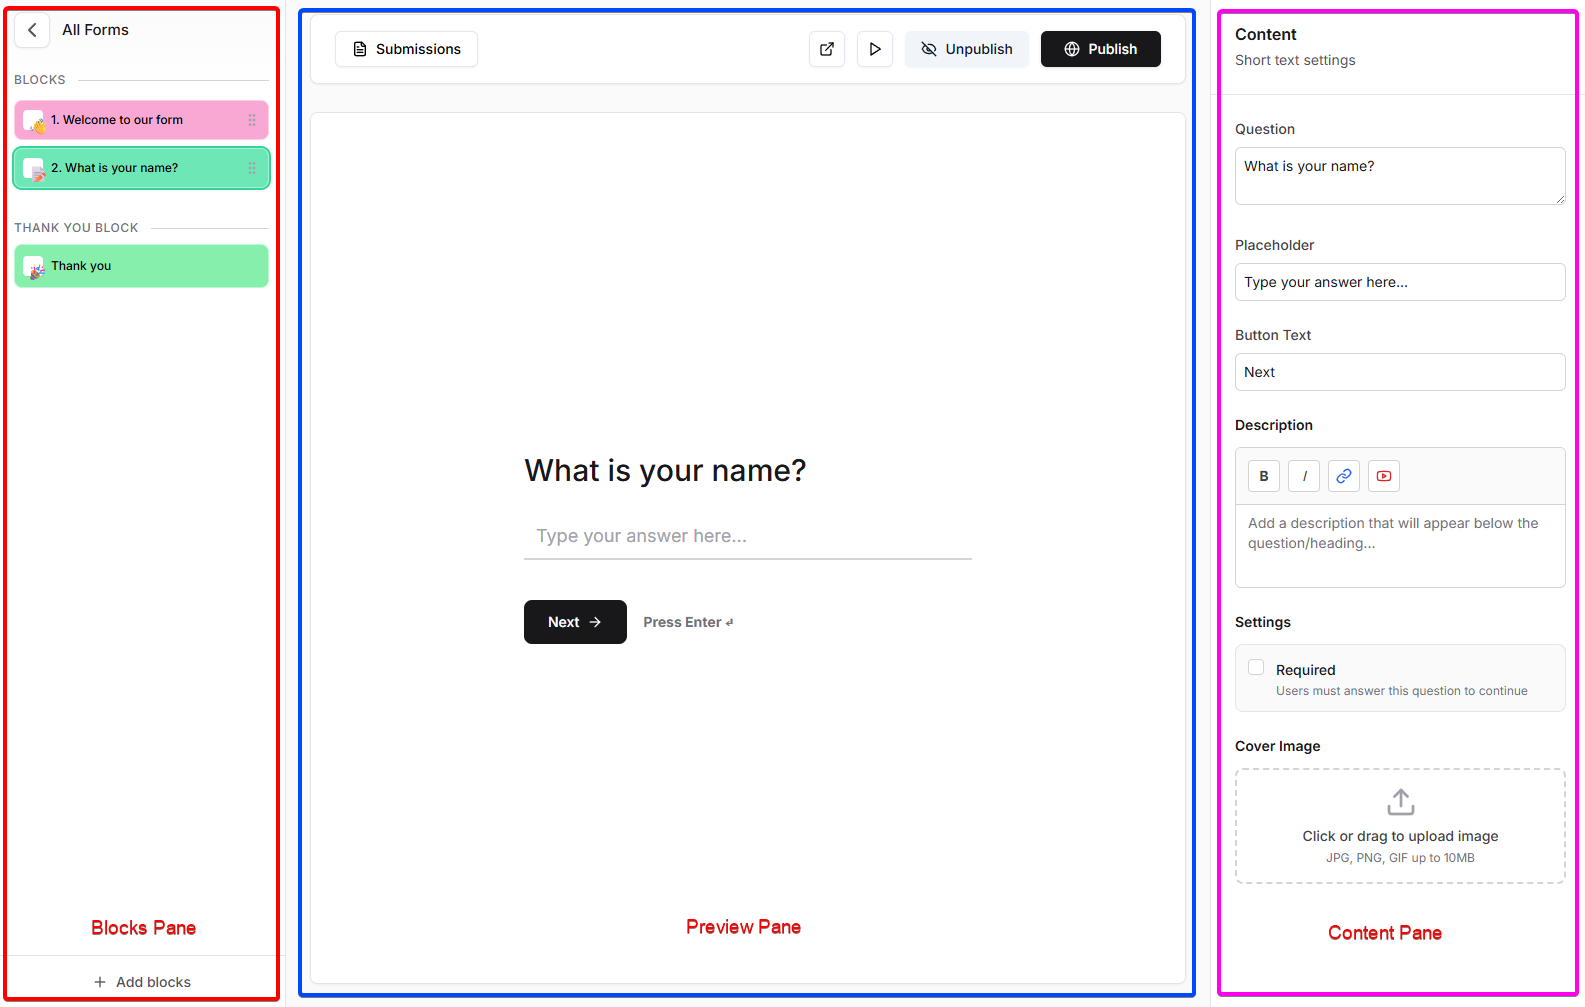 The Blocks pane on the left lists steps, the center shows a live preview, and the Content pane on the right lets you configure the selected block.Note: By default, all new forms are pre-loaded with
- Blocks pane
- Preview pane
- Content pane
The Blocks pane on the left lists steps, the center shows a live preview, and the Content pane on the right lets you configure the selected block.Note: By default, all new forms are pre-loaded with Welcome and Thank you blocks.Step 4: Add a New Block
To add a new block, click on
Add blocks button from the bottom of the blocks pane.Step 5: Select Block Type
Once you click on 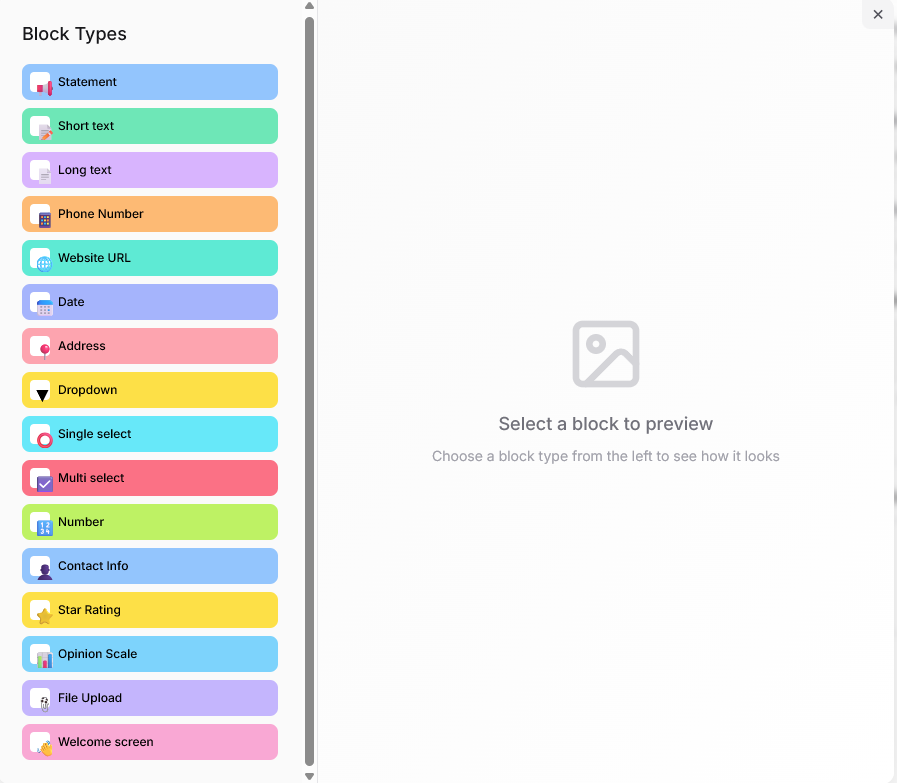
Add blocks button you will see a popup with all the avaibale block types
Step 6: Add the Block to Form
Select a block from here and click on 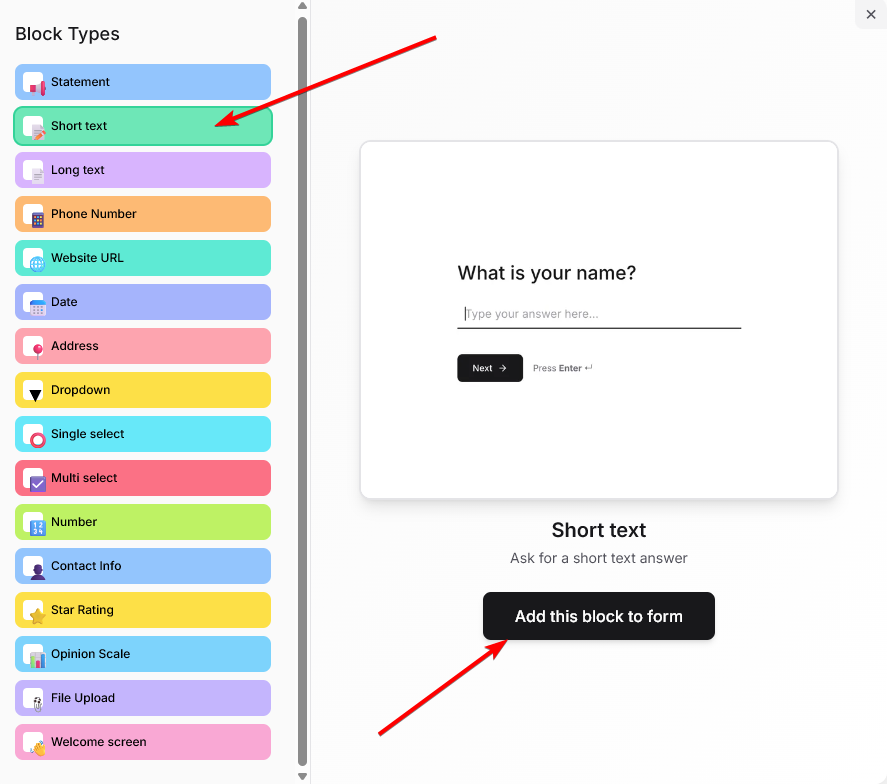
Add this block to form. We offer the following blocks that are further customizable:- Short text: Capture brief responses such as names or titles.
- Long text: Collect detailed answers or paragraphs.
- Phone number: Gather users’ phone and contact number.
- Website: Collect a URL from the user.
- Date: Let users select a date.
- Address: Collect full address details.
- Dropdown, Single and Multi select questions: Allow users to choose one or multiple options.
- Number: Allow the user to enter a number between a range specified by you.
- Contact information: Capture full name, email, and mobile number.
- Star Rating: Allows user to rate on a scale of 1-5 stars
- Opinion Scale Lets users rate on a custom scale with labels.
- File upload: Allow users to submit files or documents.
Short text block.
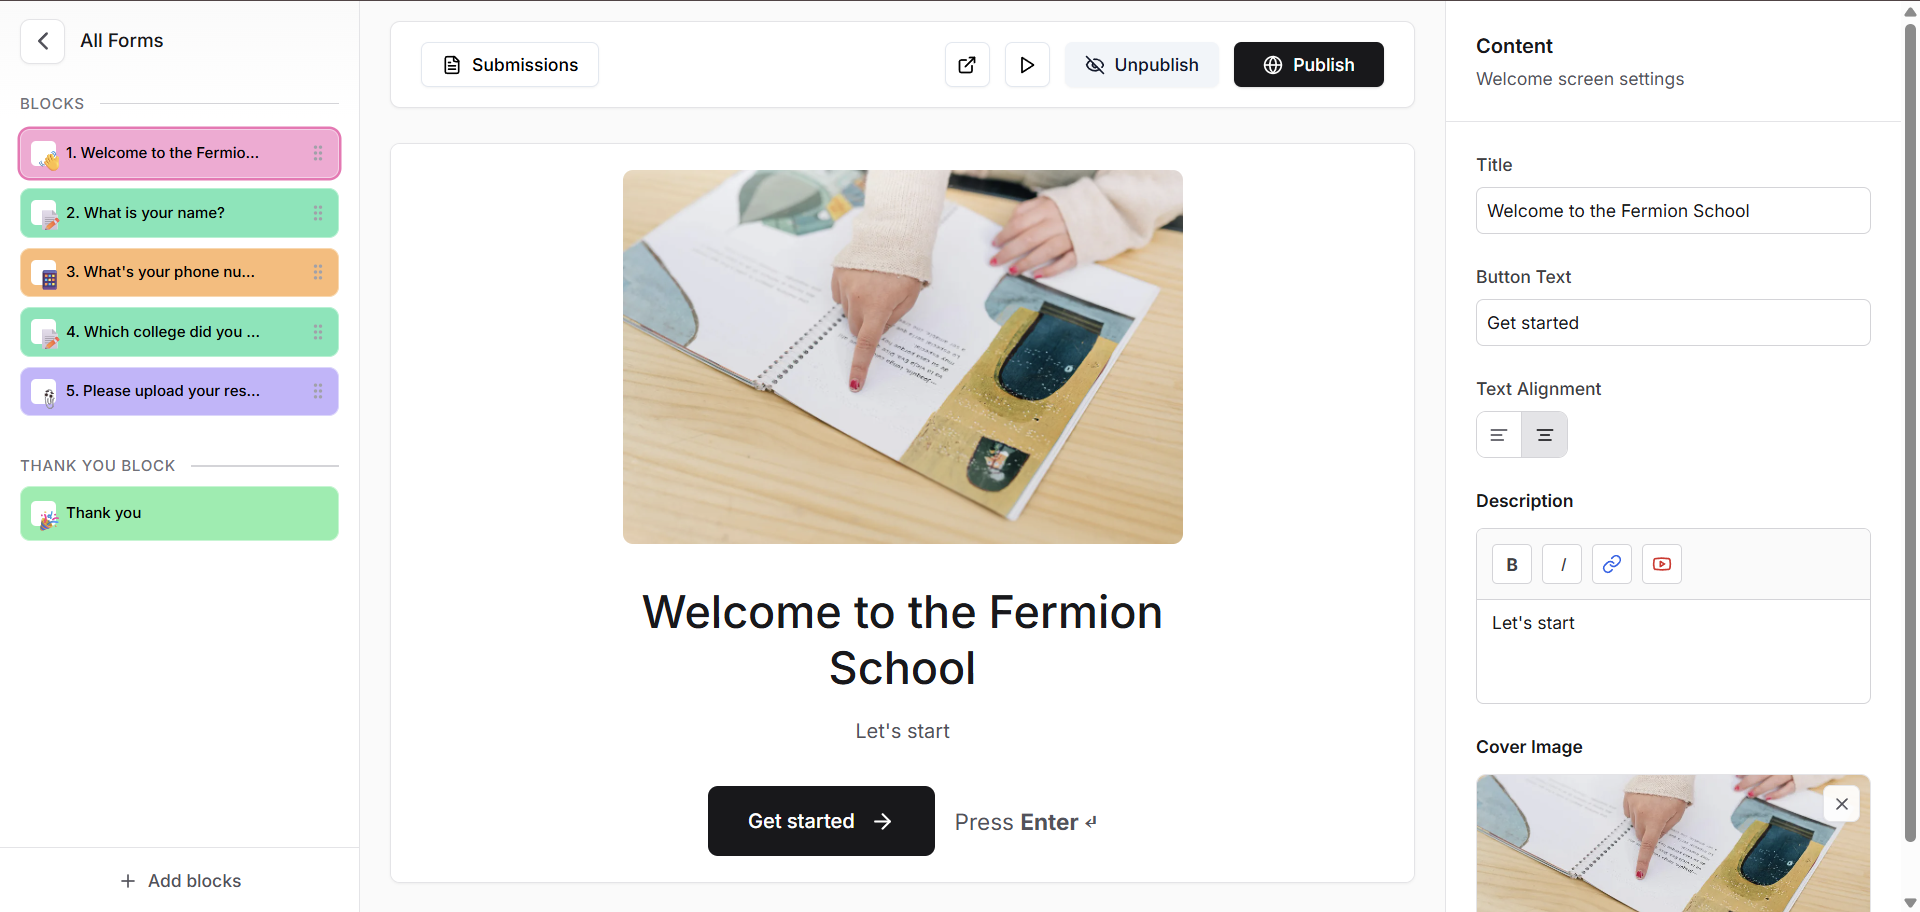
Step 7: Customize the Block
Once a block is added to the form, you can further configure it from the ‘Content Pane’ on the right side. This pane has multiple customization options like:
- Edit your question
- Edit your placeholder
- Edit the text on the
Nextbutton - Add a description(with simple text formatting and the ability to include hyperlinks and YouTube videos)
- Make a question mandatory
- Add a cover image
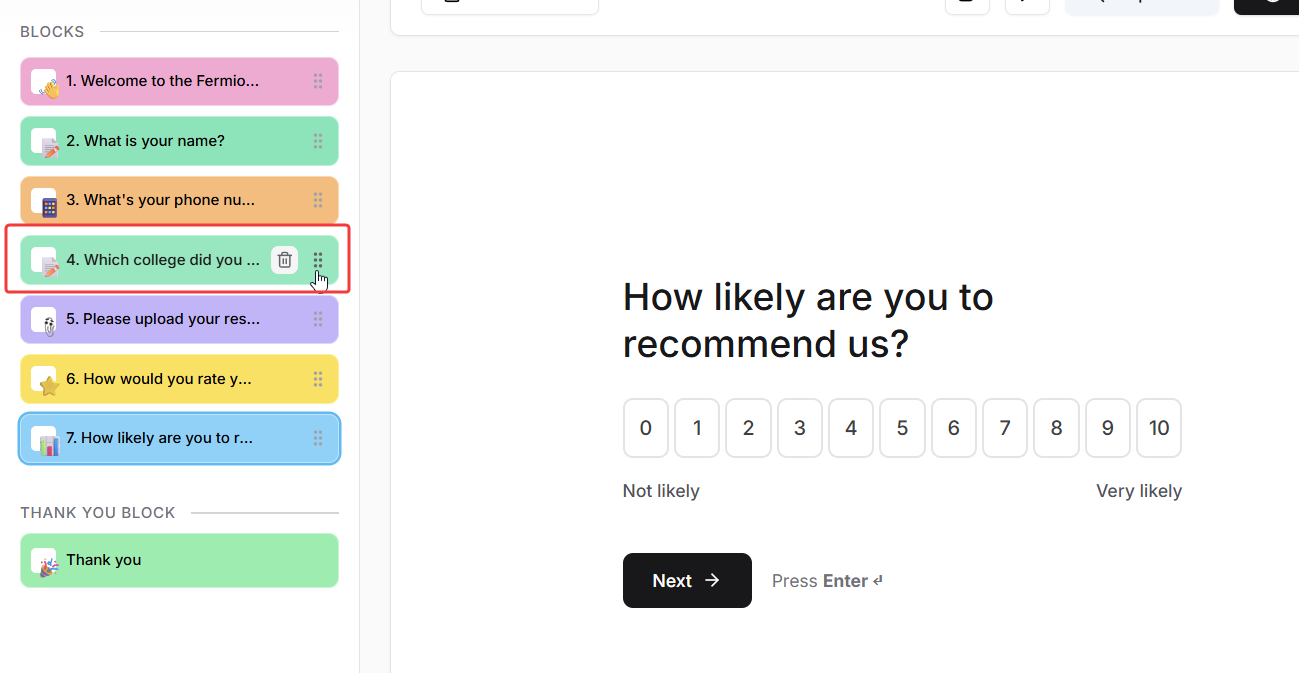
Step 8: Arrange and Publish Form
Once you have added and customized all the blocks, you can further customize the ‘flow’ of the form by re-arranding the blocks. You can do this by clicking on the ‘drag’ handle on the blocks.
 Once you are done customizing your form, click on
Once you are done customizing your form, click on Save and then click on Publish. You can also preview the form by clicking on the play button.
Next steps
Access Form Submissions
Learn how you can access form submissions from your users and also export them as CSV files