Blogs are hosted directly on your domain, so your learners and audience can read them without visiting any third-party platform. This ensures a complete branded experience while keeping all your content centralized.
How blogs differ from in-course articles
Unlike in-course articles, which are tied to a specific course and can only be accessed by learners enrolled in that course, blogs in Fermion are standalone content pieces that live on your own domain. This means they can be shared publicly across the internet, making it easy for anyone to discover and read them. Blogs give you the flexibility to reach a wider audience, showcase your expertise, promote courses or resources, and share updates or educational content in a professional, branded way.How to create a blog?
Creating a blog in Fermion is quick and easy. Follow these steps to publish your first article:Enable blogs in manage features
Before creating blogs, make sure the Blogs feature is enabled in your workspace.
You can do this from the Manage Features section.
Learn how to manage features
You can do this from the Manage Features section.
Learn how to manage features
Navigate to blogs section
Go to your Instructor Dashboard → Blogs.
Click on Create a new blog to open the blog builder.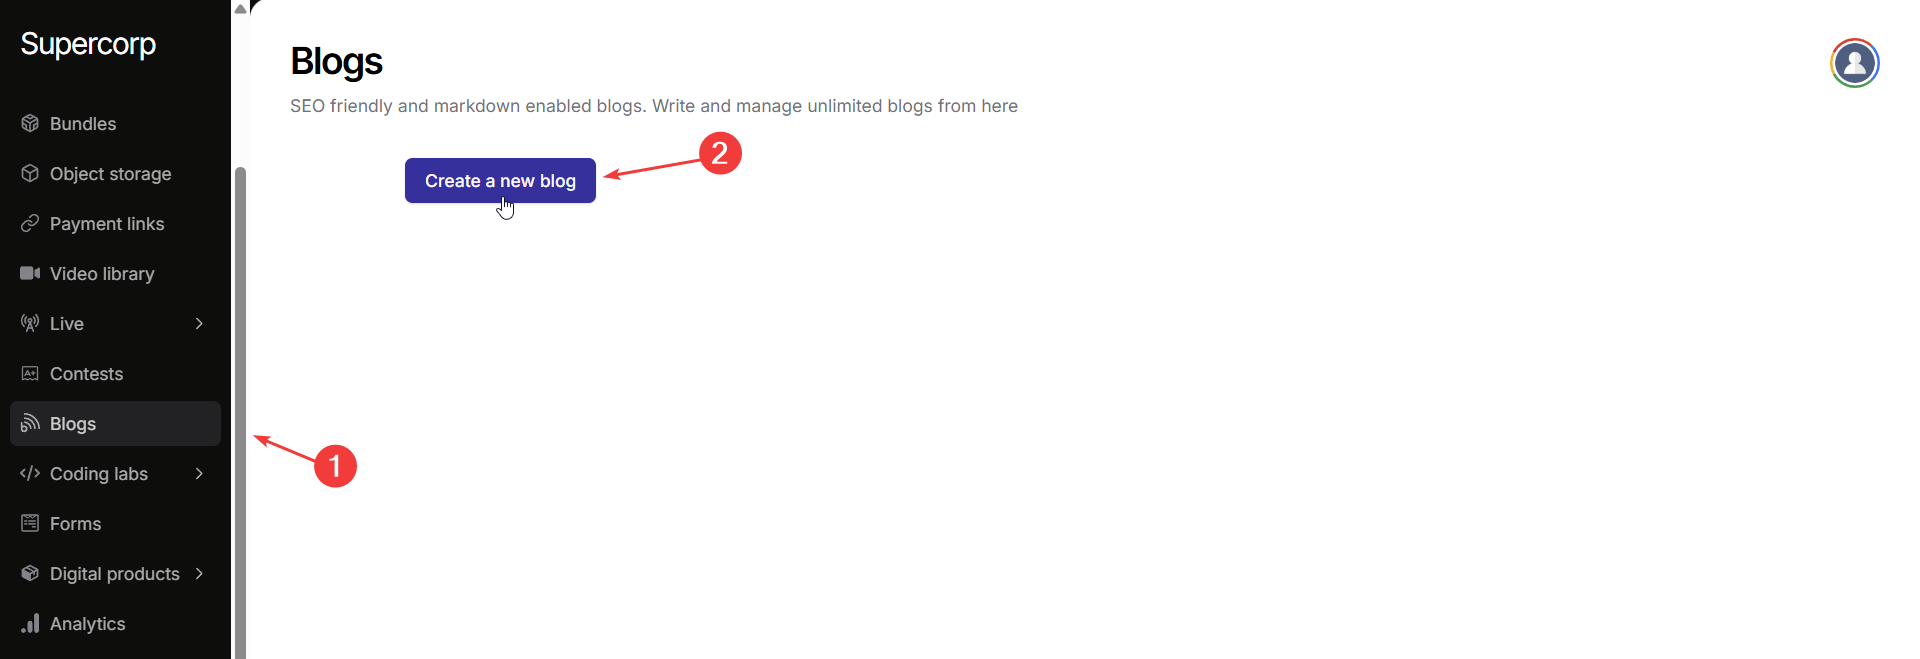
Click on Create a new blog to open the blog builder.
Add blog title and content
Enter your Blog Title at the top.
Use the editor below to write your blog content. The rich text editor supports Markdown syntax, so you can format text, add images, and insert code blocks easily.
Use the editor below to write your blog content. The rich text editor supports Markdown syntax, so you can format text, add images, and insert code blocks easily.
Add SEO details
In the Blog Settings pane on the right, you can: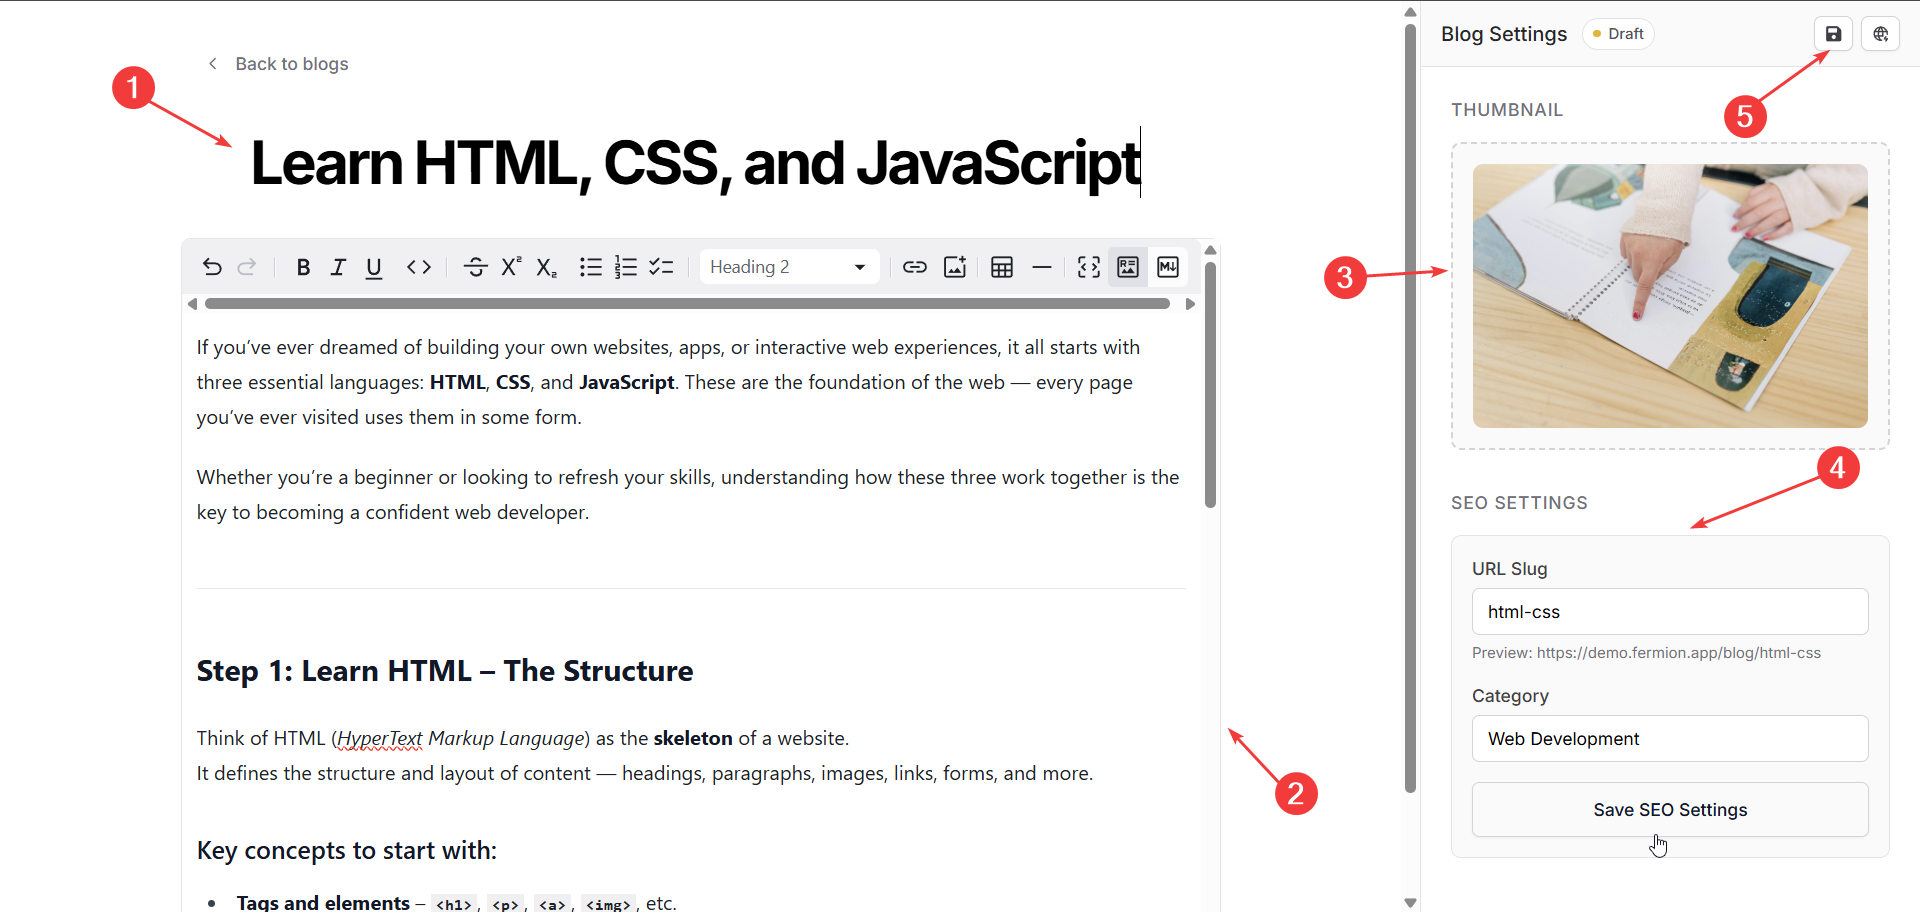
- Upload a Thumbnail Image.
- Add a URL Slug and add a Category under SEO Settings.
- Click Save SEO Settings once done.
Access blogs over API
You can also manage and retrieve blogs programmatically using Fermion’s API. The following endpoints are available:Get all published blogs
Retrieve a list of all blogs that have been published. Use this endpoint to display blogs on your website or app. Learn more
Get information for a specific blog
Fetch detailed information about a single blog, including its title, content, SEO details, and thumbnail. Learn more