Why importing users matters
Importing users helps you maintain a smooth, organized onboarding experience. It allows you to:- Enroll learners before a program or course begins.
- Give select users access to private or internal content.
- Centralize data when migrating from another LMS or platform.
- Ensure a consistent experience by pre-configuring access, groups, and emails.
How to manually enroll users
You can enroll users into your school with the help of the following steps:1
Go to the Import Users page
From your Instructor Dashboard, navigate to Users → Import Users in the sidebar.
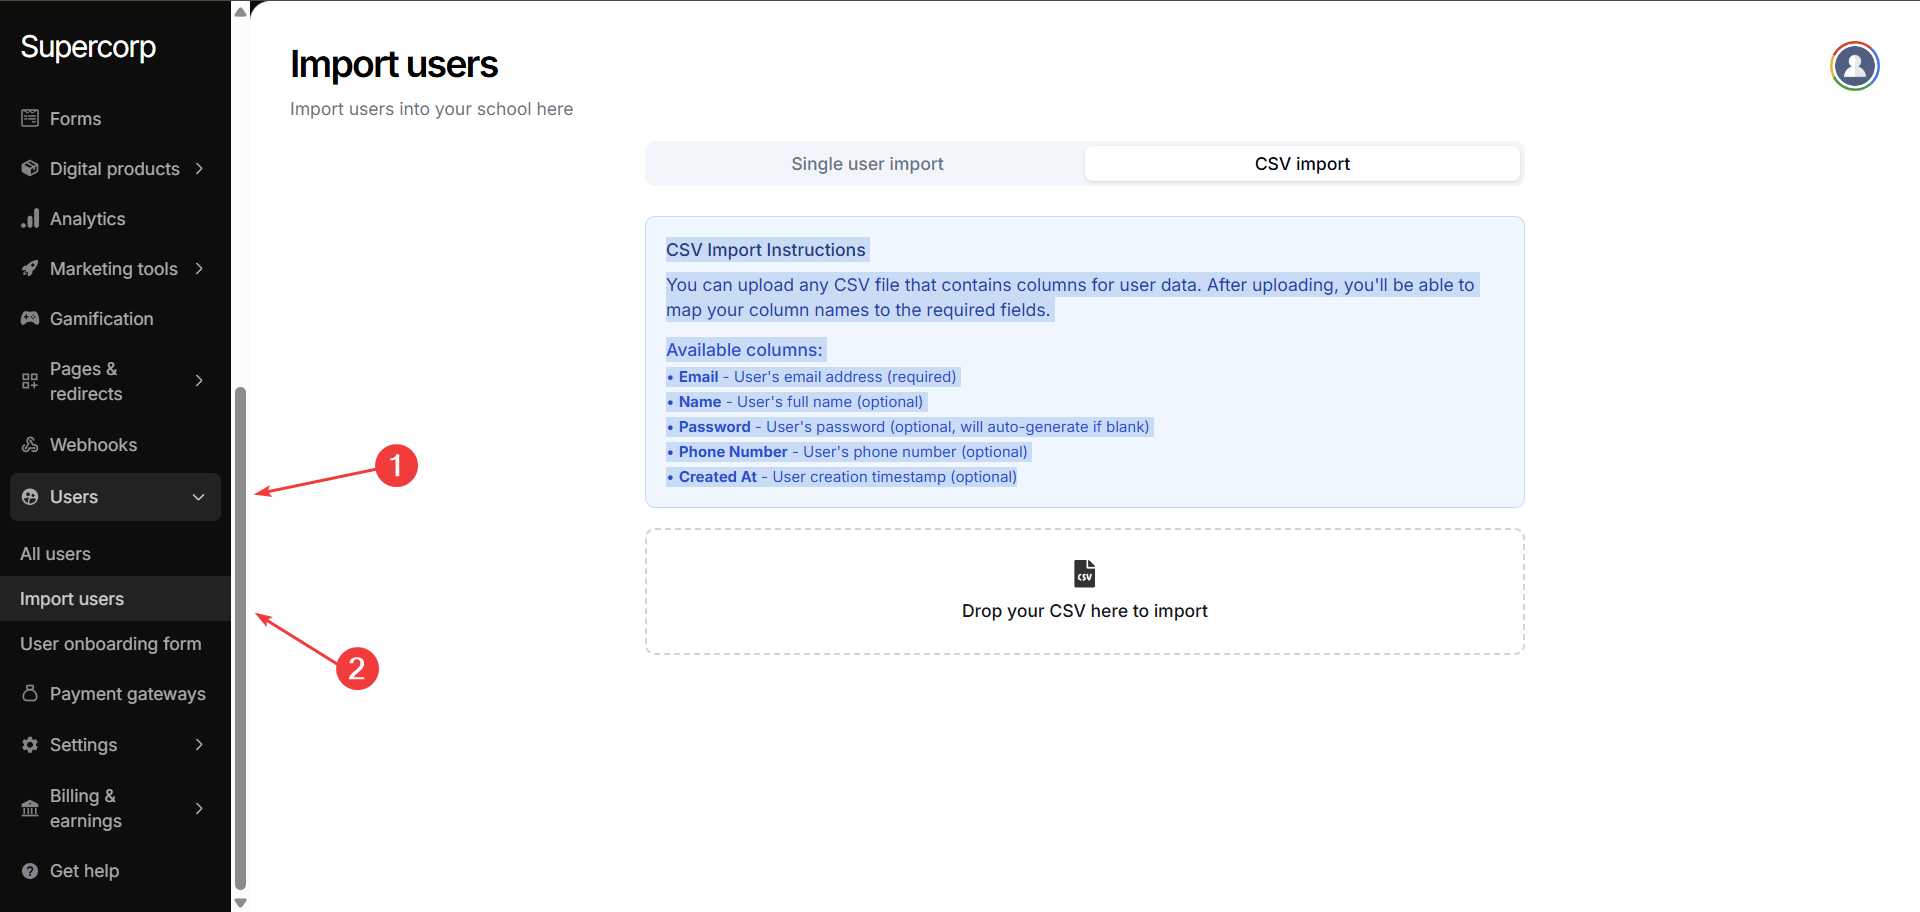
This is where you can add new users manually or import them in bulk using a CSV file.
This is where you can add new users manually or import them in bulk using a CSV file.
2
Choose your import method
You can import users in two ways:
- Single user import: add one user manually.
- CSV import: upload a file containing multiple user records.
3
Single user import
When adding a single user, fill out the following fields: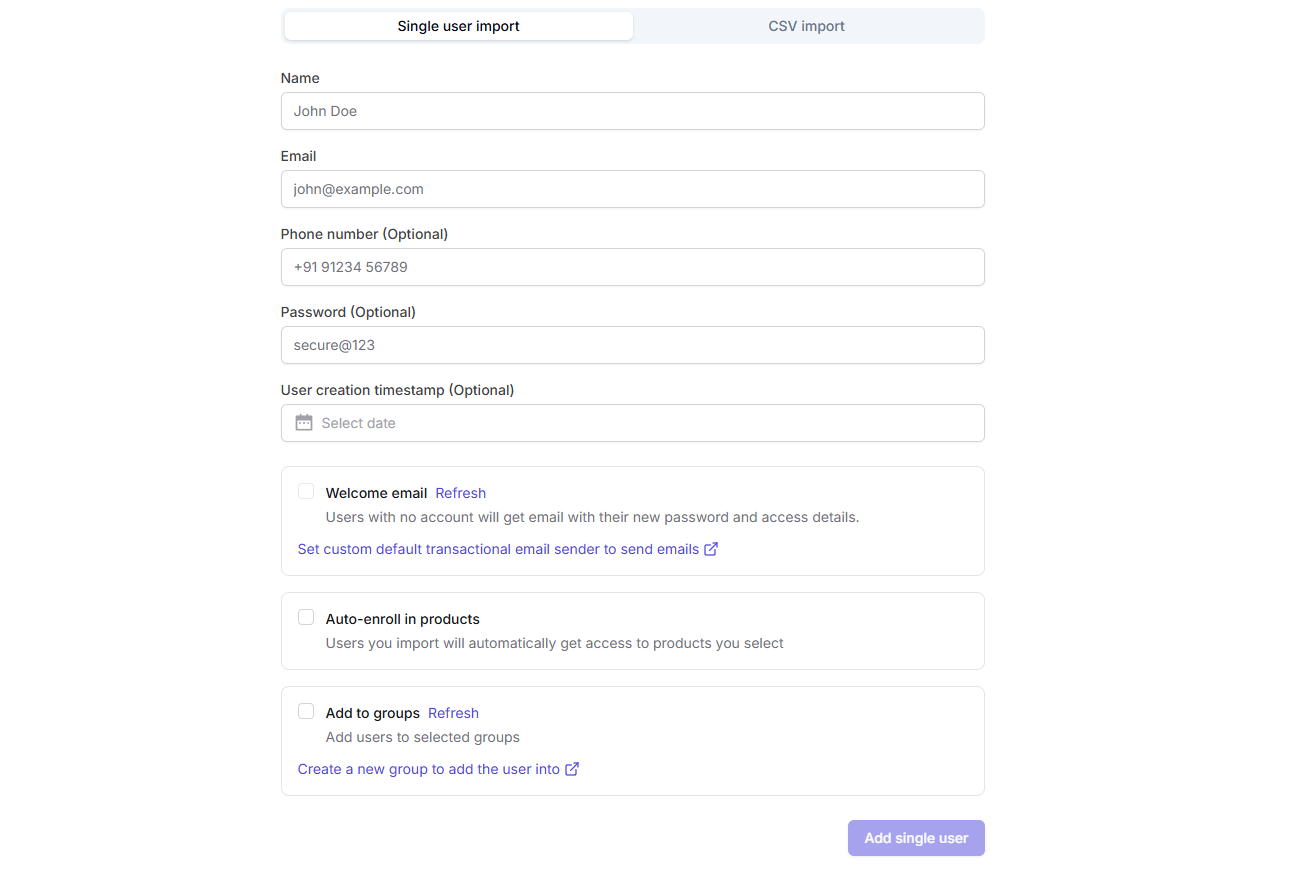 Once done, click Add Single User to complete the enrollment.
You can also configure additional options:
- Welcome Email: Send users their credentials and access details automatically.
- Auto-enroll in Products: Grant users access to selected courses or products upon import. Select the products after toggling this option to add the user into the respective product
- Add to Groups: Assign users to existing user groups or create a new one directly from this page.
Once done, click Add Single User to complete the enrollment.4
CSV import
For adding multiple users at once, use the CSV Import option.CSV Import Instructions:
Upload a CSV file containing columns for user data.
After uploading, you’ll be able to map your CSV columns to the required fields.Available columns: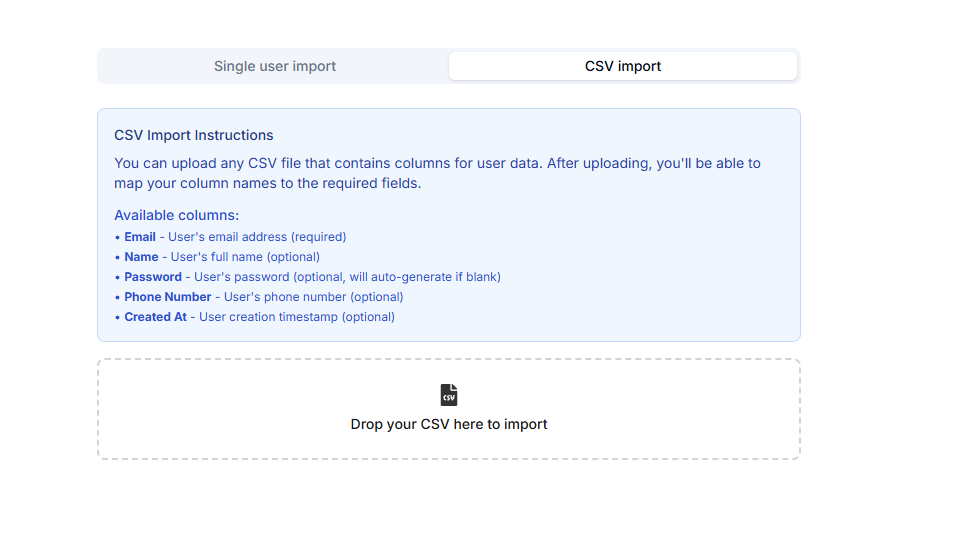
After uploading, you’ll be able to map your CSV columns to the required fields.Available columns:
Email: User’s email address (required)Name: User’s full name (optional)Password: User’s password (optional; will be auto-generated if blank)Phone Number:User’s phone number (optional)Created At: User creation timestamp (optional)
5
Map the columns with the respective fields
Once your CSV file is uploaded, you’ll see a mapping interface where you can match each CSV column to a field in your school’s user database.For example, if your CSV file uses a column labeled “Student Name,” you can map it to the Name field, and if the column is called “Email Id,” map it to the Email field.
This ensures that your imported data aligns correctly with the platform..rwirnf.png) You can also configure additional options:
You can also configure additional options:
This ensures that your imported data aligns correctly with the platform.
You can also configure additional options:- Welcome email: Send users their credentials and access details automatically.
- Auto-enroll in products: Grant users access to selected courses or products upon import. Select the products after toggling this option to add the user into the respective product
- Add to groups: Assign users to existing user groups or create a new one directly from this page.