Introduction
Custom Checkout Fields is a powerful feature in Fermion that allows instructors and course creators to collect additional information from learners during the checkout process. By default, the checkout form captures basic details such as name, email and phone number, but there are often situations where you need more specific data to personalize your sales process or gather insights from your students. With custom fields, you can now ask for extra information, such as student preferences, organizational details, prior experience, or any other information relevant to your course or program.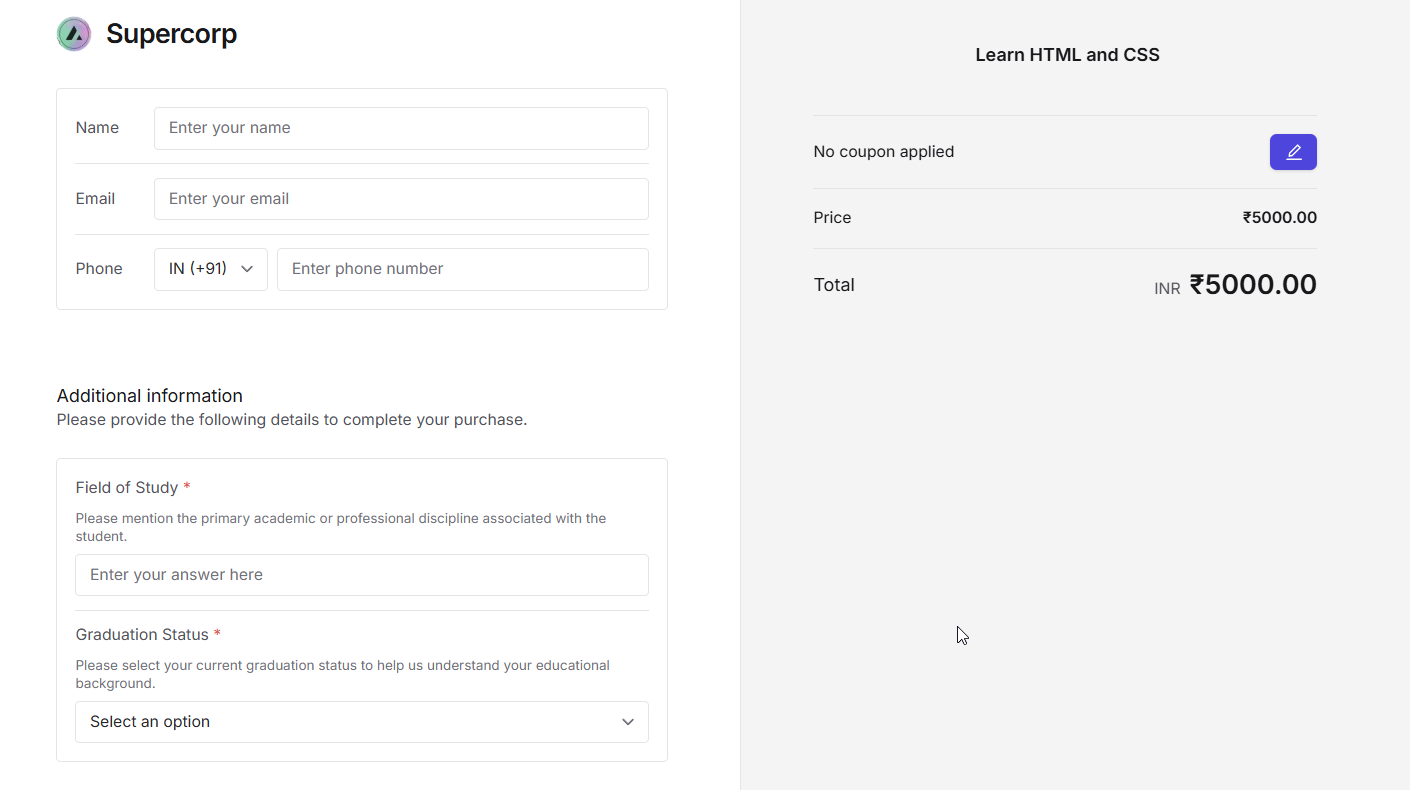
How Custom Checkout Fields Work
Custom Checkout Fields allow you to define additional input points on your checkout form. Currently, Fermion supports two types of fields:- Text Input – Allows users to enter free-form text, suitable for names, IDs, or short responses.
- Dropdown – Provides a predefined list of options for the user to select from, ensuring standardized data collection for specific questions.
 Each field can be configured with a label that appears to the learner, an optional description for additional context or instructions, and a setting to make the field required. You can also preview the field in real time to see how it will appear during checkout. This ensures that your form is clear, concise, and user-friendly before it goes live.
Steps to Add Custom Checkout Fields
Before adding custom checkout fields, make sure you have added a pricing plan to the course. Learn more about Fixed Pricing Plans and Partial Payment Pricing plans Follow these steps to add custom fields to your checkout forms:-
Navigate to Courses
Log in to your Fermion instructor account and go to the Courses section from your dashboard. -
Open Course Builder
Select the course for which you want to add custom checkout fields and click on Open Course Builder.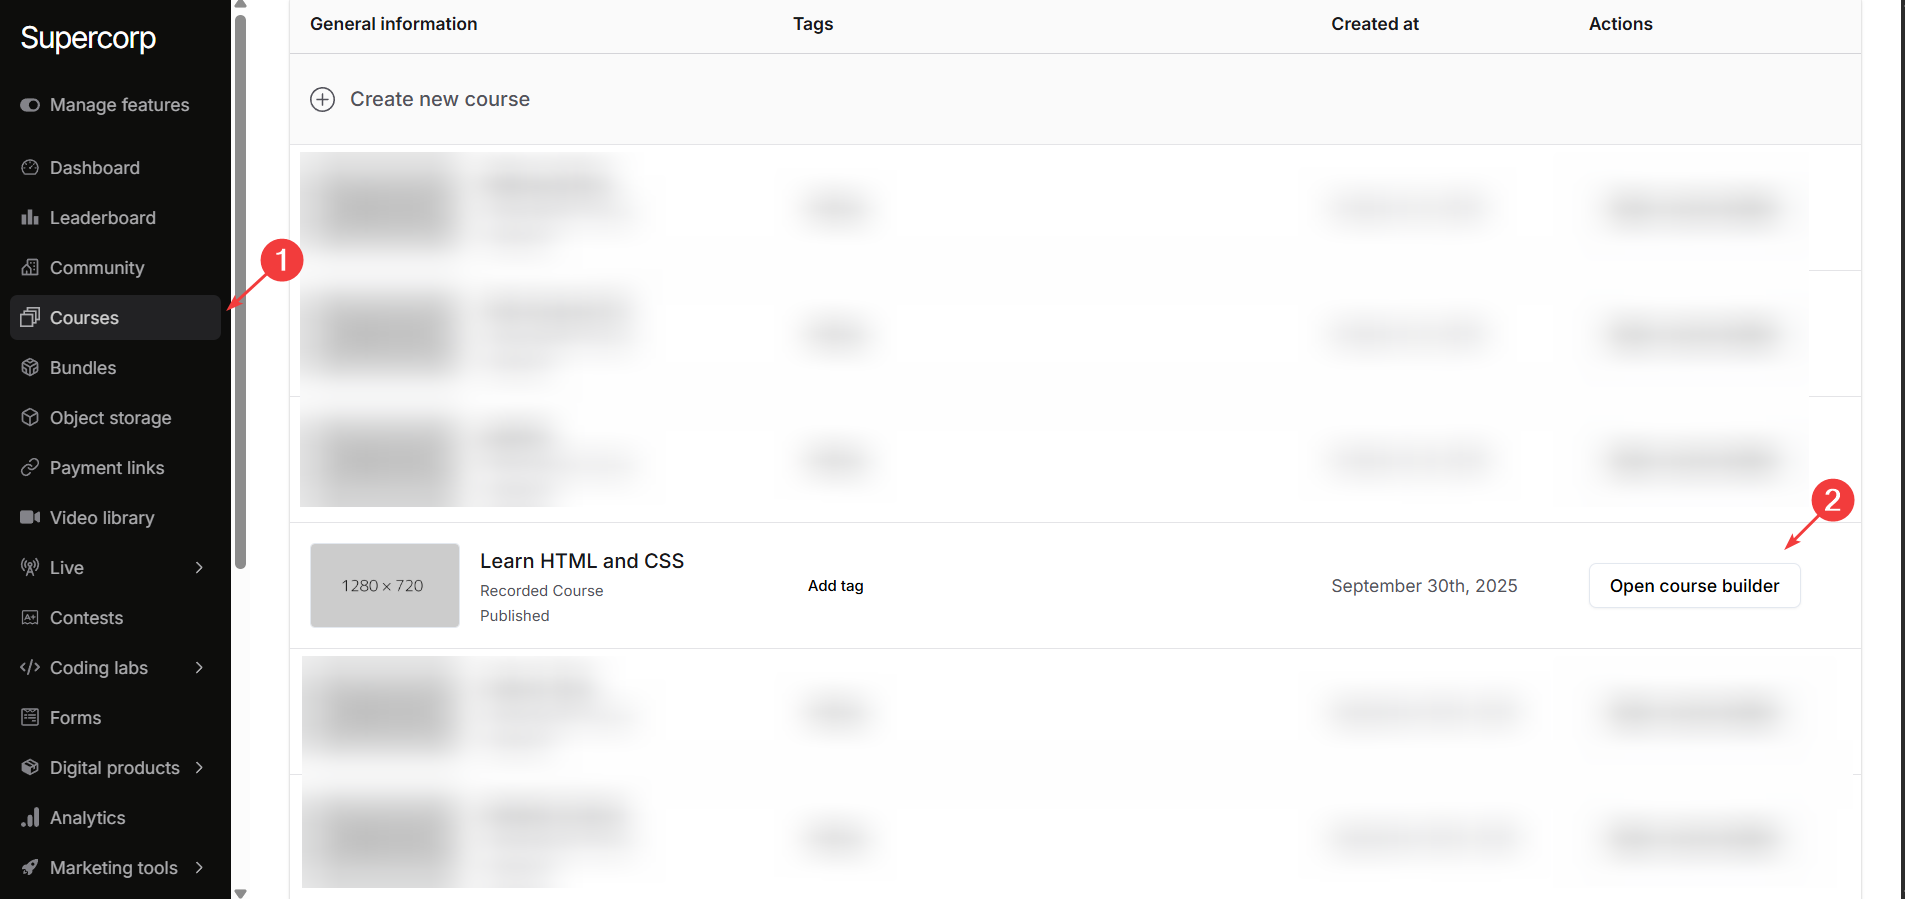
-
Go to Pricing
In the left sidebar of the Course Builder, click on Pricing to manage your course plans.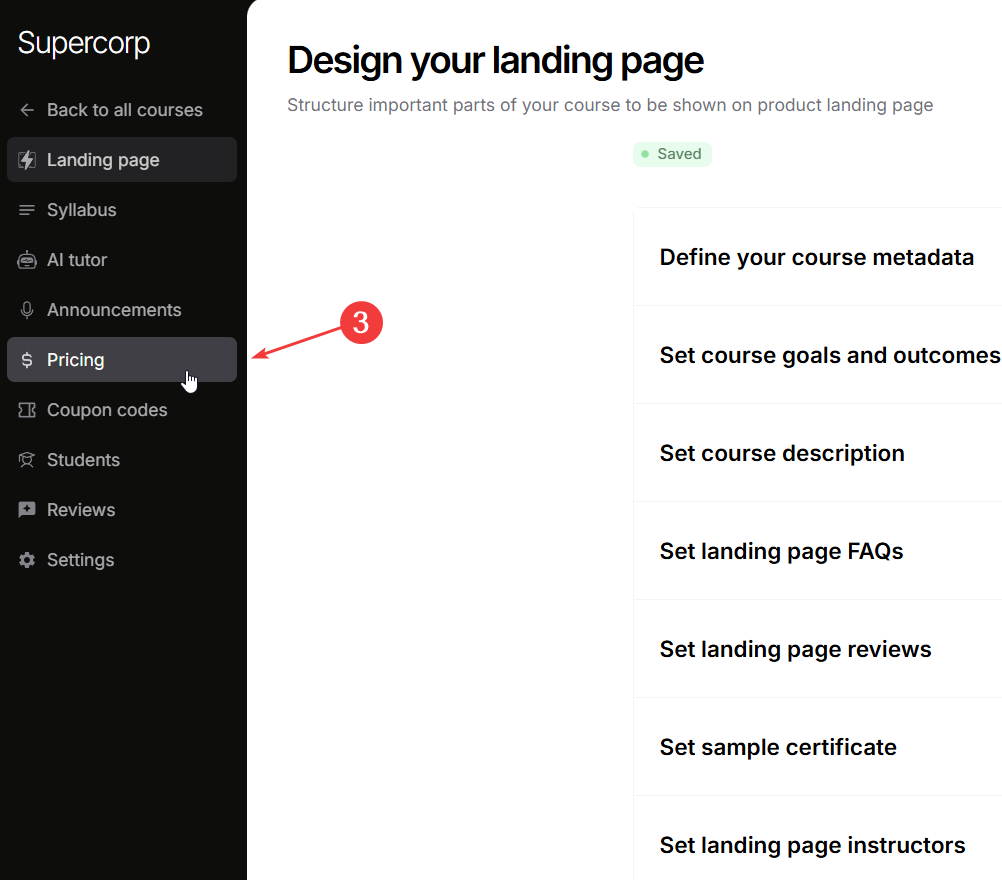
-
Select a Published Plan or Create a new one
From the list of available plans, select the published plan to which you want to attach the custom checkout field. If no plan is created, you should create a new pricing plan. Learn more on how to create Pricing Plans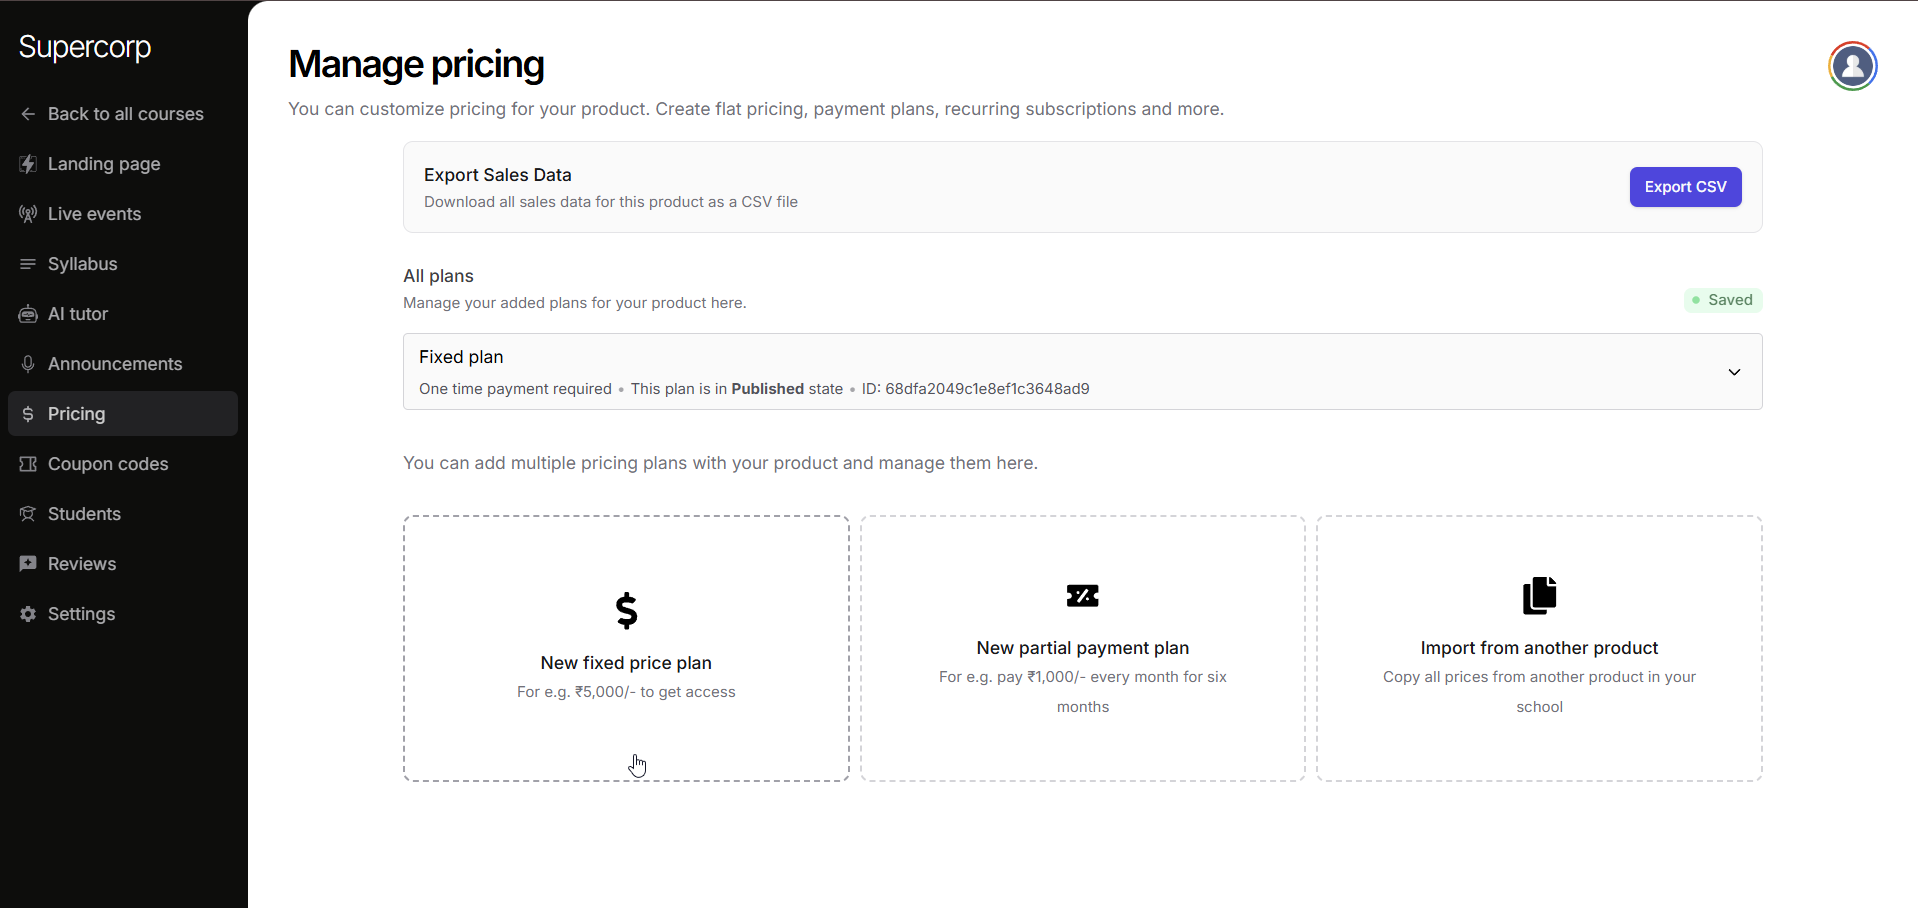
-
Locate Custom Checkout Fields
Scroll down the plan settings until you find the Custom Checkout Fields section. Click on the Add Field button.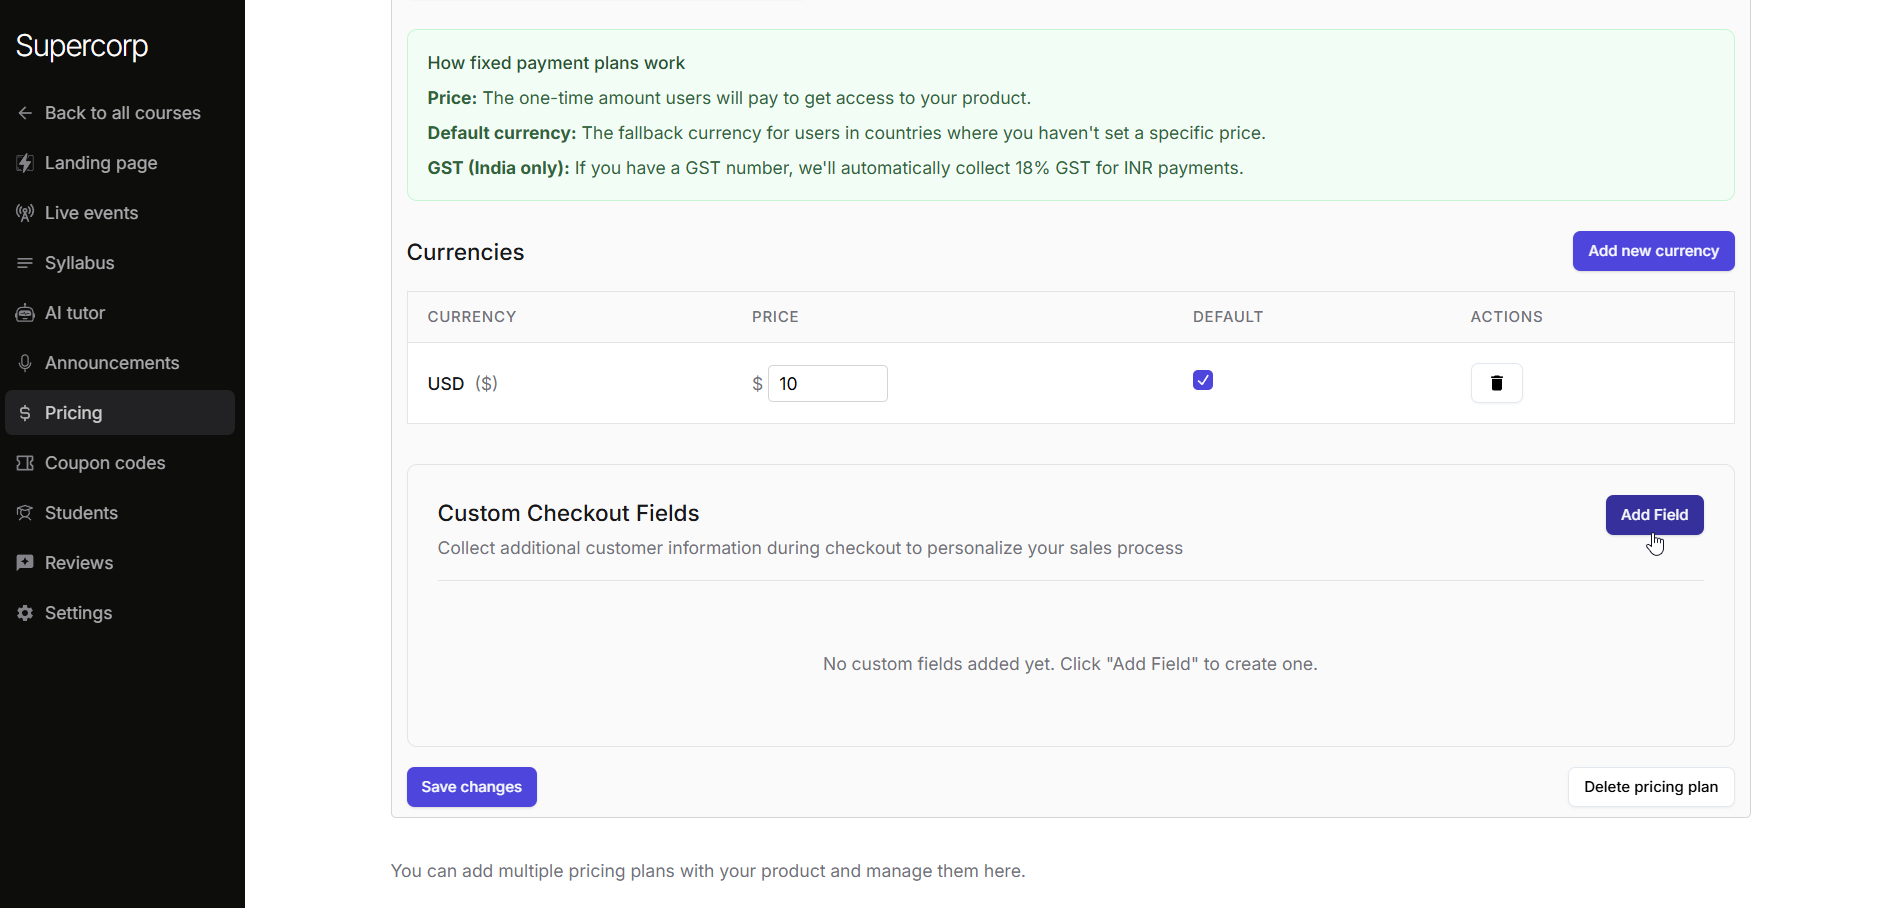
-
Configure a Text Input Field
If you are adding a Text Input field:- Select the Text Input option for the field type.
- Enter a descriptive label that will appear to learners during checkout.
- Optionally, provide a description to give additional instructions or context for the user.
- Check the “Mark this field as required” box to make the field required if learners must fill it out to complete checkout.
- Preview the field in the modal to see how it will appear to learners.
-
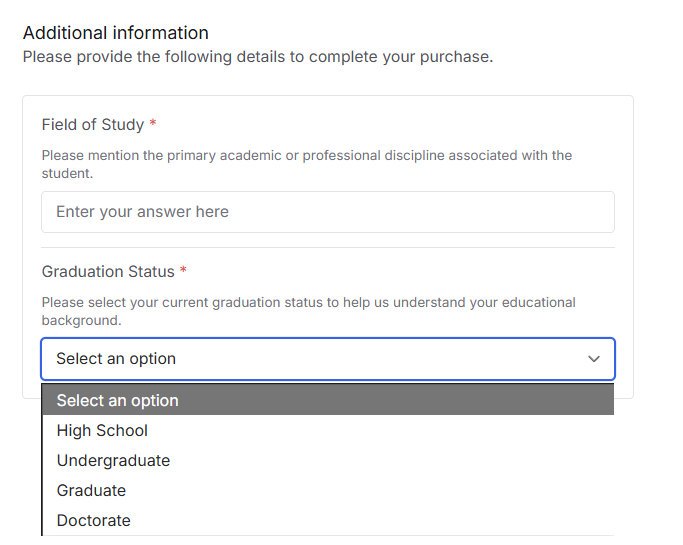
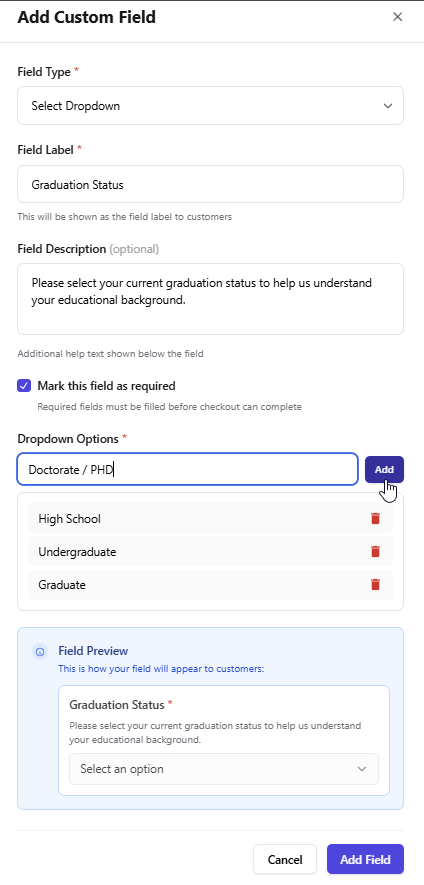
Configure a Dropdown Field
If you are adding a Dropdown field:- Select the Dropdown option for the field type.
- Enter a label that will appear to learners during checkout.
- Optionally, add a description to guide the learner.
- Enter the predefined list of options that learners can choose from.
- Check the box to make the field required if learners must select an option to proceed.
- Preview the dropdown field to see how it will appear during checkout.
-
Add Field
Once satisfied with your configuration and preview, click Add Field to apply the custom checkout field to your plan. Learners purchasing this plan will now see the field and provide the requested information during checkout.
Custom Checkout Field in Action
Here is an example of how a text input custom field looks in the checkout form for your learners. You can see the field label, optional description, and how a required field appears to the user during checkout.
Accessing Custom Checkout Data
Once your learners start providing information through custom checkout fields, you can access this data in two ways:Export via Pricing Section
You can directly export the collected data from your course plans:- Go to Courses and open the Course Builder for your desired course.
- Navigate to the Pricing section in the left sidebar.
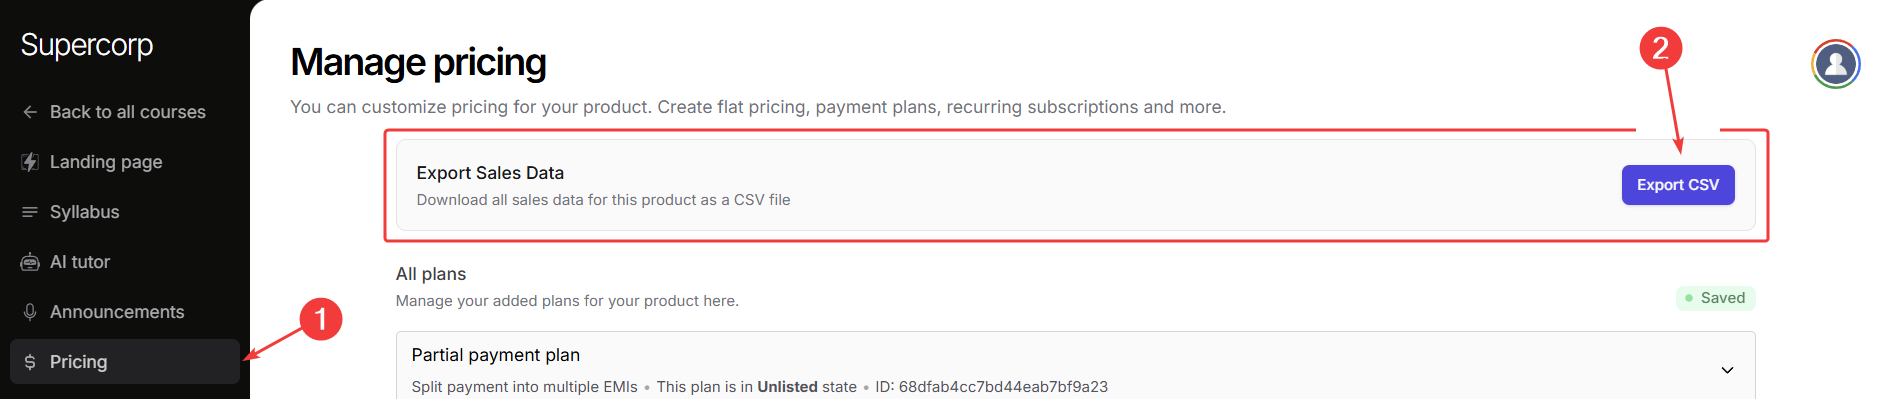
- Inside the Export Sales Data, click on the Export CSV button
- A CSV file containing all the sales data including student responses during checkout will be downloaded to your device.