How to setup a fixed pricing plan?
1
Go to the product and open Pricing
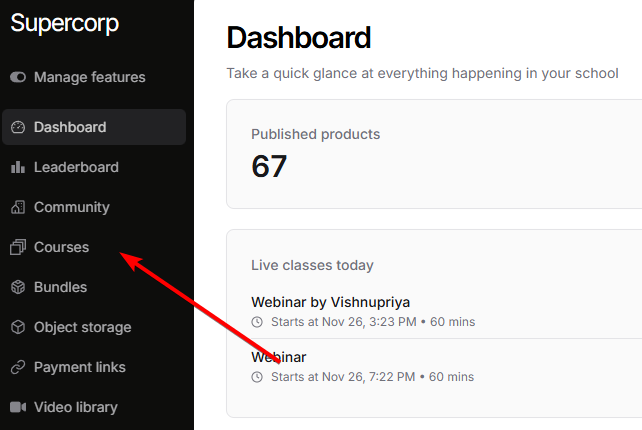
Head to any digital product in your school (let’s use Courses as an example).
2
Select the product
Select the specific course you’d like to set a pricing plan for.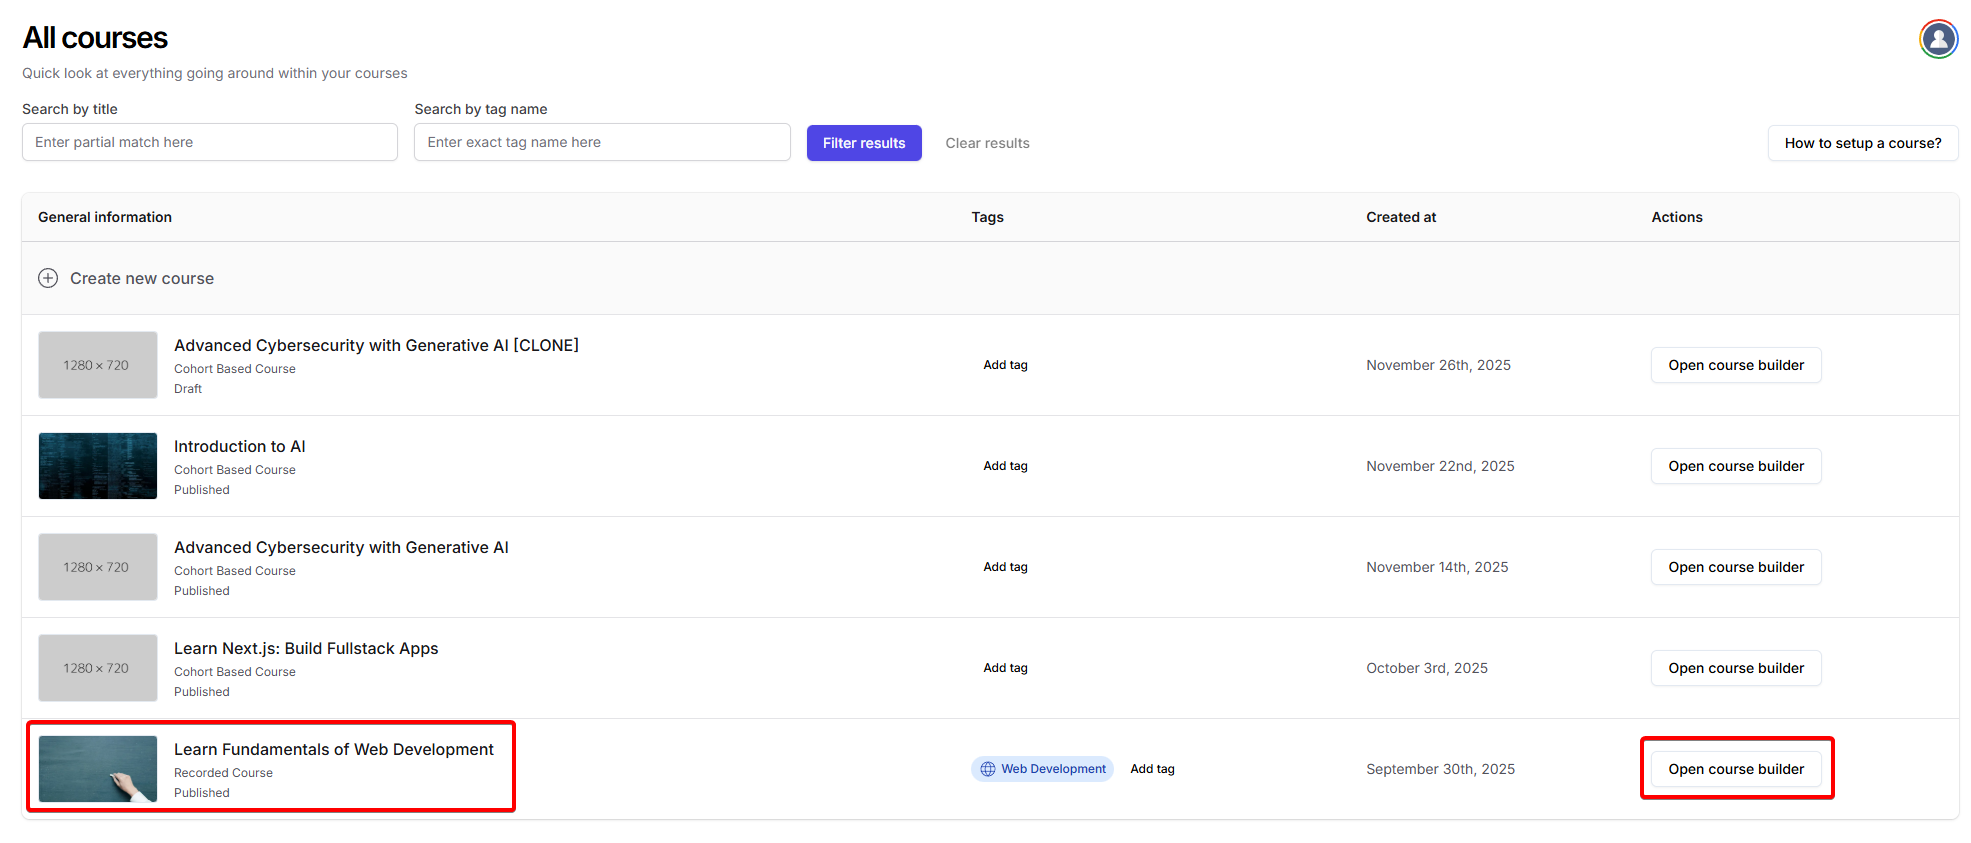
3
Go to pricing
Once inside the course builder, click on the 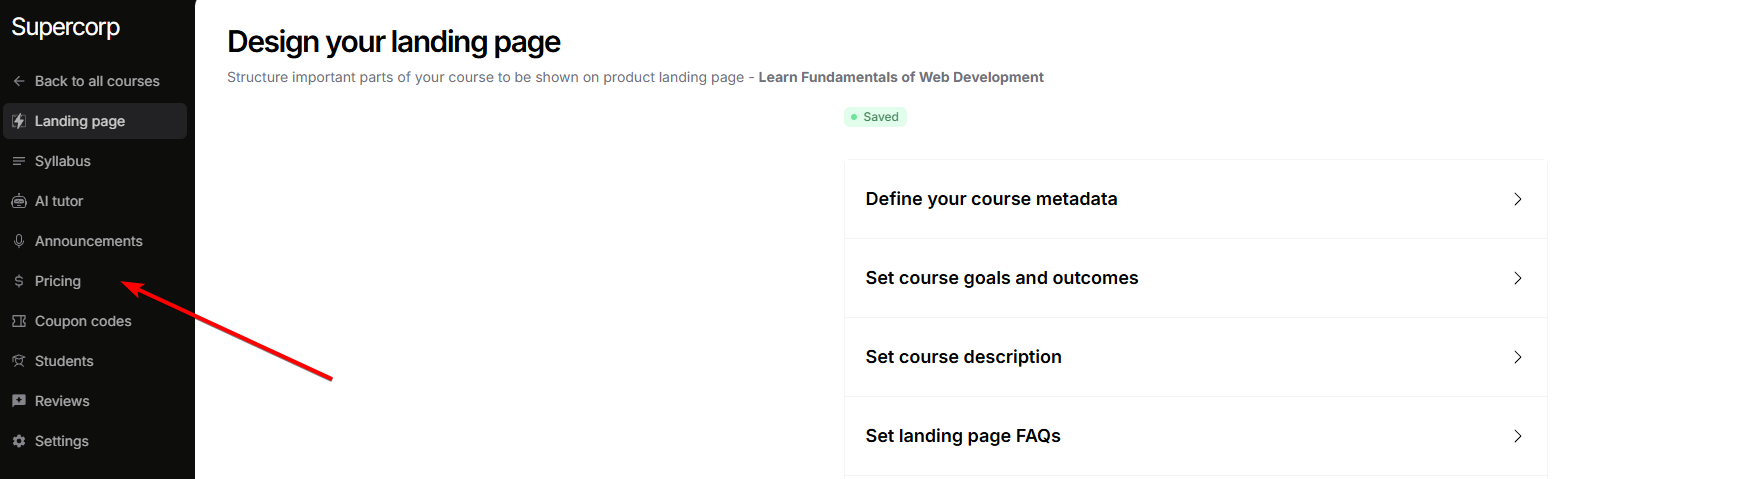
Pricing tab from the sidebar4
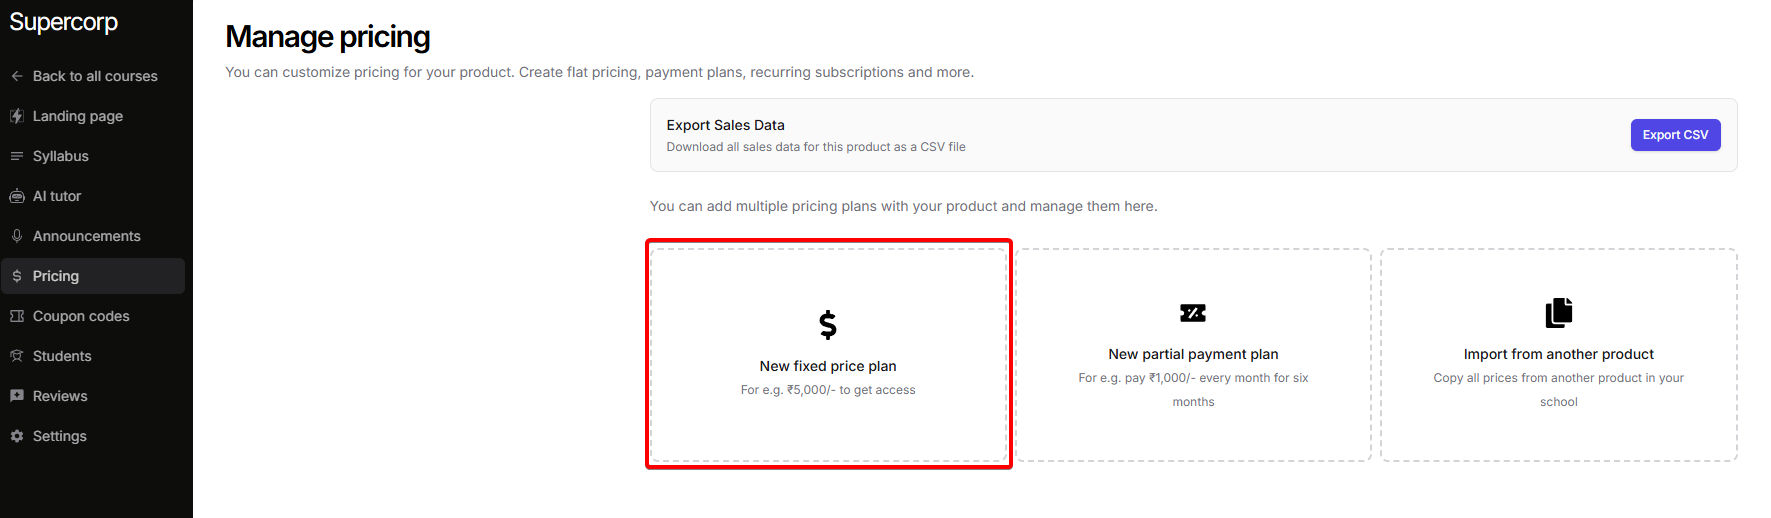
Select a new fixed pricing plan
5
Configure the fixed pricing plan
Click on the 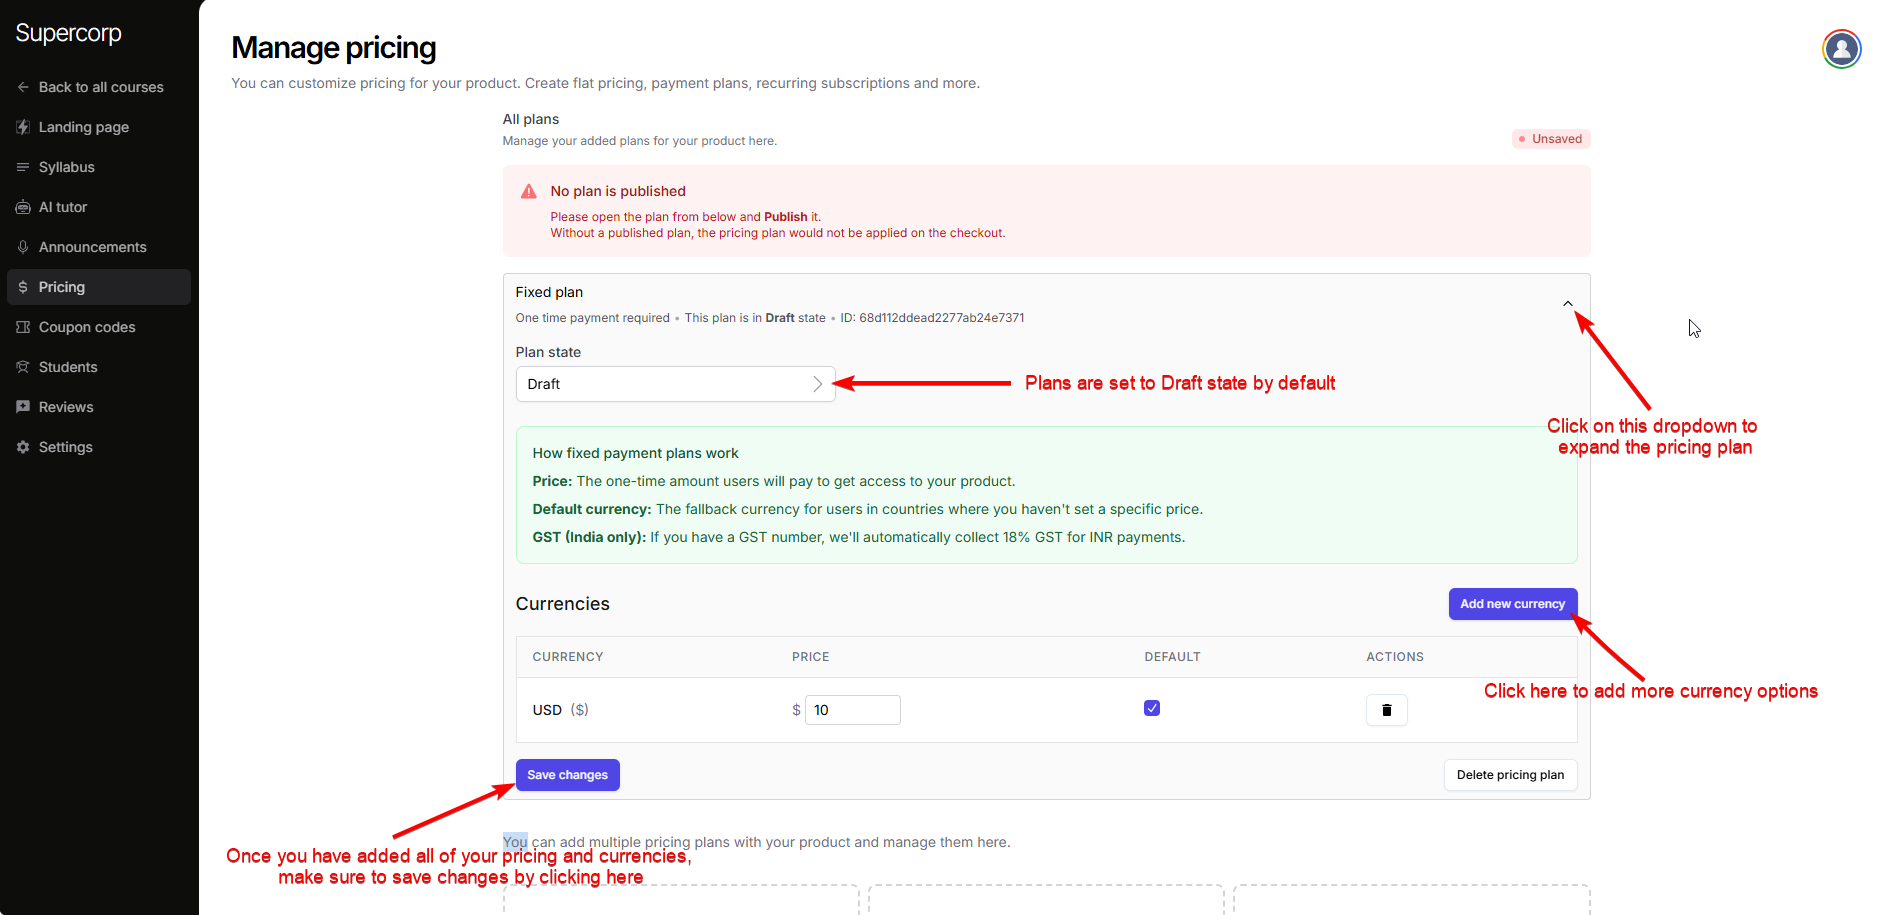
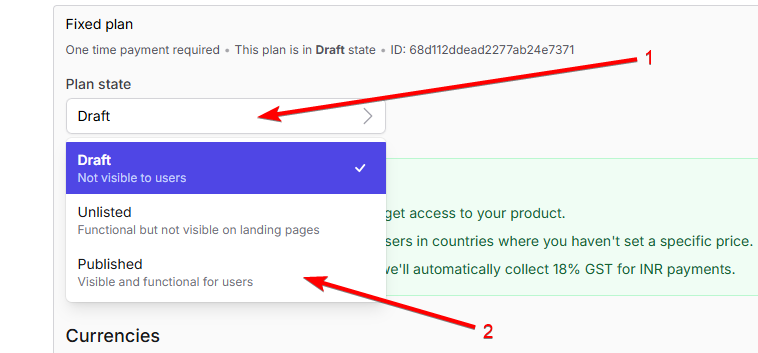
fixed plan option. This will expand the section and show multiple setup options.- Draft – Plan is invisible to users. Edit and configure in this state.
- Unlisted – Plan works but is not shown on your landing pages. You can open checkout via API.
- Published – Plan is visible and purchasable by users.
6
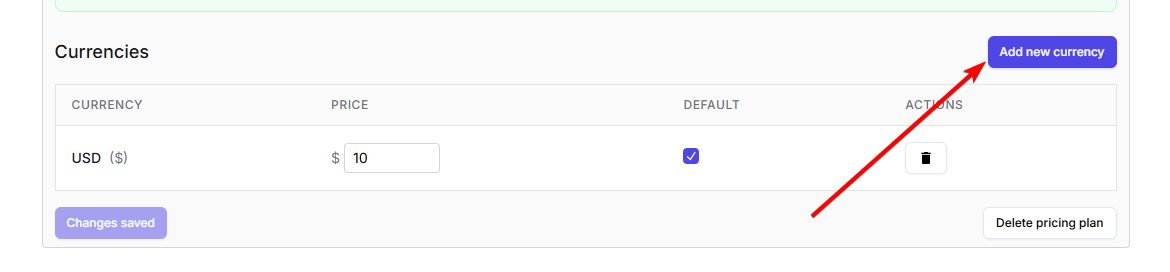
Add currencies and set prices
Click on
Enter the price or amount for the new currency.
Click on Add a new currency to add it to your plan.
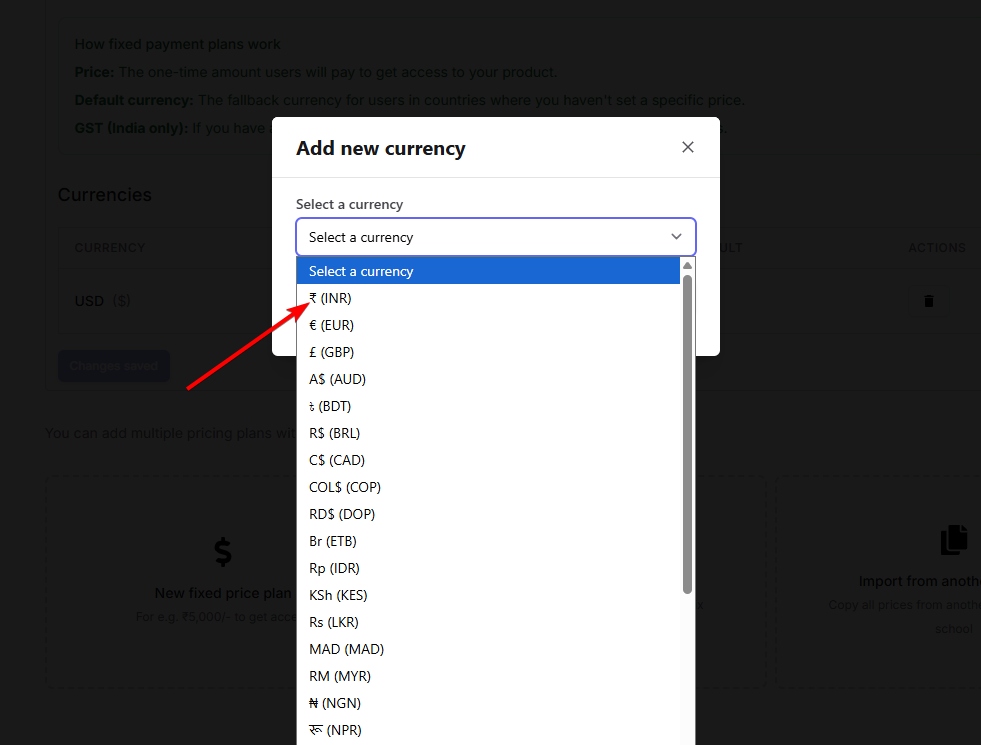
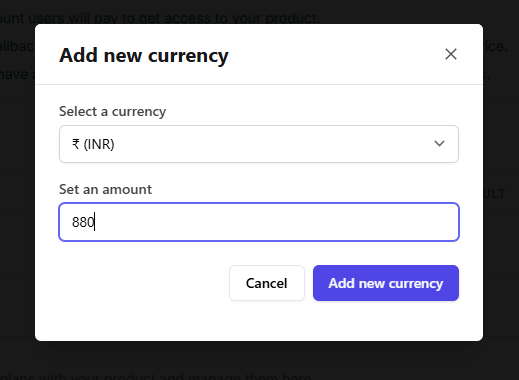
Select a currency to pick the desired currency from the picker.Enter the price or amount for the new currency.
Click on Add a new currency to add it to your plan.
7
Publish and save your plan
Click the Plan state dropdown and select Published.
Finally, click Save Changes to publish your new plan.
Finally, click Save Changes to publish your new plan.