- Recorded courses: issue when a student reaches a completion threshold (for example 100% or 80%).
- Cohort-based courses: issue after a specific date/time (for example cohort end date) regardless of per‑item completion tracking.
- Live sessions: issue after the live session ends.
Enable certificates

Choose certificate template and orientation
You can upload a custom HTML template or generate one using AI.
Additionally, you can manually choose the orientation of the certificate (landscape or portrait).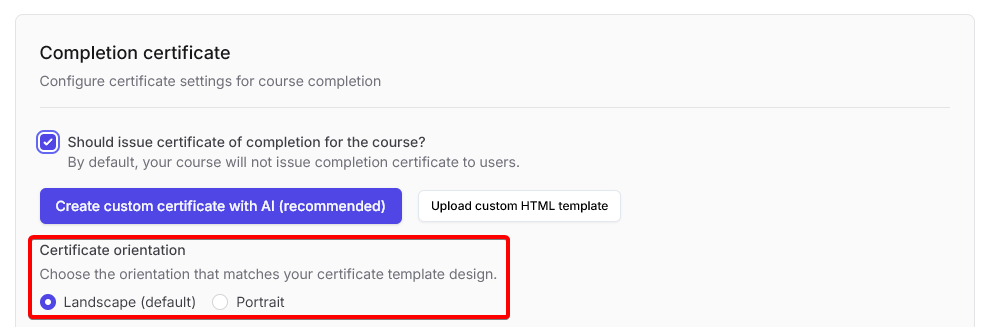
Additionally, you can manually choose the orientation of the certificate (landscape or portrait).
Set eligibility criteria for recorded courses
For Recorded courses, select the completion percentage at which a user becomes eligible for a certificate.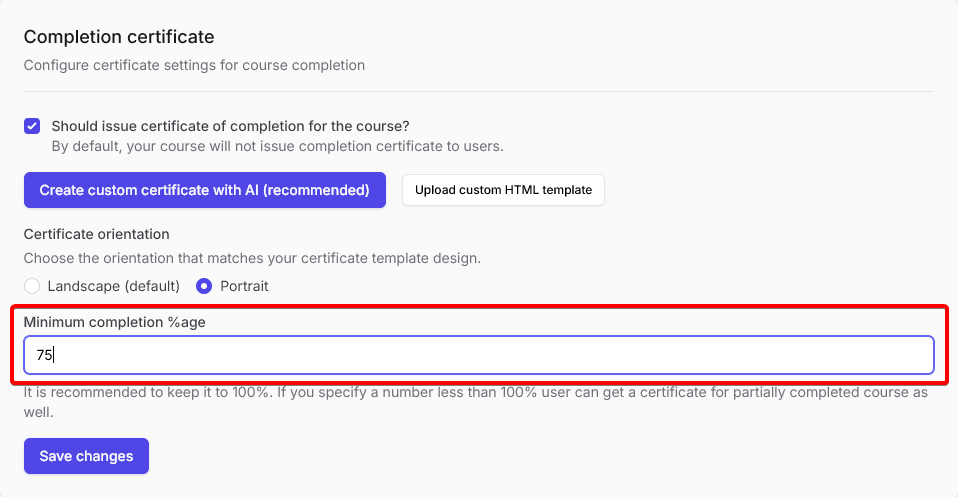
Set certificate issue date for cohort-based courses
For Cohort-based courses, choose the date after which certificates will be granted to learners.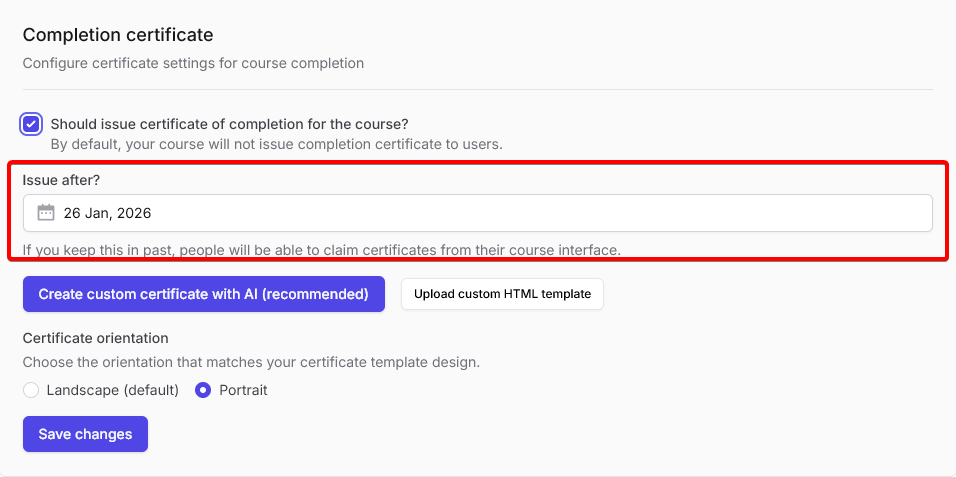
Certificate template (AI builder)
Generate with AI
Click Generate with AI in the certificate settings. Use the AI chat to describe your preferred style or layout, and the system will automatically generate a professional certificate template for you.
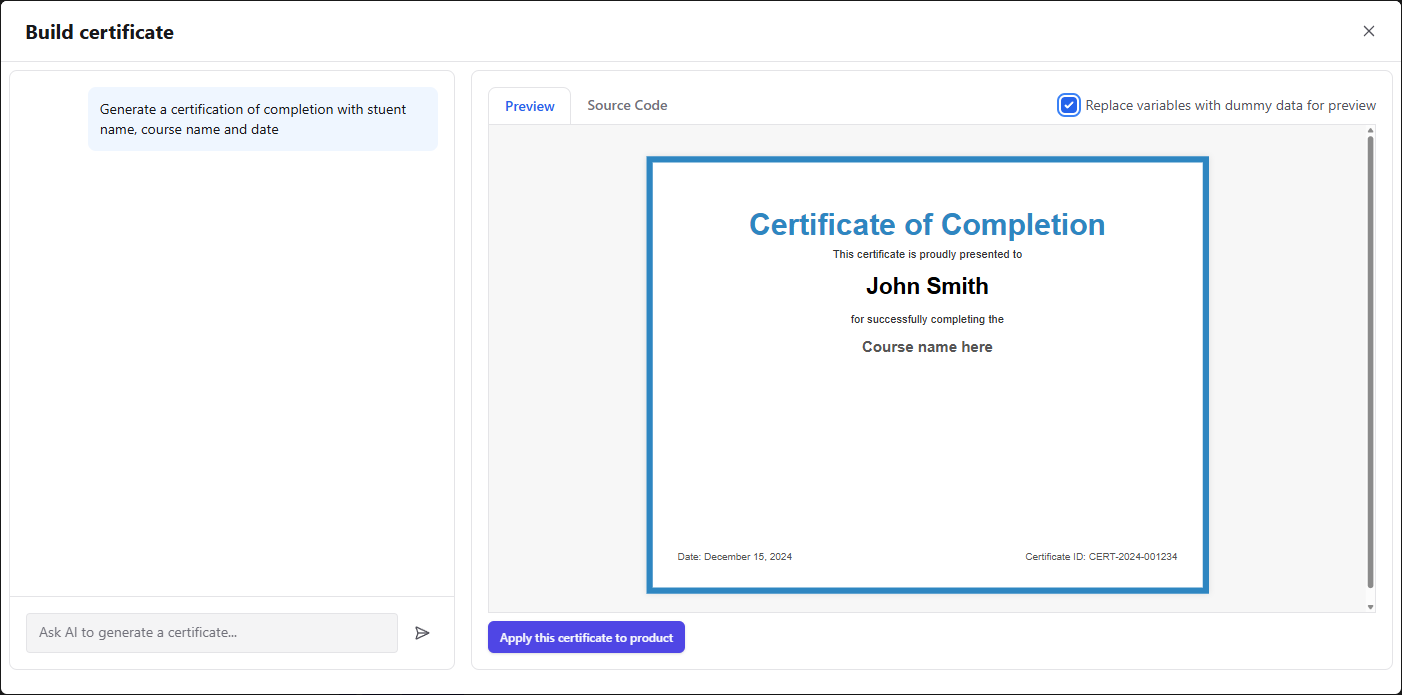
Edit the template source code (optional)
Edit the generated template’s source code directly to make any further changes or customizations as desired.
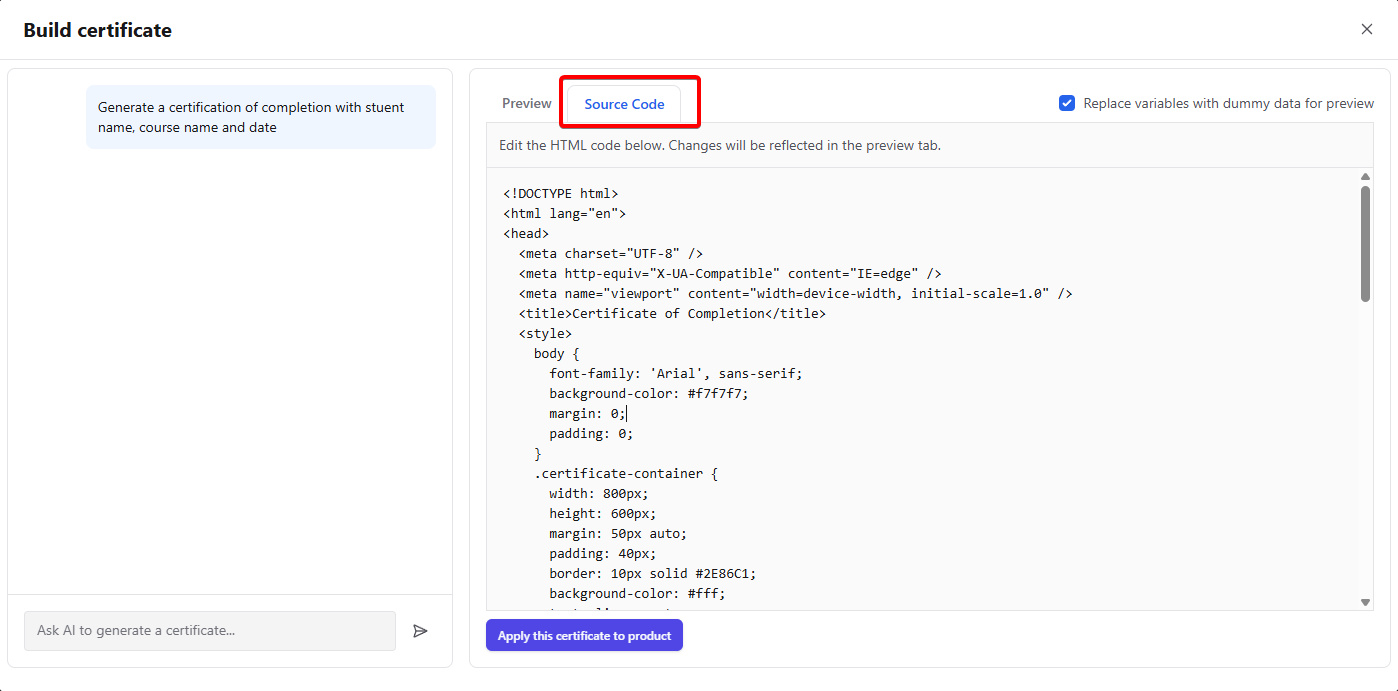
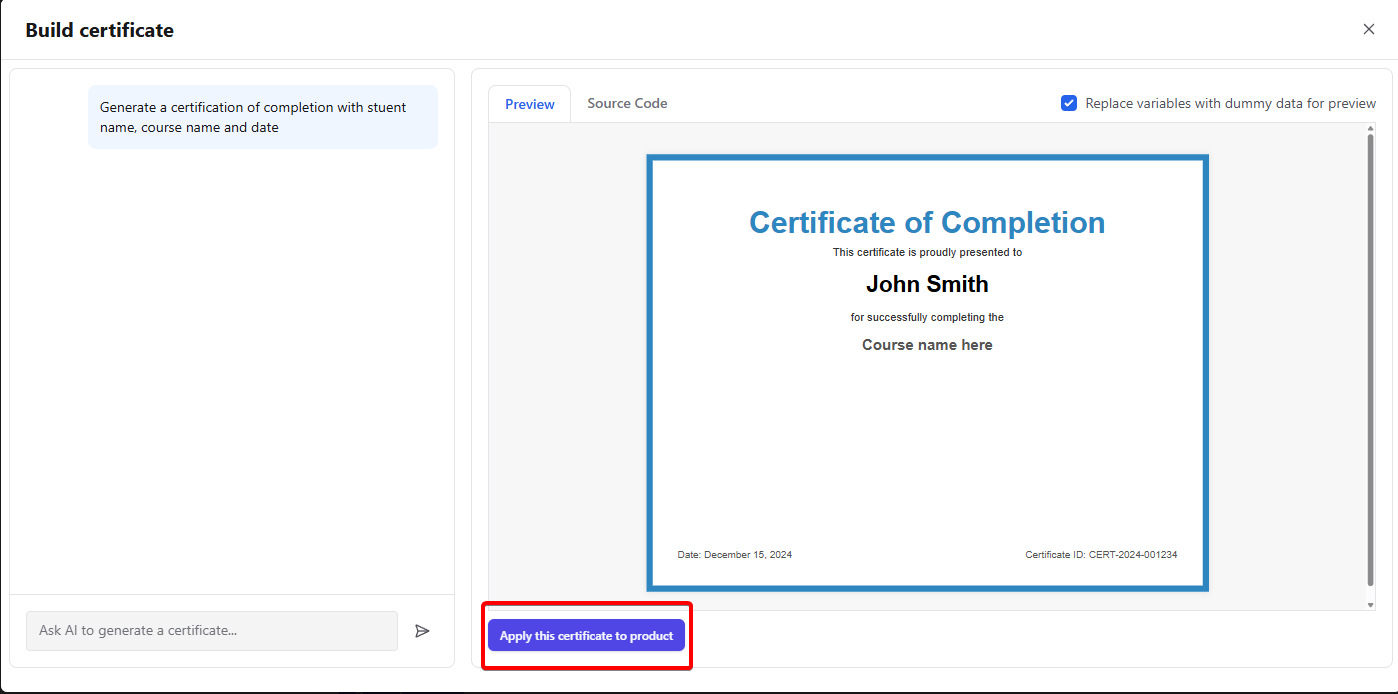
The builder automatically supports variables like recipient name, course title, issue date, and certificate ID, so your certificates are always personalized and ready for sharing or download.
Supported variables
{{forCompletingWhatEntityName}}– course or product title{{userFullName}}– certificate recipient name{{issuedAtFormattedDate}}– issuance date (formatted){{certificateId}}– unique certificate ID (hash)