How to create an assignment
You can create an assignment inside a course with the help of the following steps:Open the course builder
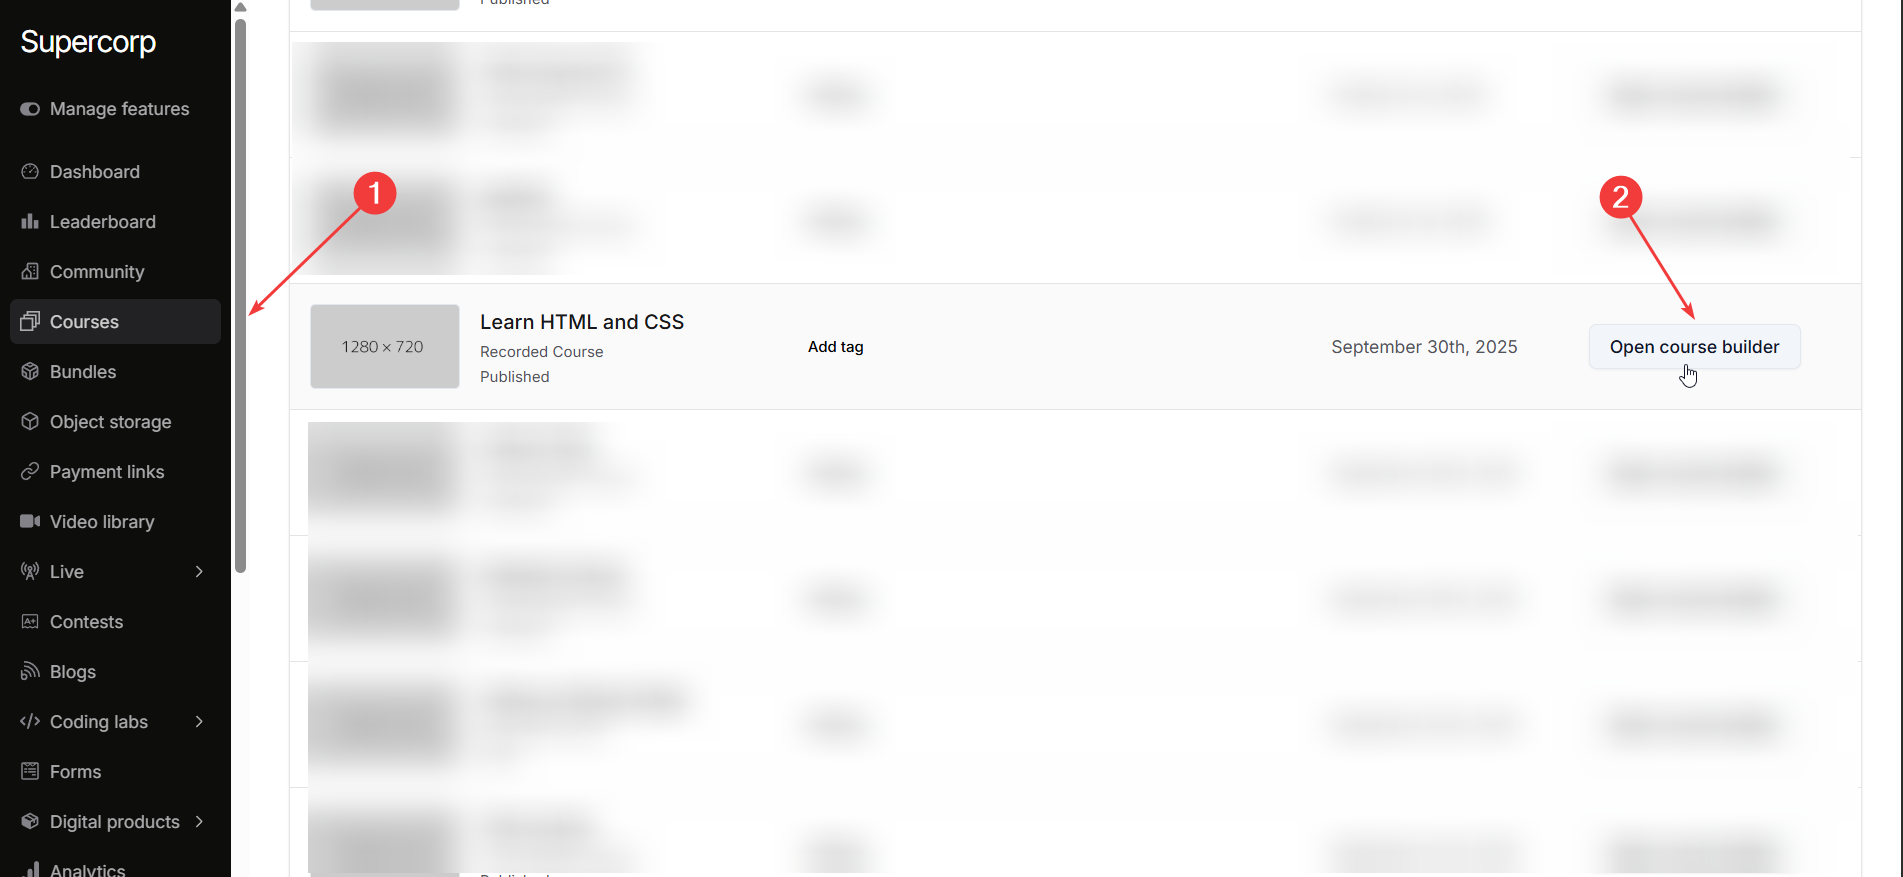
Go to the Instructor Dashboard and select Courses from the sidebar.
Choose the course where you want to add an assignment, then click Open Course Builder.
Add assignment section
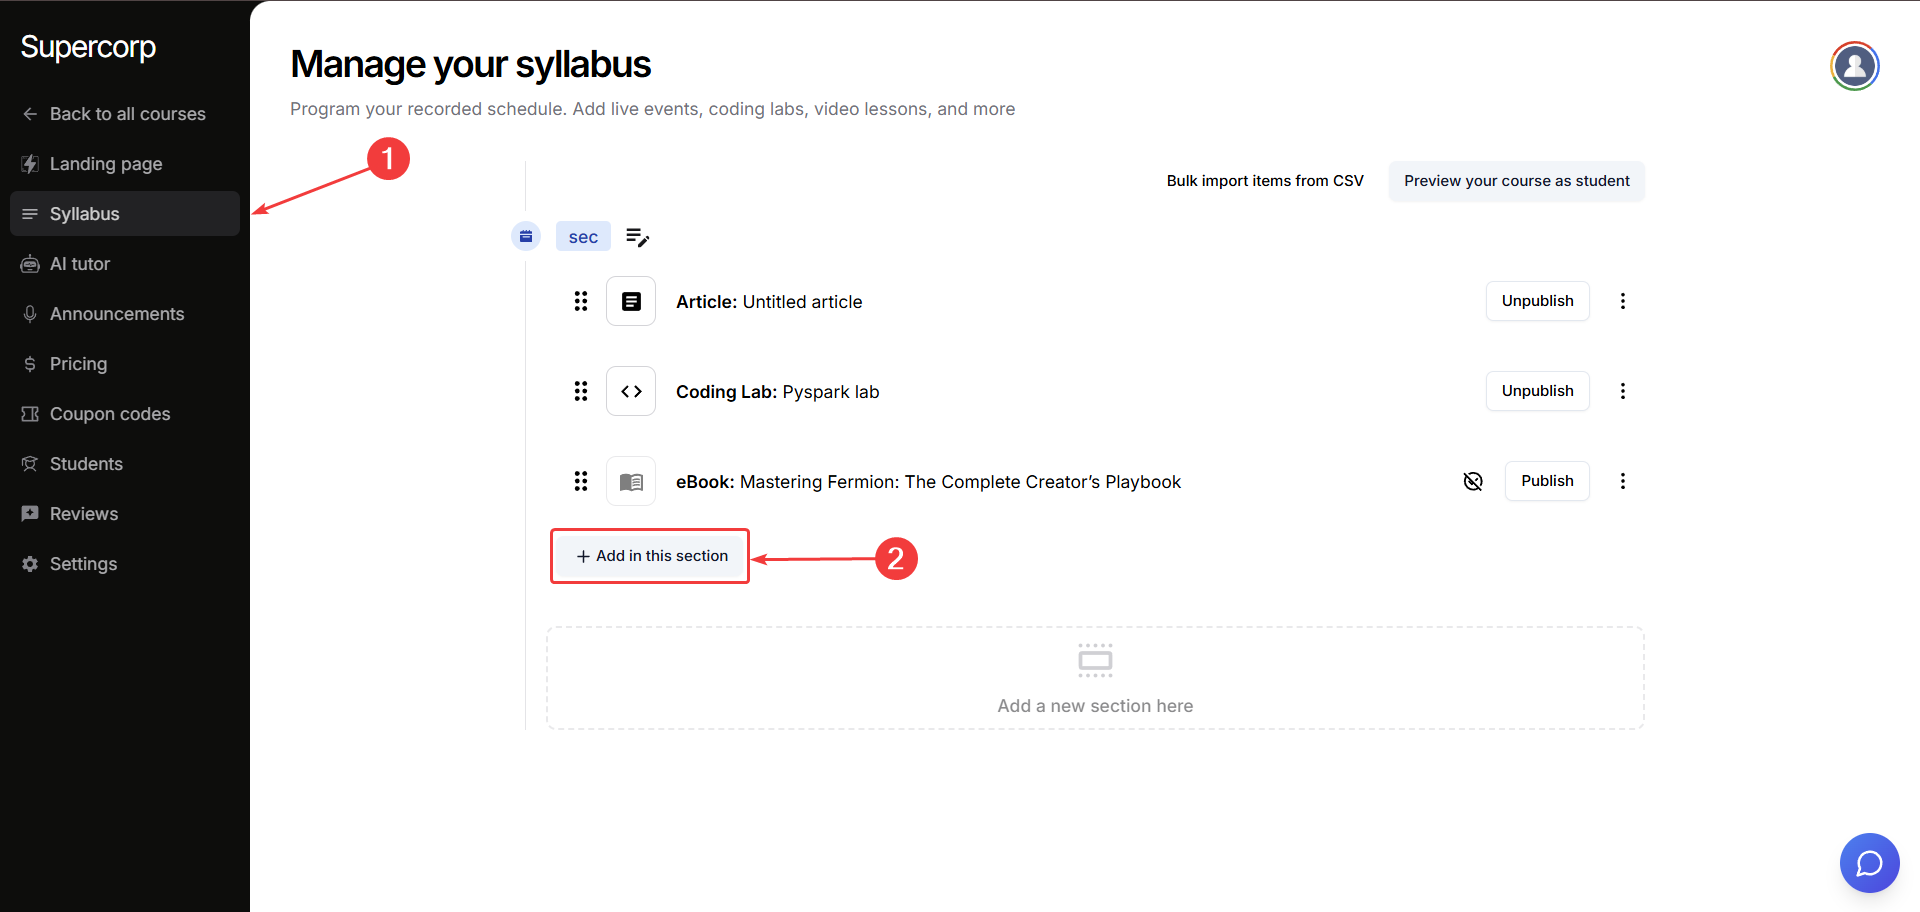
Navigate to the Syllabus tab.
Find the section where you want to add the assignment and click Add in this section.
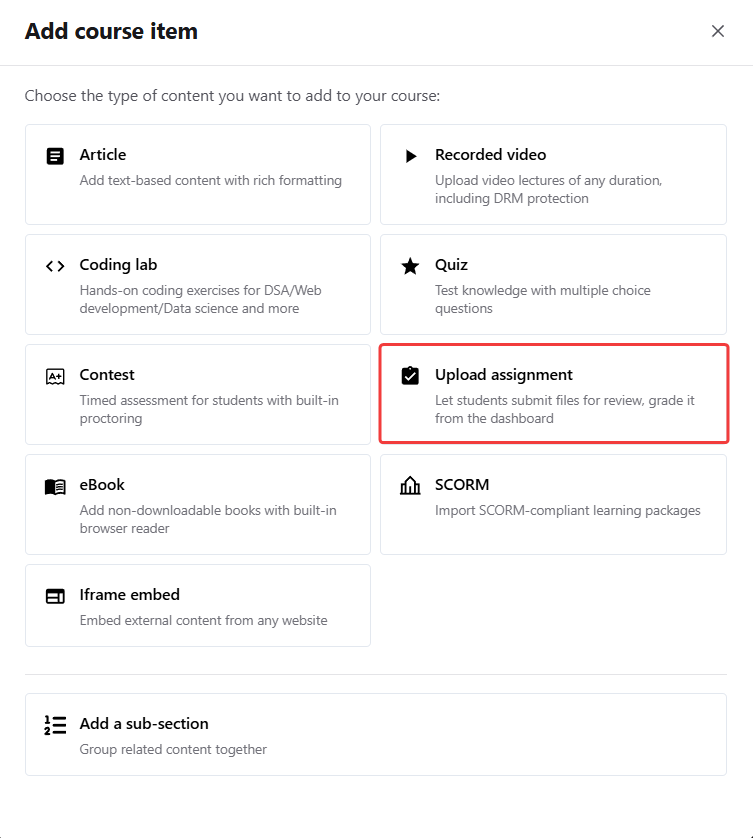
 From the list of available content types, select Upload assignment.
From the list of available content types, select Upload assignment.
Edit assignment details
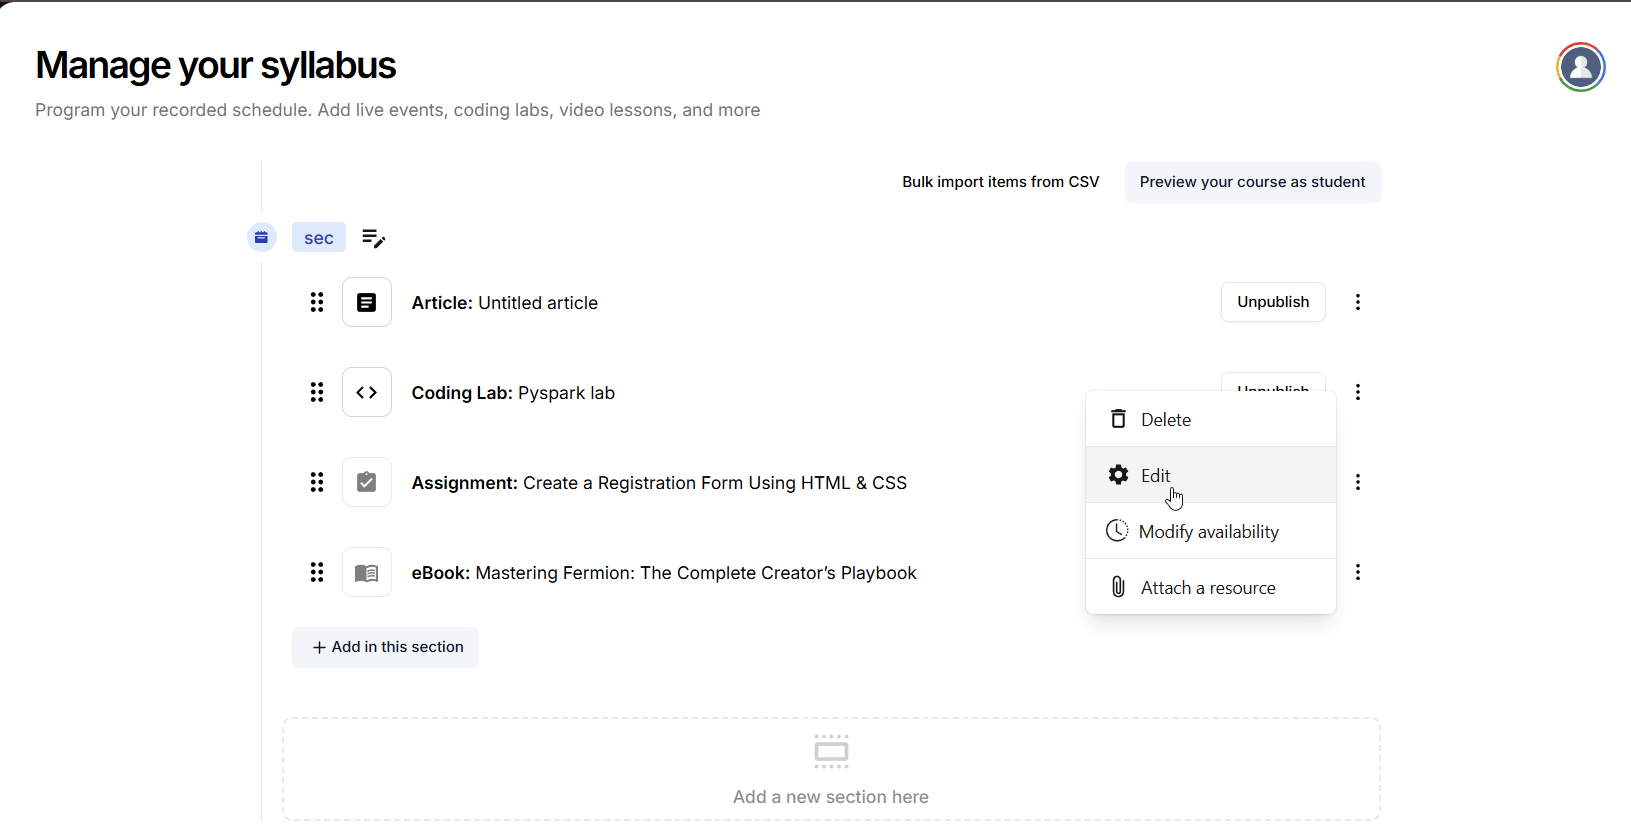
Once the assignment block appears, click the three dots (⋮) next to it and select Edit.
Add assignment title and description
Now you can:
- Add a Title for your assignment
- Write a Description (rich text supported) for your assignment. You can include formatted text, links, and images.

Configure assignment options
You can configure the following options when setting up assignments:
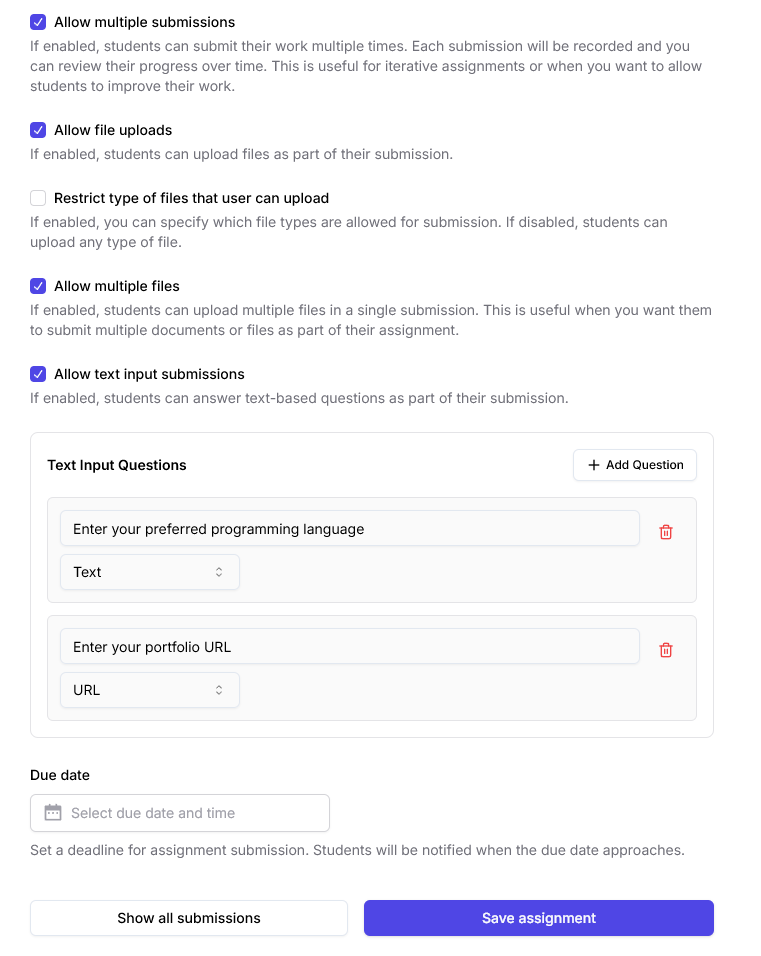
Allow file uploads
Allow file uploads
If enabled, students can upload files as part of their submission. Turn this off if the assignment only involves written/text input questions.
Restrict file types for uploads
Restrict file types for uploads
If enabled, you can specify which types of files students are allowed to upload. Leaving this off will allow any file type.
Supported file types:
- ZIP (.zip)
- RAR (.rar)
- PDF (.pdf)
- Word (.doc, .docx)
- Text (.txt)
- Markdown (.md)
- Excel (.xls, .xlsx)
- CSV (.csv)
- JPEG (.jpg, .jpeg)
- PNG (.png)
- GIF (.gif)
- Python (.py)
- JavaScript (.js)
- TypeScript (.ts)
- JSON (.json)
- MP3 (.mp3)
- MP4 (.mp4)
Allow multiple files
Allow multiple files
Allow students to upload more than one file in a single submission. This option is useful for assignments that require several documents, images, or project files.
Allow multiple submissions
Allow multiple submissions
Enable this to let students submit their assignment multiple times. Each attempt will be recorded separately for review and grading. Useful for iterative or stepwise assignments.
Allow text input questions
Allow text input questions
If enabled, you can add one or more open-ended questions to the assignment for students to answer directly in the submission form. Each text input question can be set to accept either freeform text or a URL as the response. This allows you to ask for written answers or require students to submit a link (such as to a portfolio, document, or project).
Set due date and time
Click on Select due date & time to set a deadline for the assignment.
Once selected, learners will see the due date clearly on their assignments
Review & grade assignment submissions
In the edit assignment section, you can view and manage all student submissions for your assignments by clicking the Show all submissions button. For each submission, you can see:- Student name and email
- Submission timestamp (when the assignment was submitted)
- Uploaded files: you can download any submitted file
- Preview button: shows you a preview of supported filetypes, directly inside Fermion, without needing to download files.
Supported file types & extensions
Supported file types & extensions
Here’s a list of supported file types your students can submit:
- Document:
- PDF (
.pdf)
- PDF (
- Image:
- JPG (
.jpg), JPEG (.jpeg), PNG (.png), GIF (.gif), WEBP (.webp), SVG (.svg)
- JPG (
- Audio:
- MP3 (
.mp3), WAV (.wav), OGG (.ogg), M4A (.m4a), AAC (.aac), FLAC (.flac)
- MP3 (
- Video:
- MP4 (
.mp4), WEBM (.webm), OGV (.ogv), MOV (.mov), AVI (.avi), MKV (.mkv), FLV (.flv), WMV (.wmv)
- MP4 (
- Grade status: whether the assignment is graded or not
 You can also grade submissions directly from this page, add remarks or feedback for the student, and track all submissions in a table format. This allows you to efficiently review, evaluate, and provide feedback to your learners.
Additionally, you also have an option to upload files, along with grade and remarks ( evaluated copies of submitted pdfs, for example ) when grading an assignment :
You can also grade submissions directly from this page, add remarks or feedback for the student, and track all submissions in a table format. This allows you to efficiently review, evaluate, and provide feedback to your learners.
Additionally, you also have an option to upload files, along with grade and remarks ( evaluated copies of submitted pdfs, for example ) when grading an assignment :
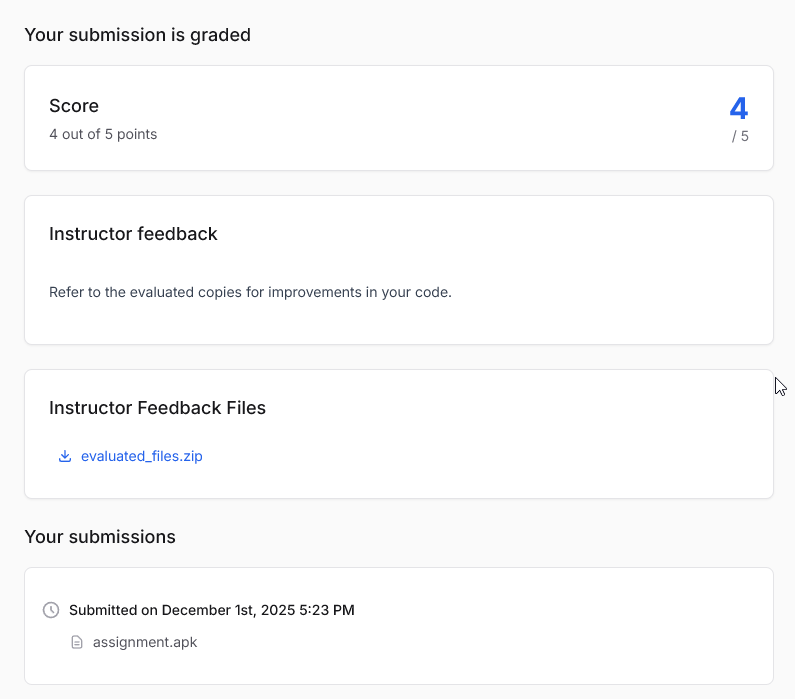
 Which the student can see on their course, like so :
View all assignment submissions across all courses
Open your Instructor Dashboard
Navigate to your Instructor Dashboard. Here, you’ll find an overview of your courses, analytics, and recent activity.
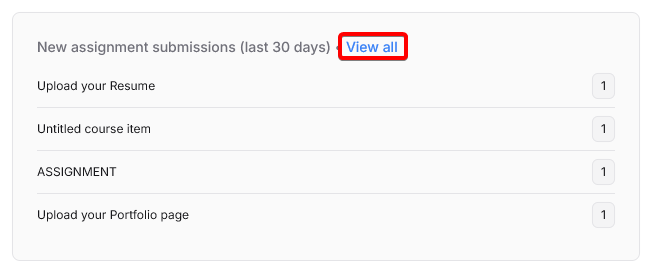
Locate the assignments widget
Look for the New assignment submissions (last 30 days) widget on your dashboard homepage.
This widget lists recent assignment submissions from all your courses for quick reference.
Click on `View all`
In the widget, click the View all button. This will open a dedicated page where you can see all assignment submissions across every course you manage.
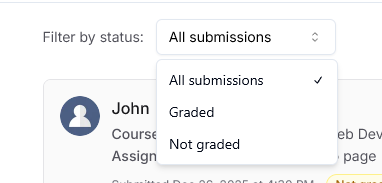
Filter and manage submissions
On the “View all” page, you can:
- View all recent assignment submissions in one place
- Filter submissions by graded / not graded status
- Click on any submission to review files, provide feedback, and grade
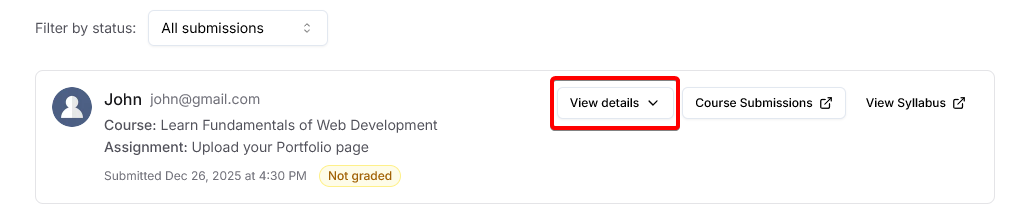
- Download or preview submitted files (for supported file types)
- Grade the assignment with feedback & files if needed.
Next steps
Track course analytics
Learn how to monitor student progress, view engagement metrics, and measure performance across your courses.
Set up completion certificates
Discover how to create and issue certificates to learners automatically after they complete your course.