Why use an onboarding form?
Onboarding forms help you collect essential information from new users automatically during sign-up. This information can include personal details, preferences, or any other data necessary to provide a tailored experience. By gathering responses upfront, you can personalize learning paths, verify eligibility, segment users into relevant groups, and ensure all necessary compliance or consent requirements are met. Additionally, onboarding forms streamline administrative processes by reducing manual data entry and giving instructors a clear overview of each new user’s profile. The data collected can also help you make informed decisions and enhance the overall learning experience for students.How to attach an onboarding form to your school?
You can enable an onboarding form for a new user with the help of the following steps:1
Enable Forms
Before creating your onboarding form, make sure the Forms feature is enabled for your school. Go to Manage Features in your admin panel and toggle on the Forms option.Learn more about how to manage features
2
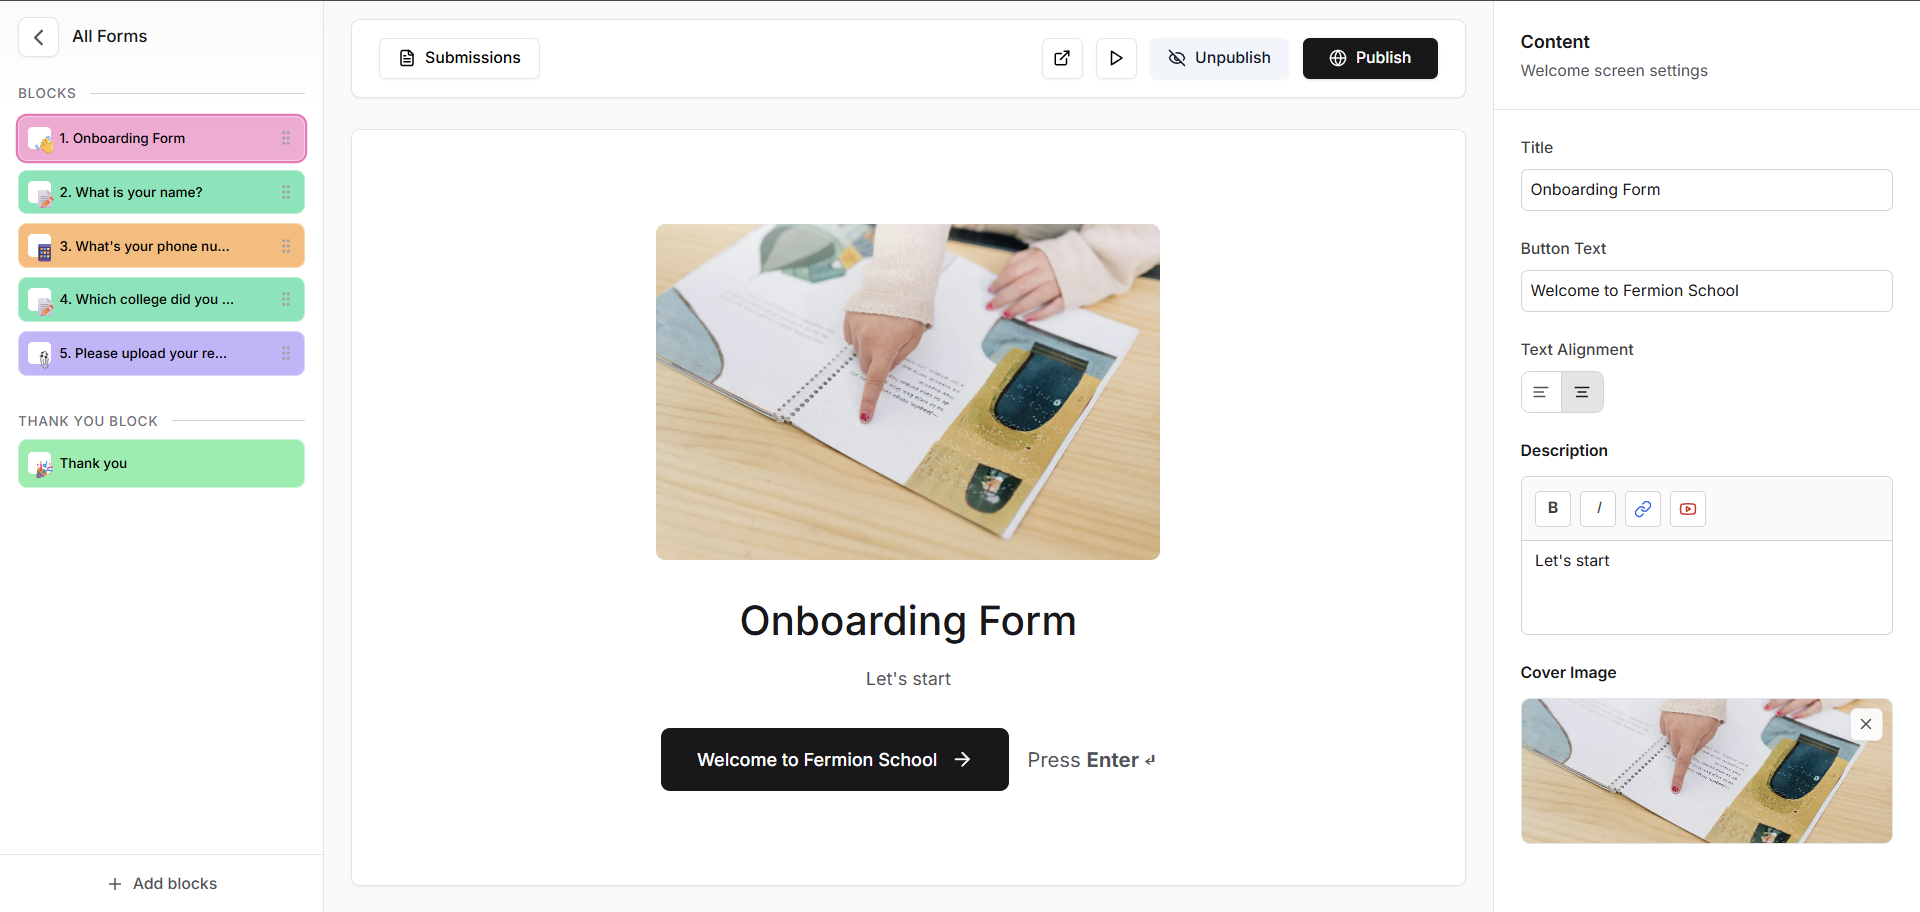
Create a new form
Once forms are enabled, you can create your onboarding form.
Navigate to the Forms section in your dashboard and click Create Form.Learn more about how to create forms
Navigate to the Forms section in your dashboard and click Create Form.Learn more about how to create forms
3
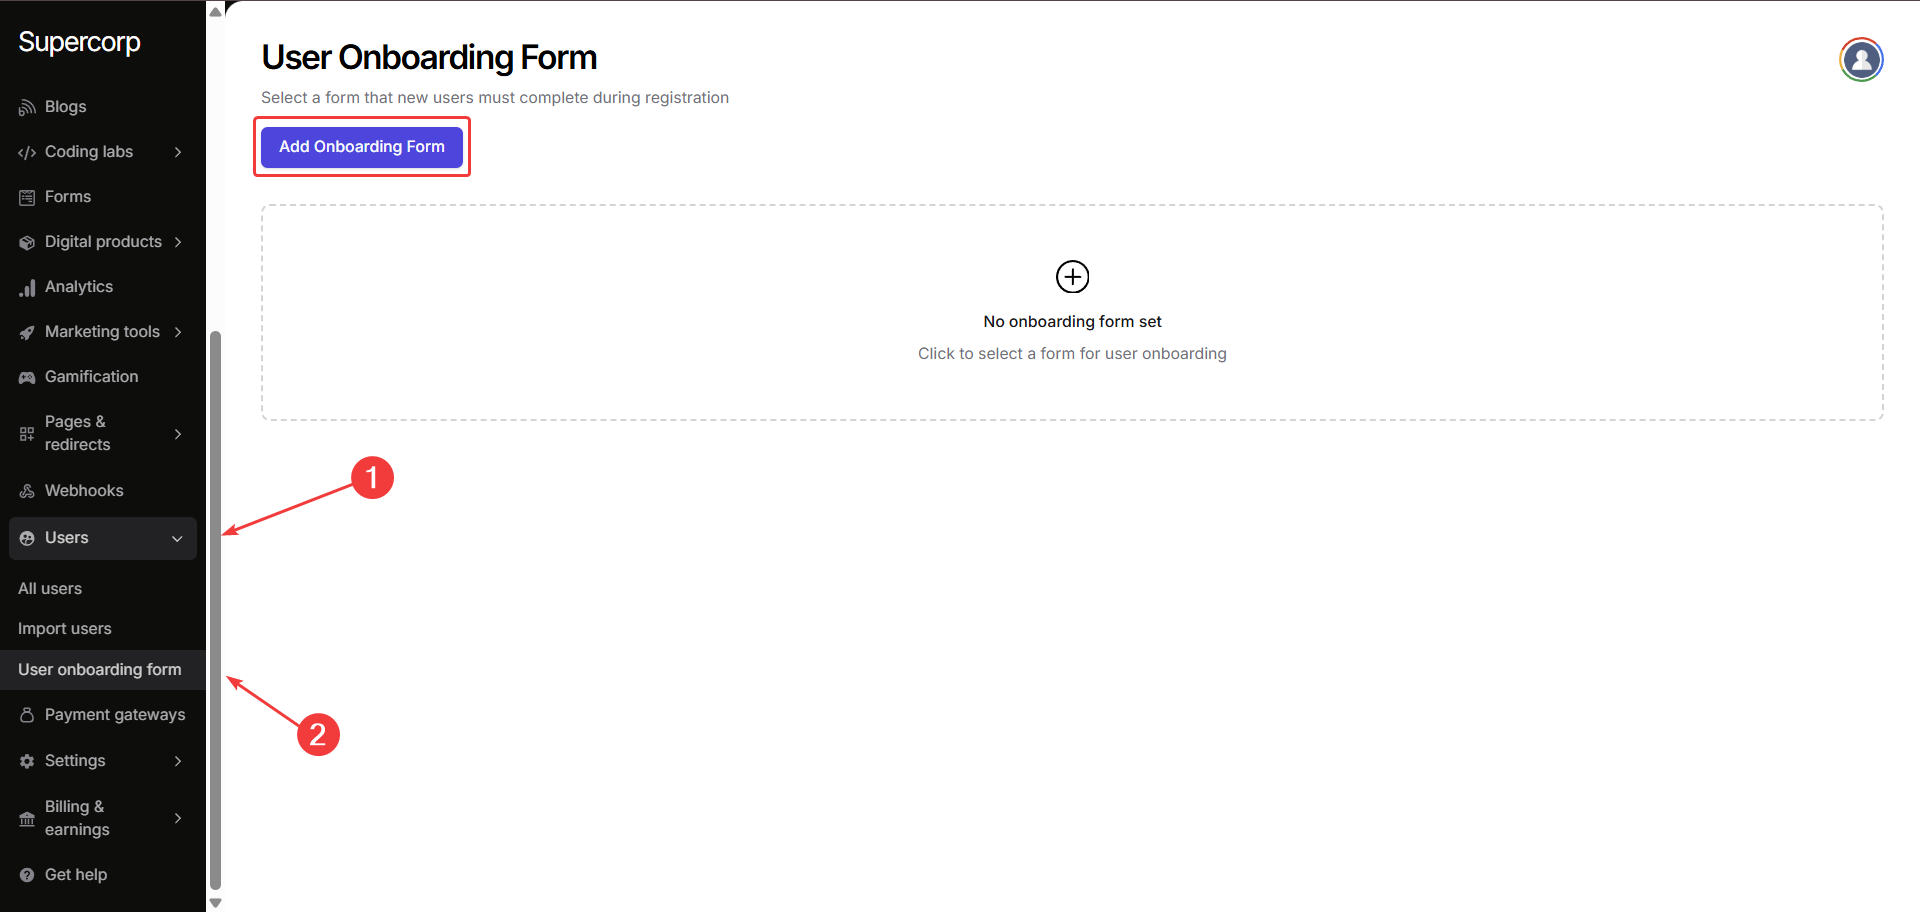
Go to user onboarding form
After creating your form, go to Users → User Onboarding Form from your instructor dashboard sidebar.
4
Add onboarding form
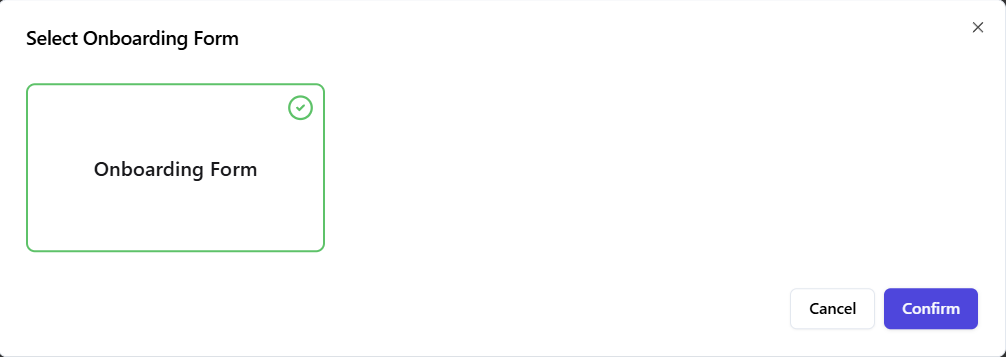
Click on Add Onboarding Form, then select the form you created in the 2nd step.
Now click confirm, the form will automatically appear for every new user when they register.
Now click confirm, the form will automatically appear for every new user when they register.
Viewing responses
All onboarding form submissions are automatically stored in the Submissions tab inside your form. You can export them as CSV or view them directly from your dashboard. Learn more about accessing form submissions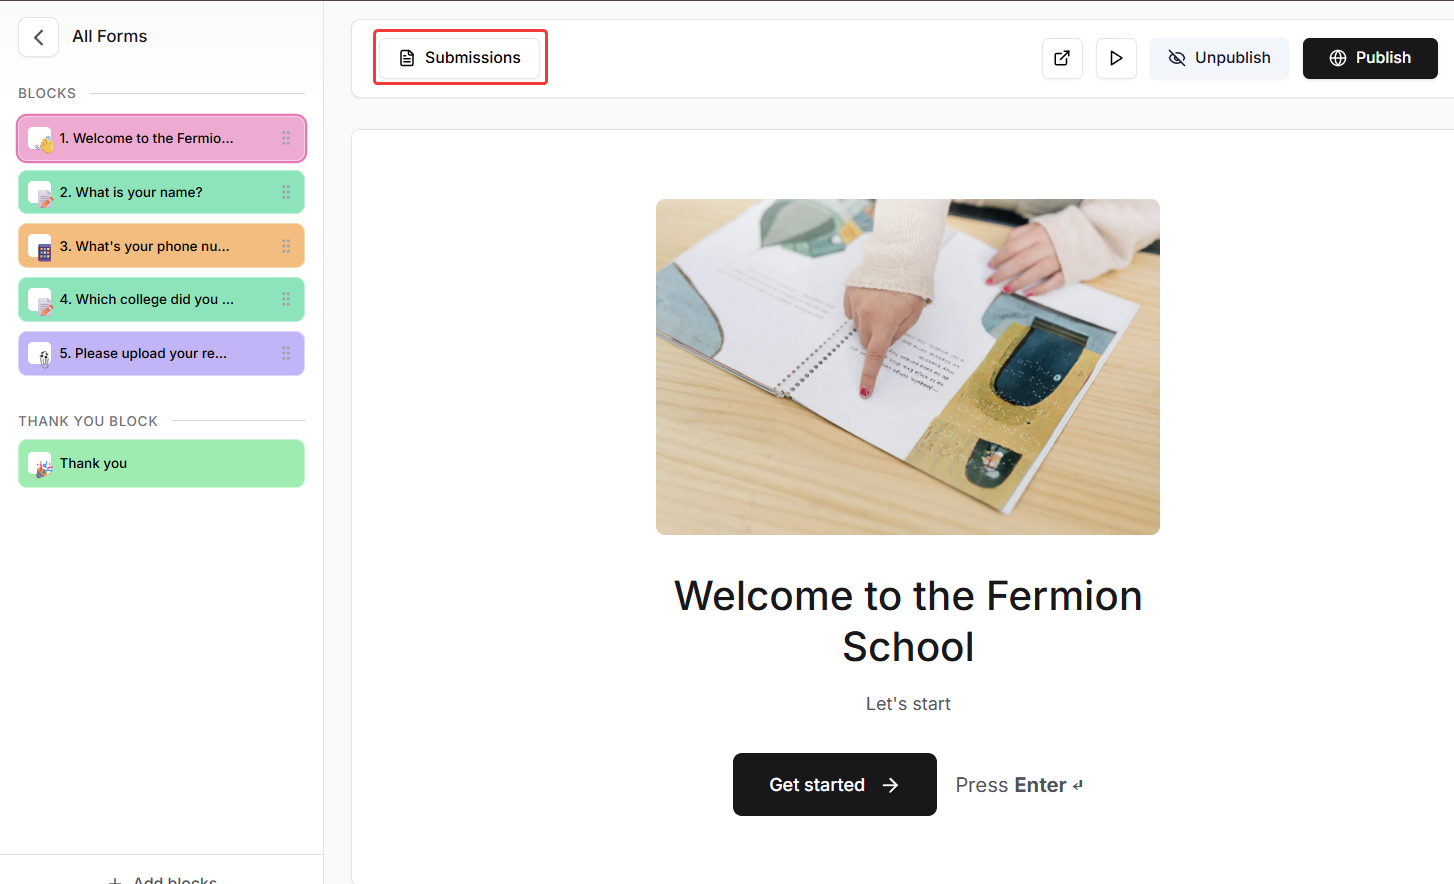
Next steps
eBooks
Create and publish ebooks to share structured learning material and in-depth guides with your students.
Blogs
Write and post blogs to share updates, announcements, and insights directly with your learners.