Some pre-requisites
Before getting started, make sure of the following things:- Have a good internet connection before you stream so that the stream doesn’t buffer or lag, these issues are usually caused by poor network connections.
- Make sure that your browser and graphic drivers are up-to date, to avoid any issues that arise with outdated versions.
- Keep a good webcam and a good microphone to ensure that you’re able to stream smoothly to your learners.
Live session
You can schedule live classes in three ways at Fermion:-
Live class inside a course:
You can create a live session within a cohort-based course. This helps you manage attendance, track progress, and keep the session part of the course flow.
Refer to the next section in this documentation to learn how to schedule a live class inside a course. -
Public events:
You can organize a live event that anyone can join. You can use this option for open sessions such as webinars, announcements, or community discussions.
Learn more about public events -
One-on-one calls:
You can set up a live session just between an instructor and an individual learner. This option can be used for personalized guidance, mentorship, or performance reviews.
Learn more about 1:1 calls
How to create a live class inside courses?
You can schedule live classes in cohort based courses and go live with the help of the following steps:1
Expand course items
Inside your syallbus section itself, click on 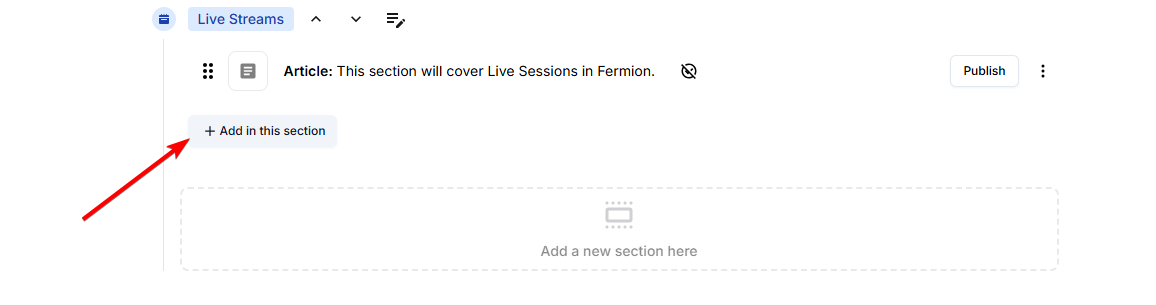
+ Add in this section button to expand to all course items.2
Add a live class
Click on 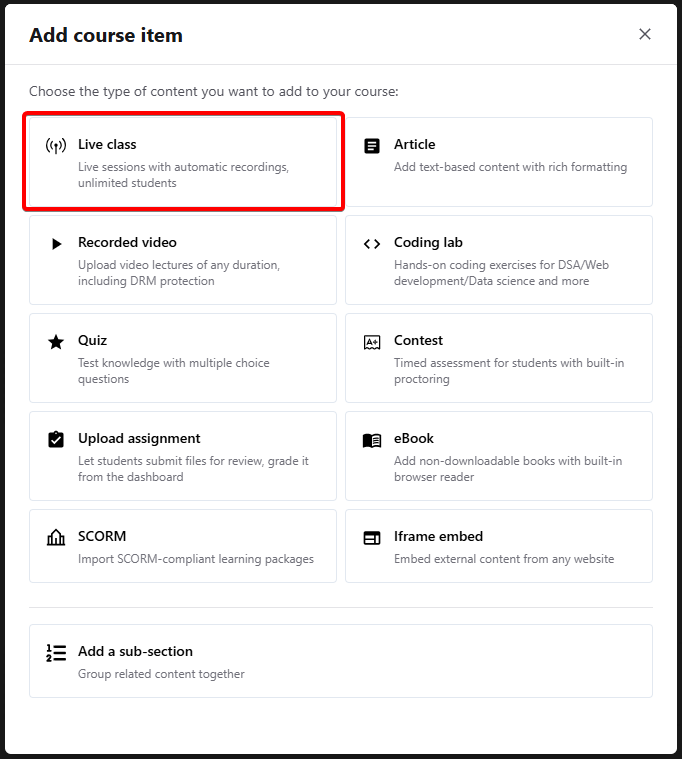
Live class from the available course items to add a live session.3
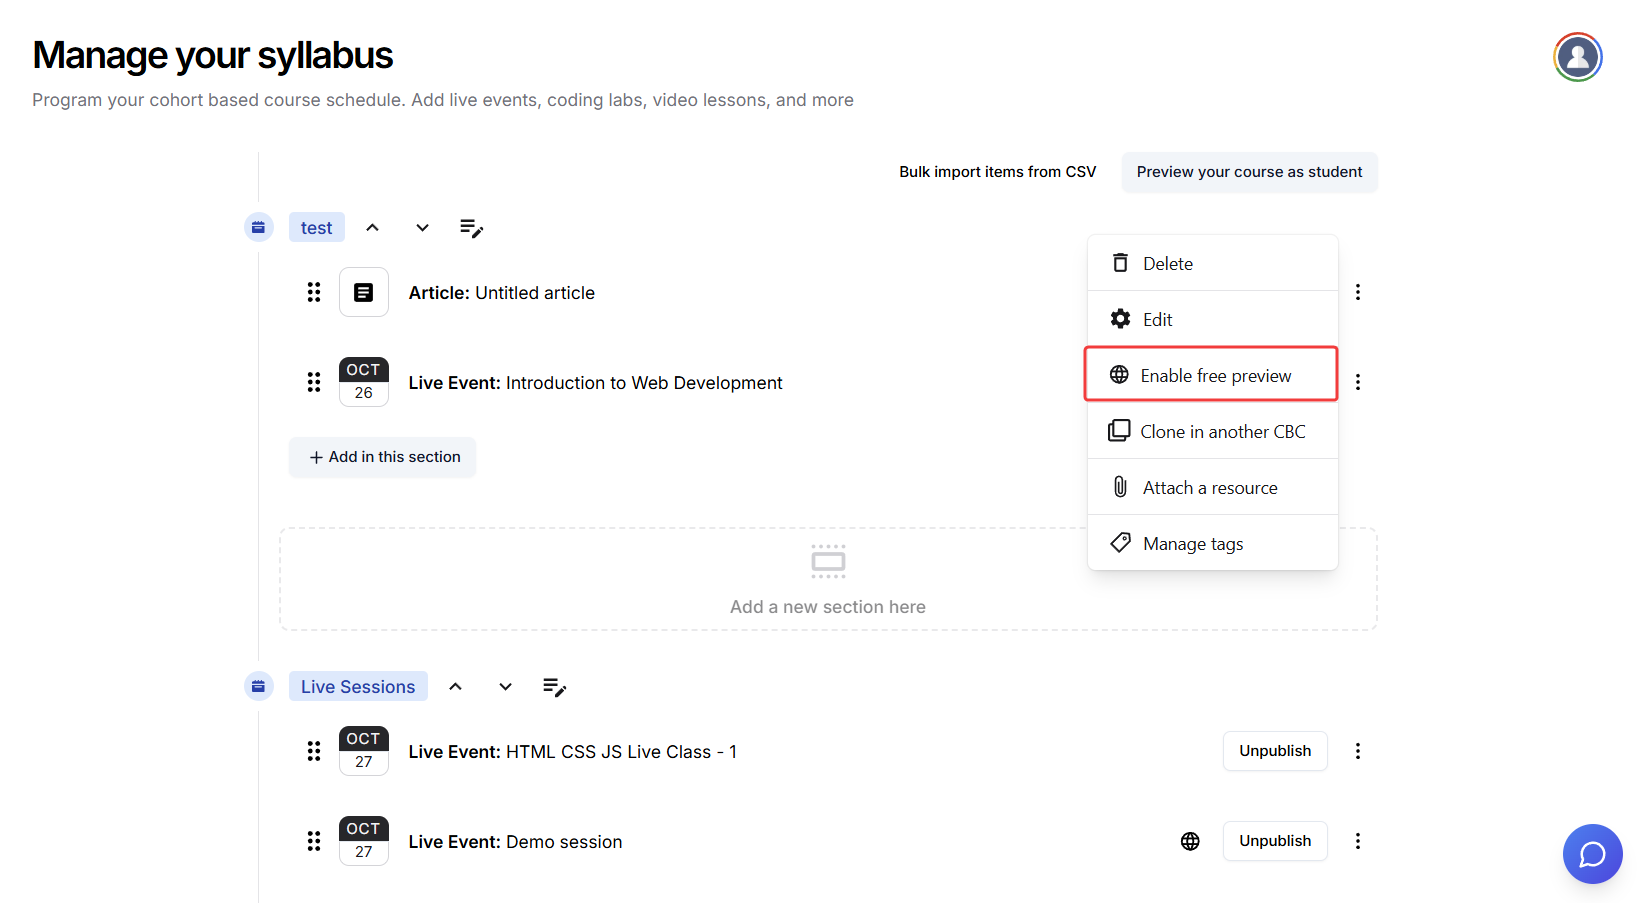
Enable free preview
If you wish to enable a free preview for your live session and generate a public invite link, click on the the three dots next to the live class and click Enable free preview button and provide confirmation.
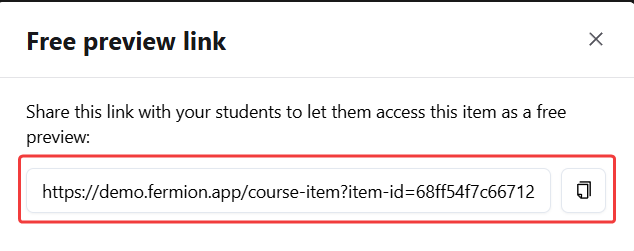
 Now, you can copy this link and share with your learners.
Now, you can copy this link and share with your learners.
4
Edit the live class
Click on the three dots next to the newly created live session and select 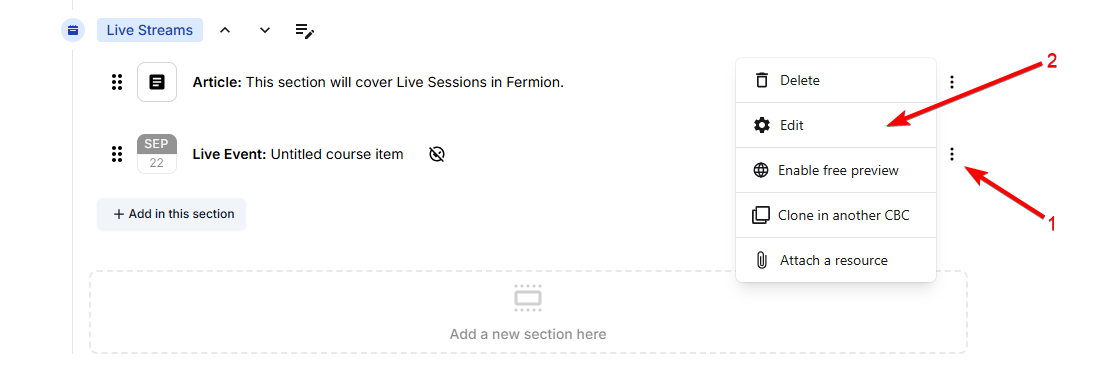
Edit.5
Configure the live session
This will take you to a Live Session Manager page where you can configure a lot of the options related to this upcoming live session.
Title & description
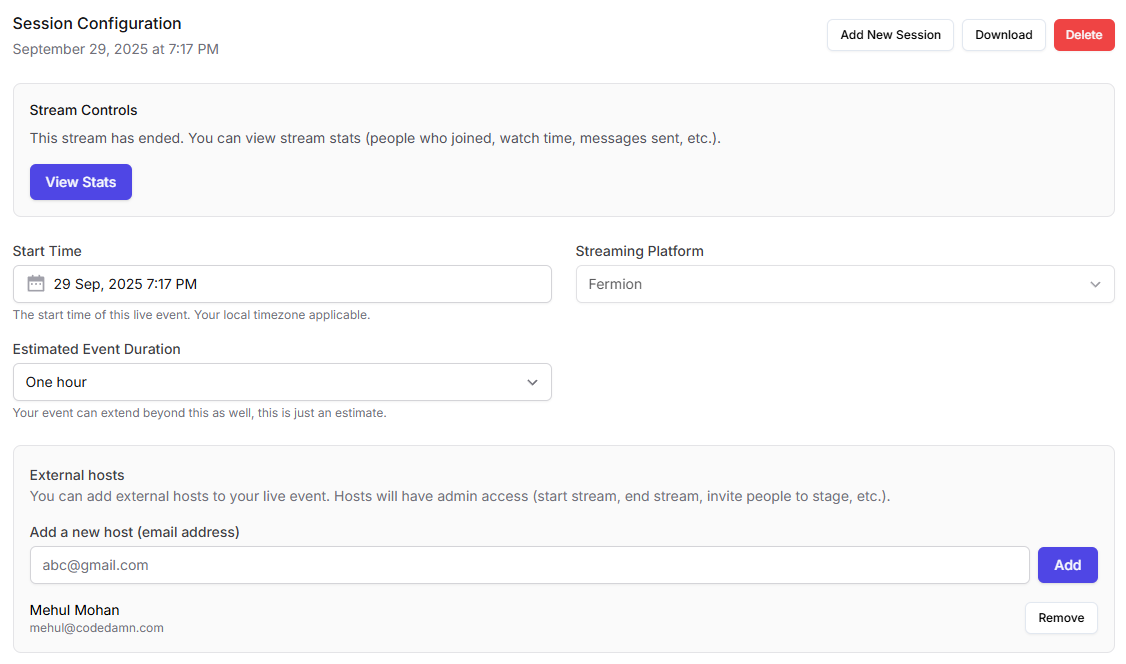
Session configuration
From here, you can set the time, duration of the stream. Click on View stats button to access the live stream’s analyticsAdditionally, you can also add external hosts via email address. When a user joins the live class with the added email address, they will have host priviledges inside the livestream, that is they’ll be able to access the whiteboard, screenshare, mute participants and end the session for everyone.Using other livestreaming solutions
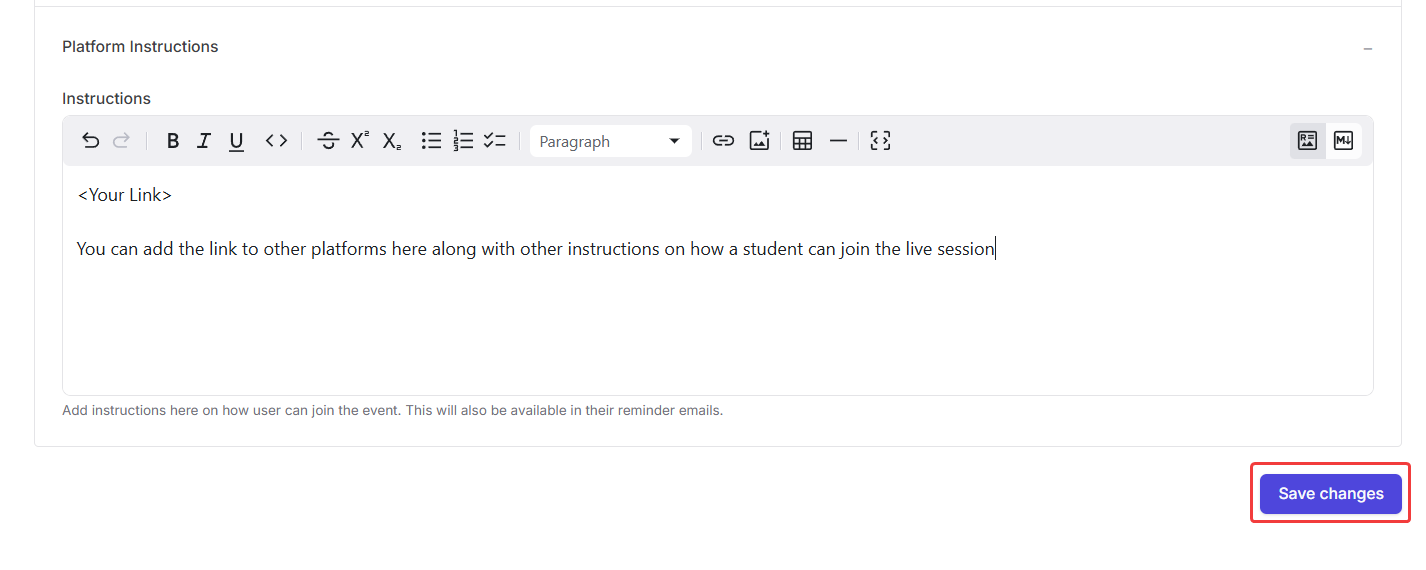
If you prefer to use an external livestreaming provider instead of Fermion’s in-house system, click on Streaming Platform and select Other from the dropdown menu. You can then add your call link inside the Platform Instructions section. These instruction will also be automatically included in reminder emails sent to your participants before the session starts.Please note that when using an external livestreaming platform, you will not get access to livestream recordings, auto-generated captions, or stream analytics, as these features are only available for events hosted through Fermion’s native livestreaming solution.Additional settings
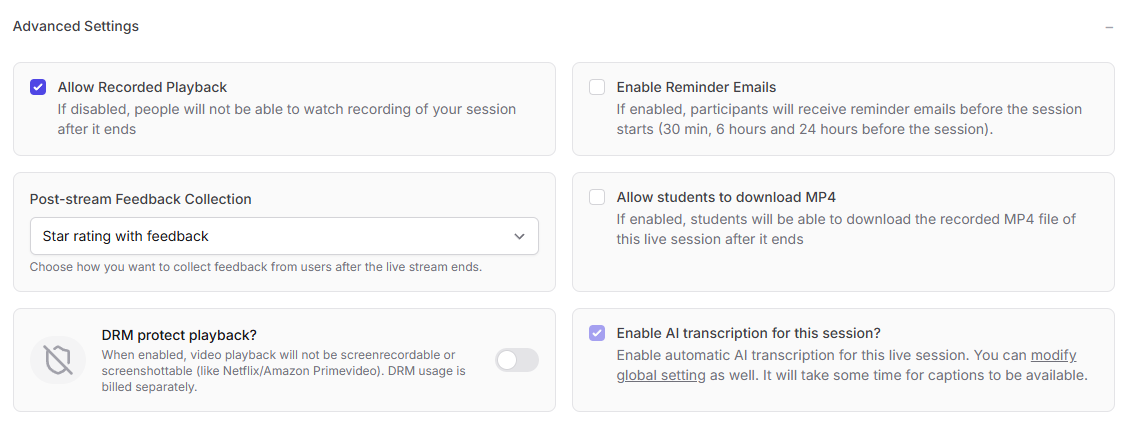
You can configure the following:- Recorded Playback: allows users to have access to the live session as a recorded video, that they can watch from their course page later.
- Enable Reminders: By default, reminder emails are sent to students 24 hours, 6 hours and 30 minutes before a live session starts. Learn how to enable reminders for all live events in your school
- Post-stream feedback collection: Shows user a screen where they can submit feedback and star rating for the live session. These ratings can be accessed later at livestream analytics.
- Allow MP4 downloads: You can make the session recording available to students as a downloadable video for offline access .
- DRM playback: Turning this on will prevent users from screen recording and screenshotting your content.
- Enable AI transcripts: You can opt-in to have transcripts generated for your live session, which will be directly available during playback of your recording as closed captions.
6
Publish the live class
Once you are done configuring your live session, click on 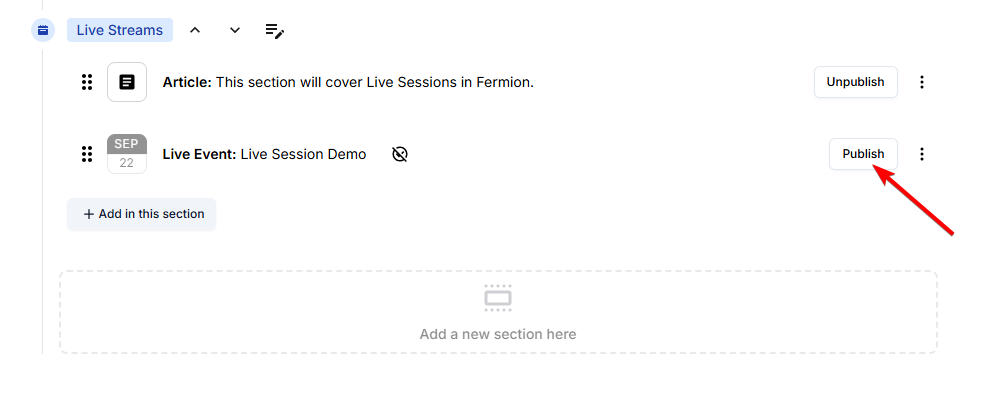
Publish to publish the live class.7
Access live sessions
Once you have published the class, go to 
Live Sessions from the left sidebar of your screen.8
Start the live stream
Click on  Instructors and added hosts can also access and start live classes directly from the Live event course items widget on their User dashboard, providing a quick way to go live without opening the Course Builder.
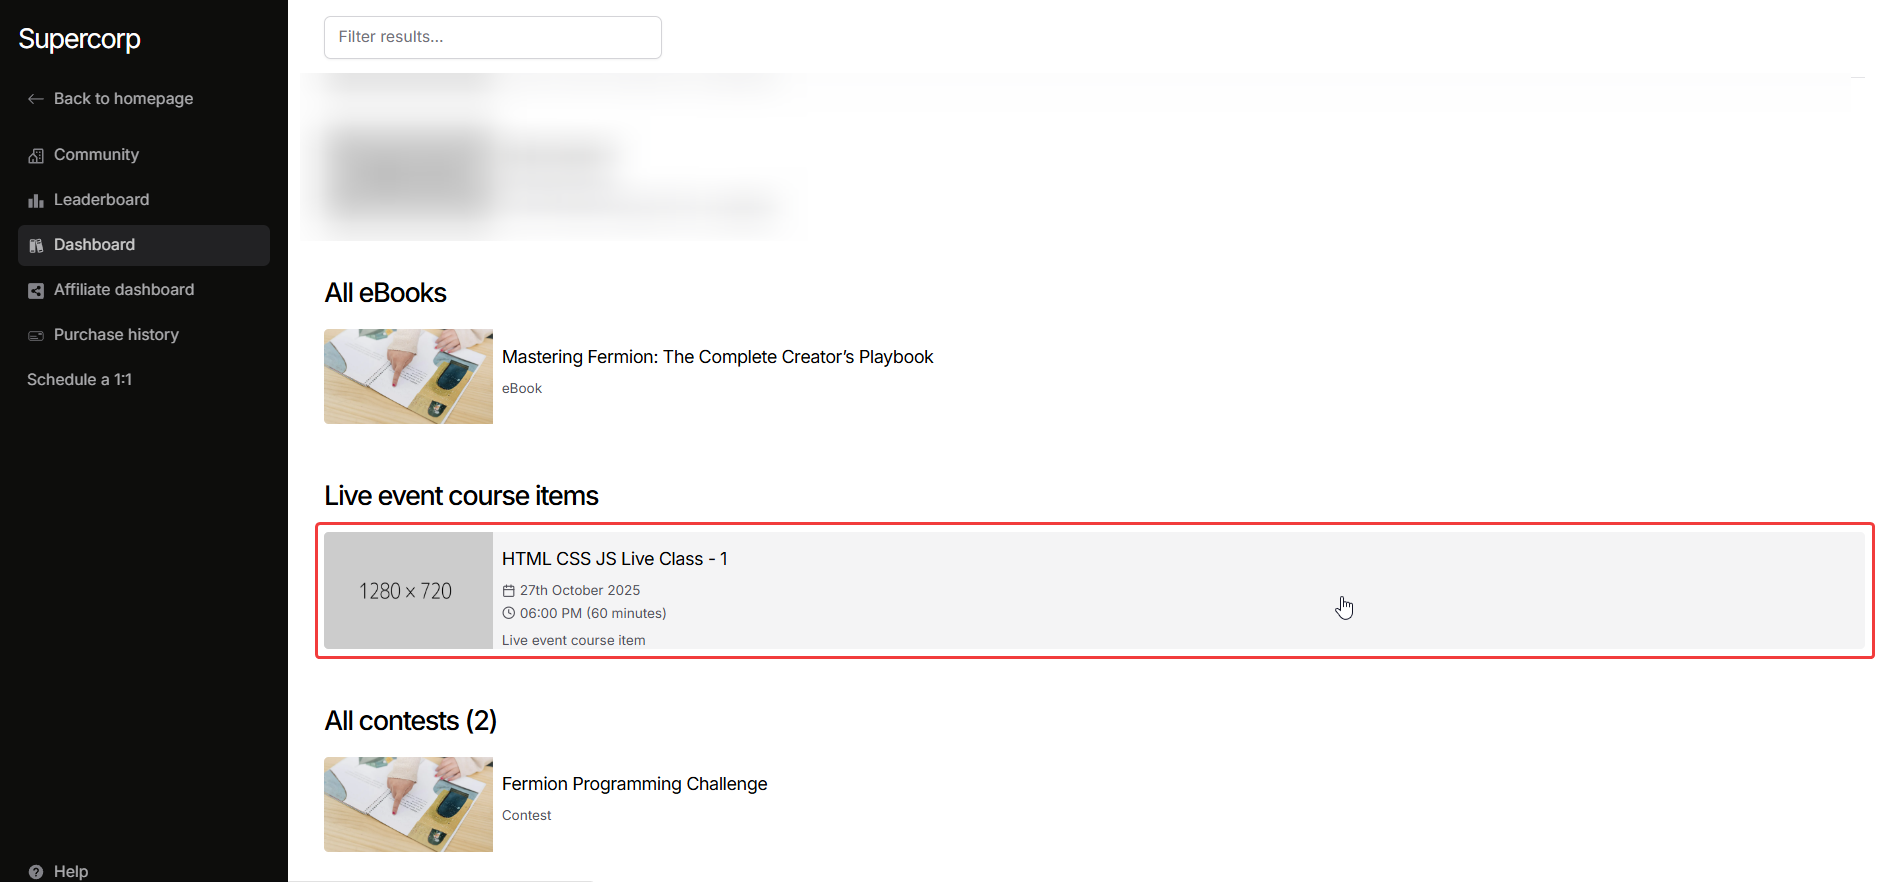
Start live stream for the live class that you have created.
Instructors and added hosts can also access and start live classes directly from the Live event course items widget on their User dashboard, providing a quick way to go live without opening the Course Builder.
9
Go live
Once you proceed, you will see such a screen. Press on the button Begin stream when you want to start streaming.
Your users on the other side (inside the course item page) will be able to watch the stream normally.
Press on the button Begin stream when you want to start streaming.
Your users on the other side (inside the course item page) will be able to watch the stream normally.
Press on the button Begin stream when you want to start streaming.
Your users on the other side (inside the course item page) will be able to watch the stream normally.10
End the session
Once your class concludes, click on End Session within the live call interface to properly end the live session. This ensures your recording is processed correctly and analytics are finalized.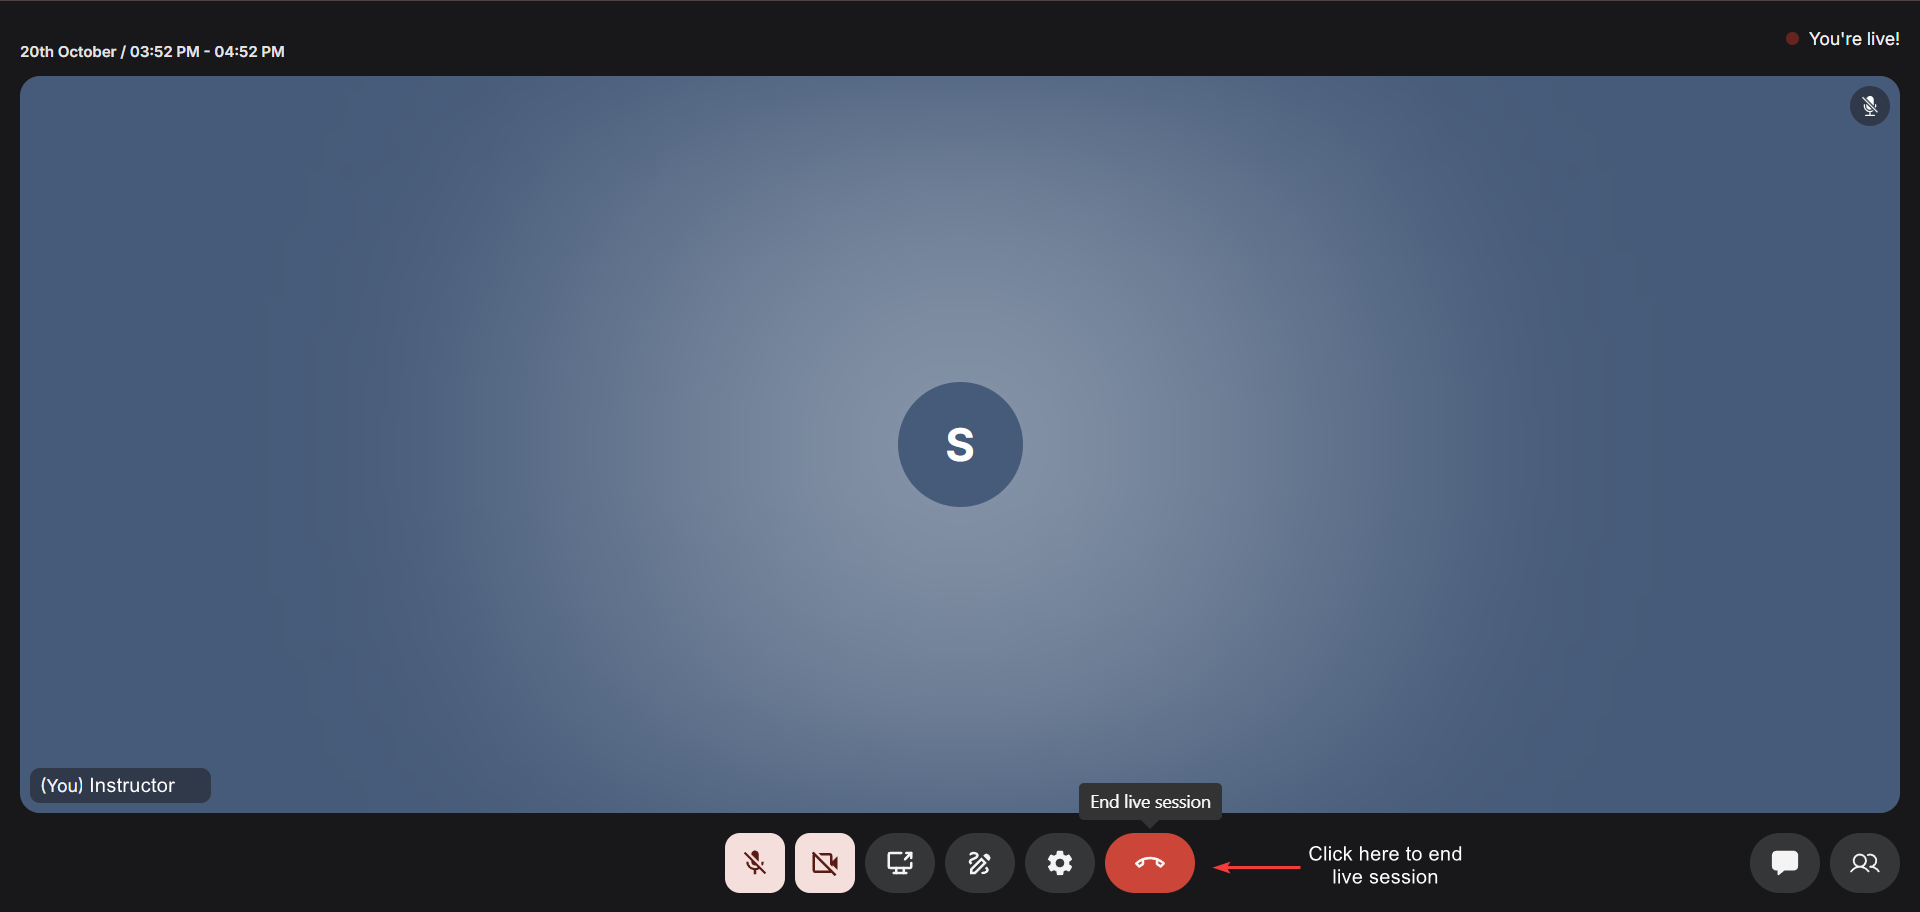
Only meeting hosts can end the live class for everyone.
Closing your browser tab or window does not automatically end the live session on Fermion’s
side. A session only ends when you manually end it within the call or by invoking the End
API. If the live call remains completely empty
(no participants) for 1 hour, the system will automatically end the session for you.
Scheduling live classes
You can schedule your live classes in two ways: singularly or in bulk using our Event Calendar.- Live class Scheduling: If you want to schedule a one-off session, you can set the date and time directly in the Event Calendar to create your live class. Learn more about this feature in Schedule a live class in Event Calendar
- Bulk scheduling: For multiple sessions at once, you can use the Event Calendar to plan your entire course’s live sessions ahead of time. This is especially helpful if you want to maintain a consistent weekly or monthly schedule. Learn more about Bulk Schedule live classes via CSV