Getting Started
1
Access the AI Lab Builder
To get started with the AI Lab Builder: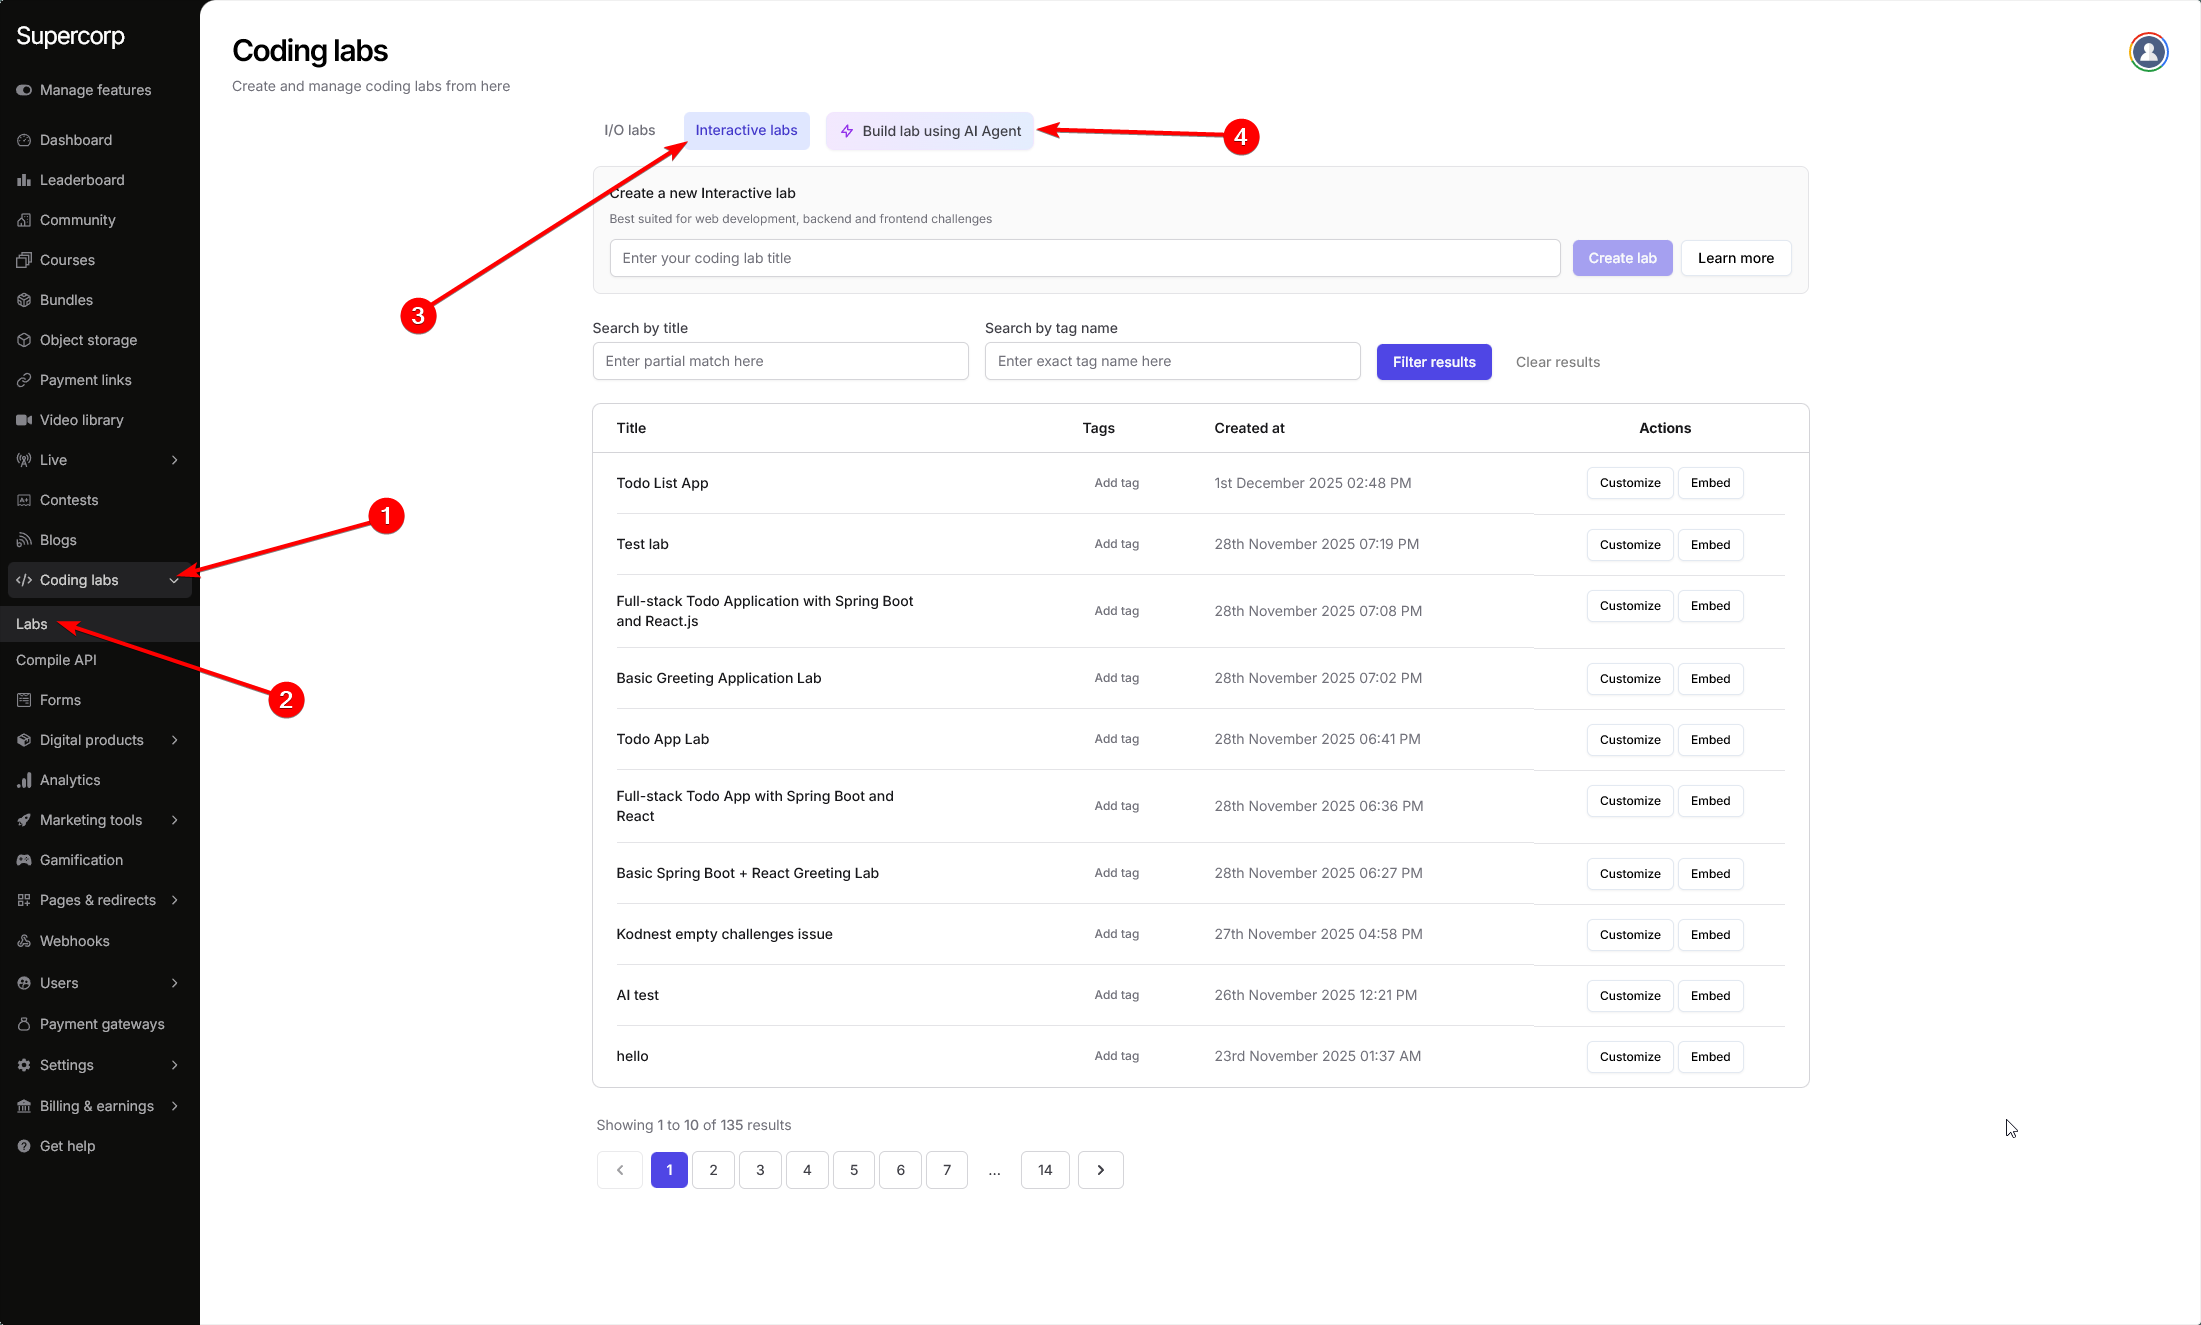
- Navigate to your Dashboard
- Go to Coding labs → Labs → Interactive labs
- Click on Build using AI Agent
2
Configure Your Lab
Once you’ve accessed the AI Lab Builder, you’ll need to: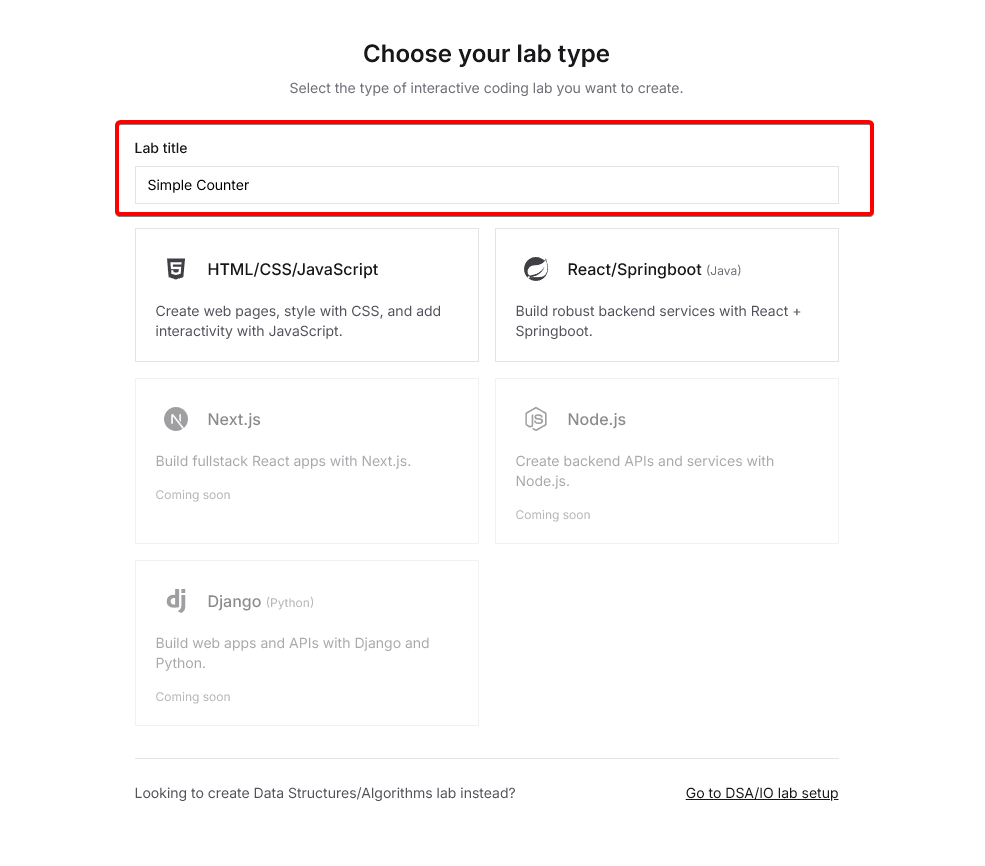 Once you’ve selected your preferred technology and entered a title, the AI Agent will help you generate the lab structure, including:
- Enter a title for your coding lab
- Choose a language or framework from the available options
Once you’ve selected your preferred technology and entered a title, the AI Agent will help you generate the lab structure, including:- Initial project setup
- Lab instructions
- Coding challenges
- Evaluation criteria
3
Use the AI Agent Chat Window
After configuring your lab, use the AI agent chat window on the left to start building your lab. The AI agent can understand natural language instructions and automatically configure your lab by invoking various tool calls.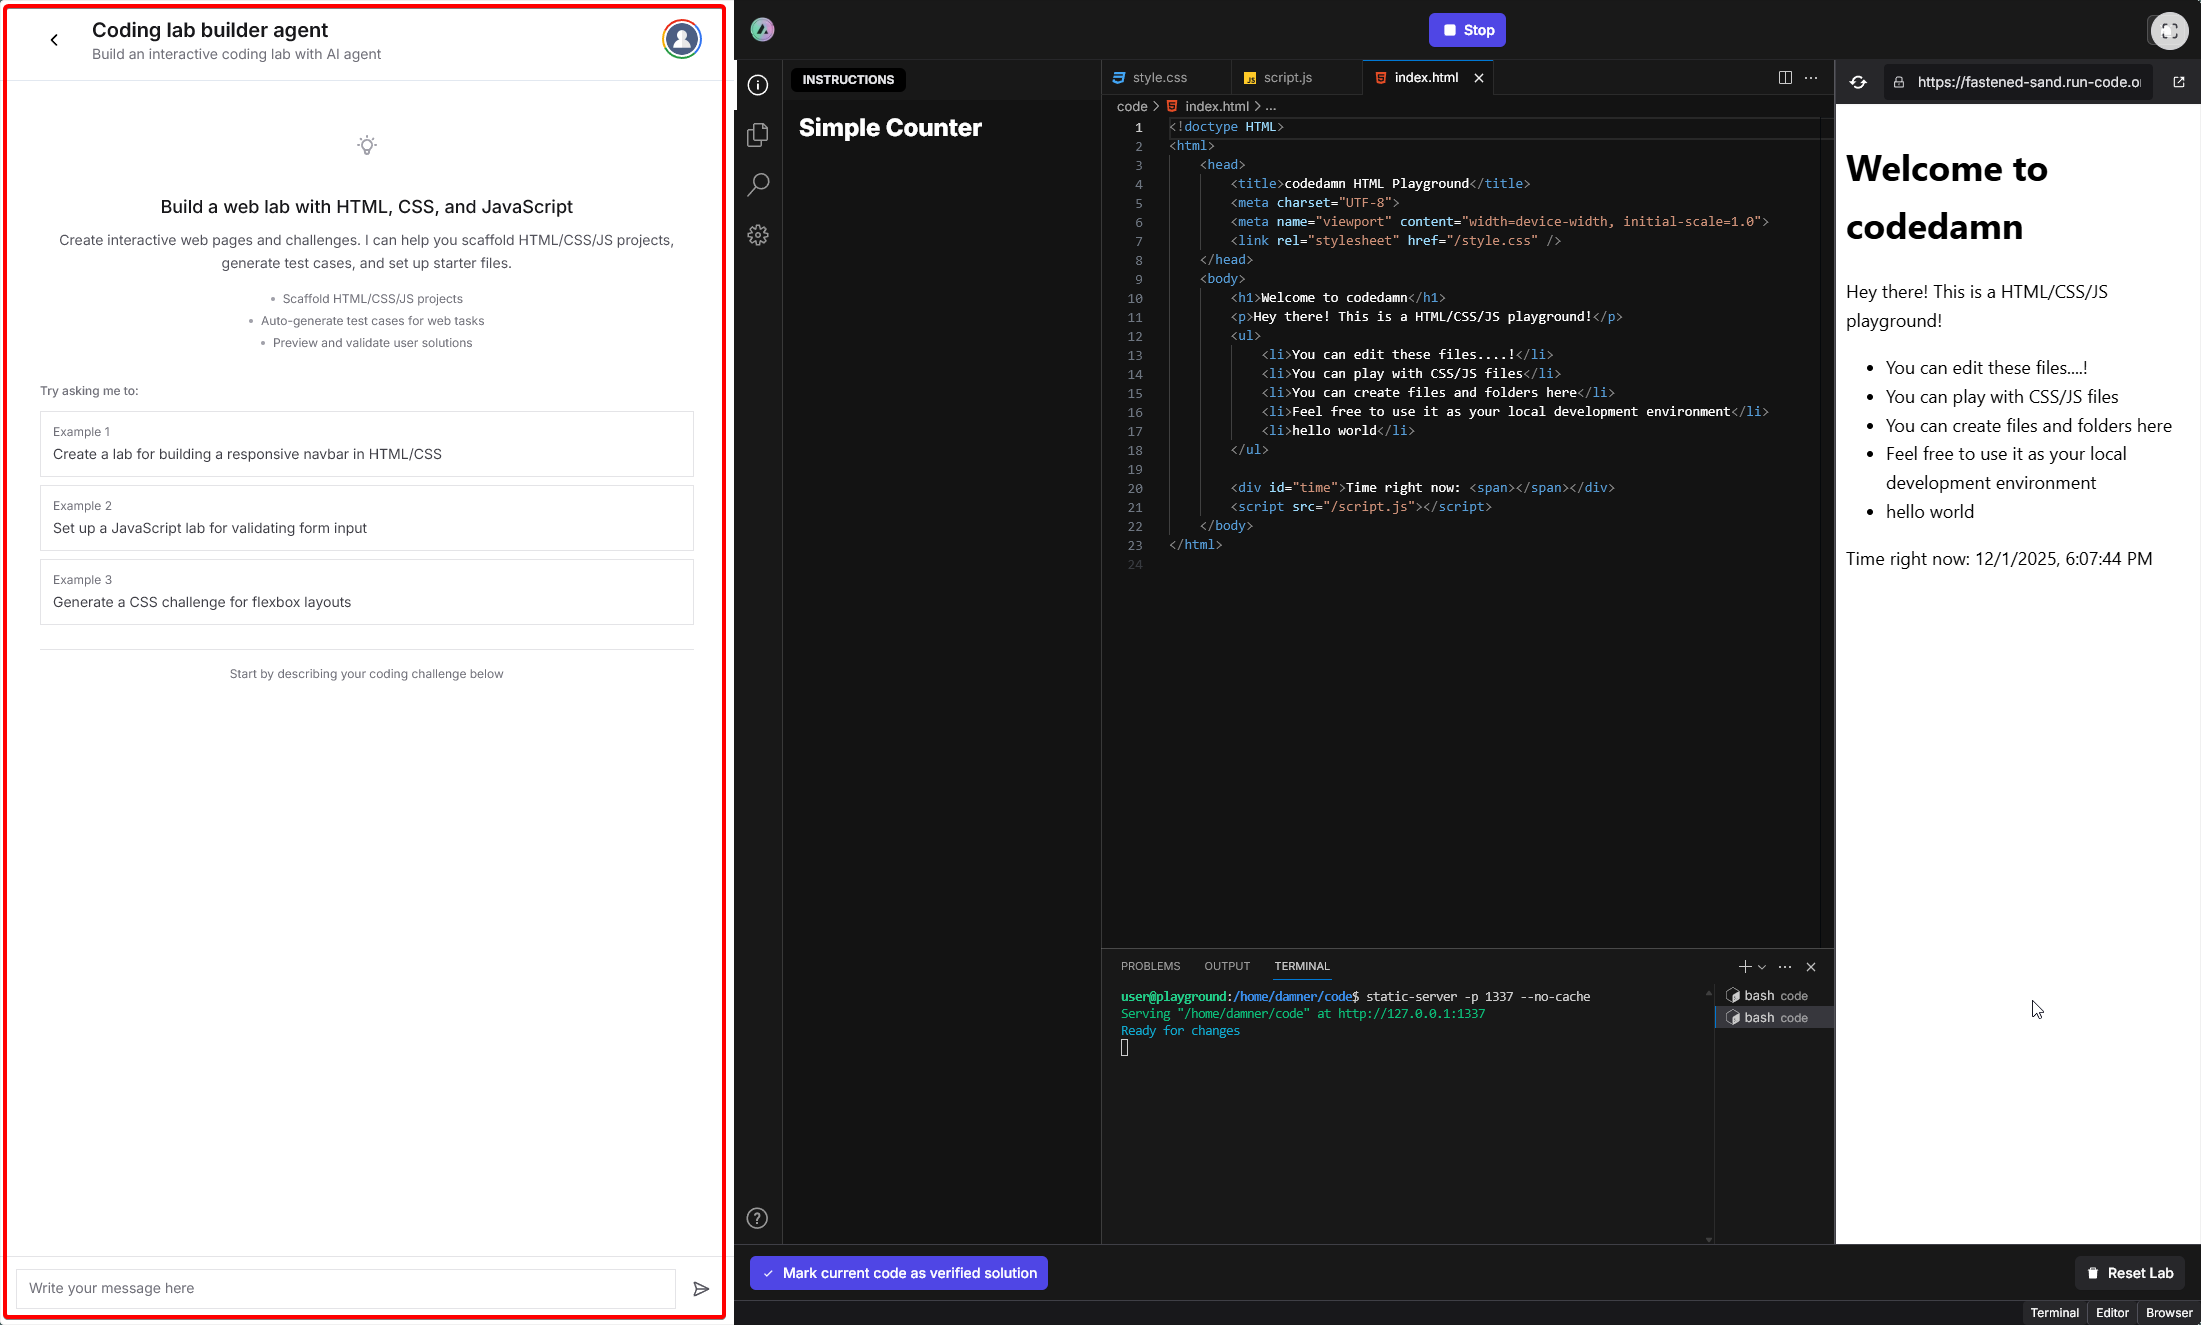 You can interact with the AI agent using natural language. For example, you can ask it to:
You can interact with the AI agent using natural language. For example, you can ask it to:- Create project files and folder structure
- Install dependencies
- Set up test cases
- Configure the lab description
- Generate evaluation scripts
4
Interact with the AI Agent
Interact with the AI agent by describing your requirements in natural language. The AI agent will process your instructions and automatically set up the lab for you, including: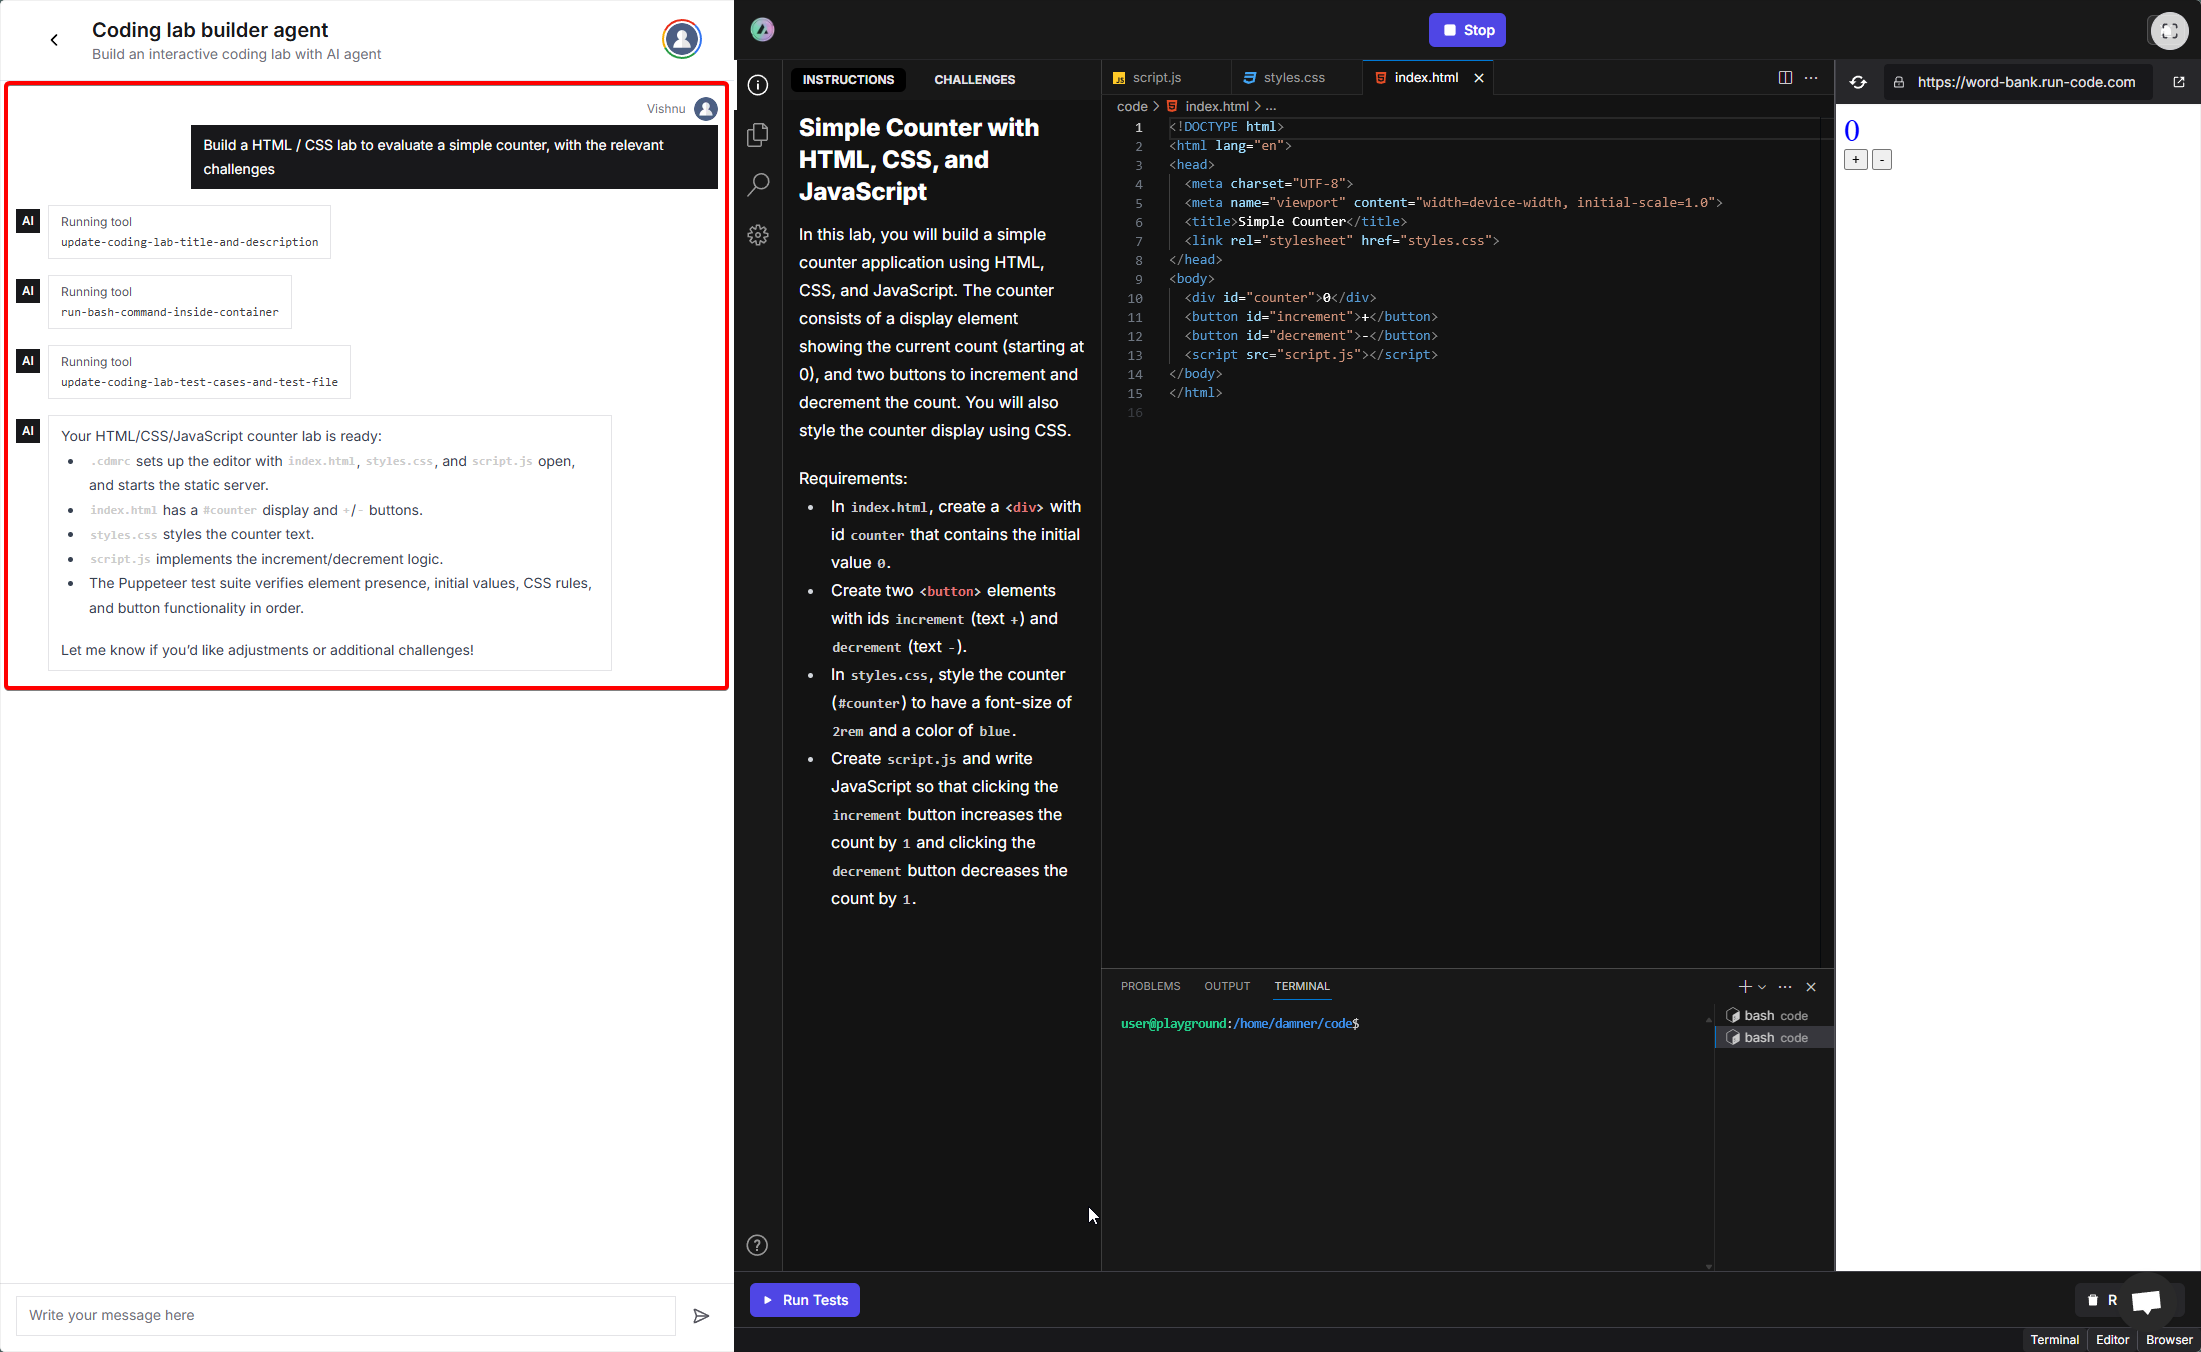 Simply type your requirements in the chat window and wait for the AI agent to set up the lab. The agent will execute the necessary tool calls in the background and provide you with a summary once the lab is ready. You can then review the generated lab, test it, and make any additional adjustments as needed.
- Creating the necessary project files
- Writing initial code templates
- Configuring challenges
- Updating lab instructions and descriptions
Simply type your requirements in the chat window and wait for the AI agent to set up the lab. The agent will execute the necessary tool calls in the background and provide you with a summary once the lab is ready. You can then review the generated lab, test it, and make any additional adjustments as needed.5
Verify the Generated Lab
After the AI agent has set up your lab, it’s important to verify that all the generated data and code are correct. Review the following components and make any necessary adjustments before using the lab in your courses.
Available Languages and Frameworks
The AI Lab Builder supports the following technologies:HTML/CSS/JavaScript
Create web pages, style with CSS, and add interactivity with JavaScript.
React/Springboot (Java)
Build robust backend services with React + Springboot.

Next.js
Build fullstack React apps with Next.js
(Coming soon)
(Coming soon)
Node.js
Create backend APIs and services with Node.js
(Coming soon)
(Coming soon)
Django (Python)
Build web apps and APIs with Django and Python
(Coming soon)
(Coming soon)
Available Tool Calls
The AI agent can invoke the following tool calls to build your lab:update-coding-lab-title-and-description
update-coding-lab-title-and-description
Updates the lab’s title and its Markdown description.Parameters:
title(string) - The title of the coding labdescription(string) - The Markdown description of the lab
update-coding-lab-test-cases-and-test-file
update-coding-lab-test-cases-and-test-file
Defines or updates the array of challenge descriptions and the Puppeteer-based evaluation script.Parameters:
testCases(string[]) - List of challenge texts in ordertestFileContent(string) - Full content of the Node.js/Puppeteer test file
run-bash-command-inside-container
run-bash-command-inside-container
Executes an arbitrary bash command inside the sandbox (working directory:
/home/damner/code). Useful for creating files, listing directories, installing dependencies, etc.Parameters:command(string) - The bash command to execute
Verification Checklist
After the AI agent has set up your lab, use this checklist to verify everything is correct:Check the Challenges
Check the Challenges
Make sure the AI has generated the right set of challenges that align with your requirements. You can view the challenges in the CHALLENGES tab on the left sidebar. Verify that:
- All required challenges are present
- Challenge descriptions are clear and accurate
- Challenges are in the correct order
- Each challenge tests the intended functionality
Review Generated Code
Review Generated Code
Check the generated code files to ensure:
- Project structure - Files and folders are organized correctly
- Code quality - The initial code templates are appropriate for the lab
- Dependencies - Required packages and libraries are properly installed
- File completeness - All necessary files have been created
Test the Lab
Test the Lab
Use the Run Tests button to verify that:
- The lab environment boots correctly
- All challenges can be evaluated properly
- The evaluation script works as expected
- Students can complete the challenges successfully
Make Adjustments
Make Adjustments
If you find any issues or want to make changes:
- Continue chatting with the AI agent to request modifications
- Manually edit files, challenges, or descriptions as needed
- Test again to ensure everything works correctly