> ## Documentation Index
> Fetch the complete documentation index at: https://docs.fermion.app/llms.txt
> Use this file to discover all available pages before exploring further.
# Public Events
> Host live sessions that are open to everyone using Fermion’s Public Events feature.
## Overview
[Live Events](/live-classes/what-are-live-classes) on Fermion can be added inside your courses, or hosted as **public sessions** accessible to anyone through a shareable invite link.
This gives you complete flexibility: teach within a structured course or reach a wider audience with open webinars, bootcamps, and workshops.
***
## Creating a Public Event
Creating a public event allows you to host sessions that anyone can join using a shareable link, making it perfect for webinars, workshops, or open community classes. Follow the steps below to set up your event from start to finish.
Make sure the **Live Events** feature is enabled under **[Manage Features](/manage-settings/manage-features)** in your instructor dashboard.
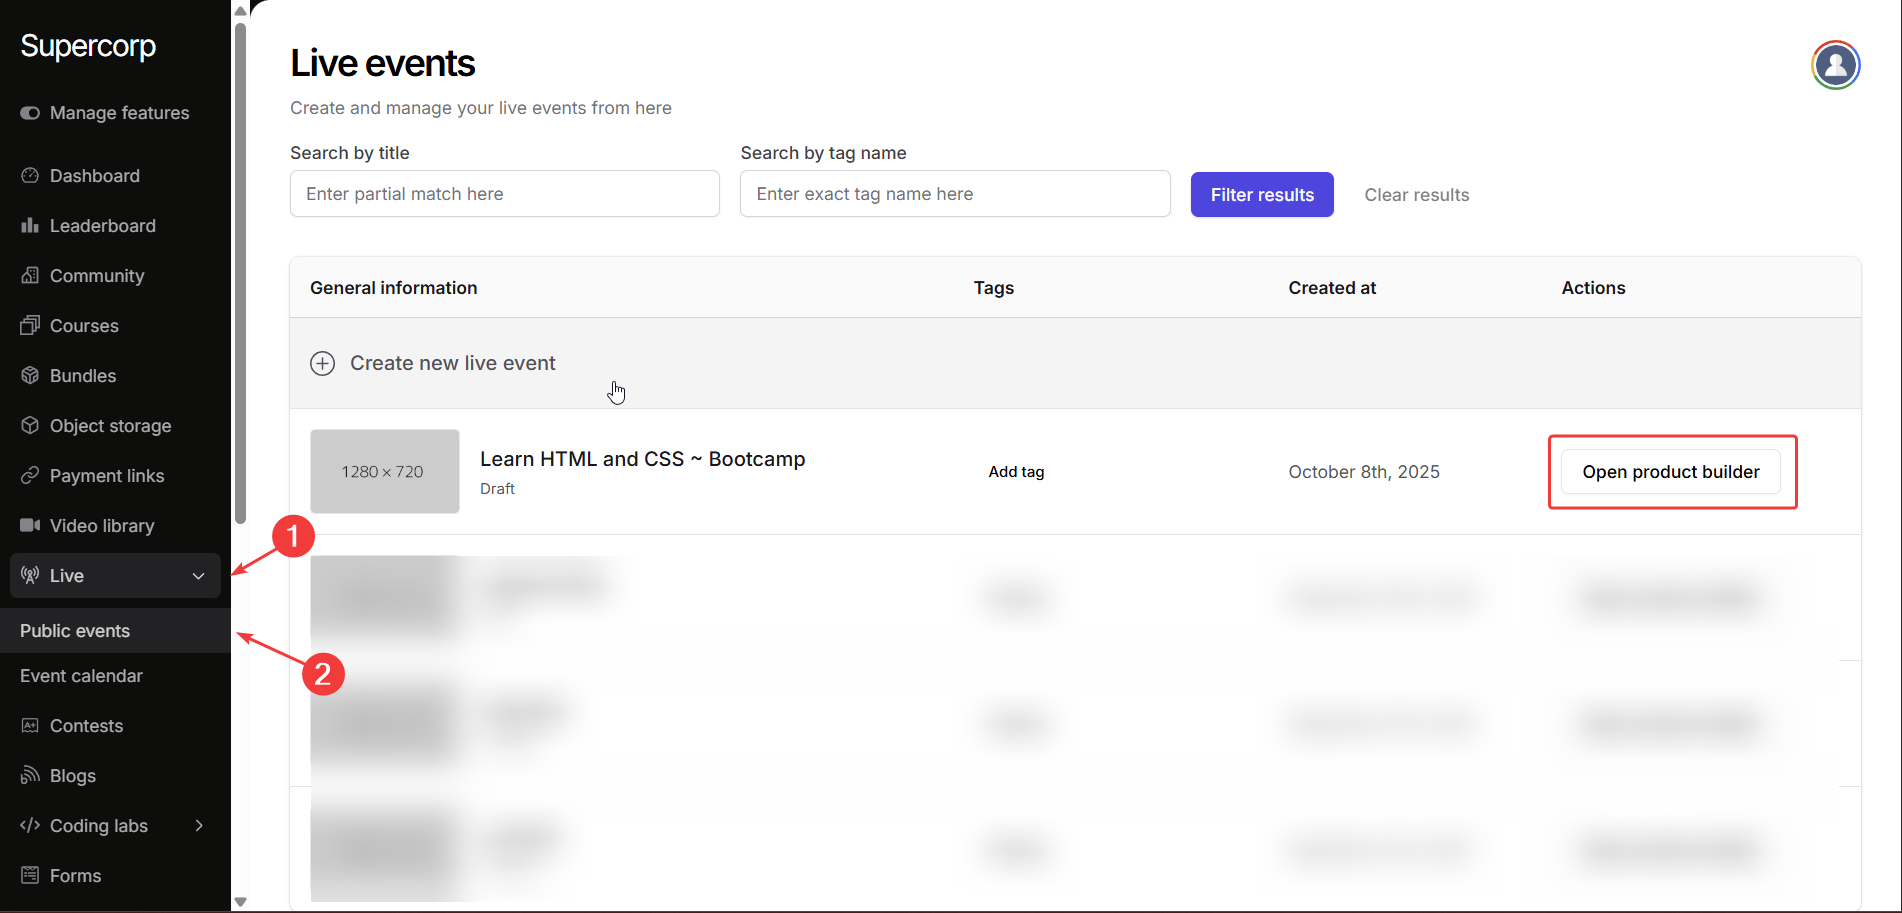
Navigate to **Live → Public Events** from your instructor dashboard sidebar. Here you can click
**Create New Event** or open an existing one in the **Product Builder** to edit.
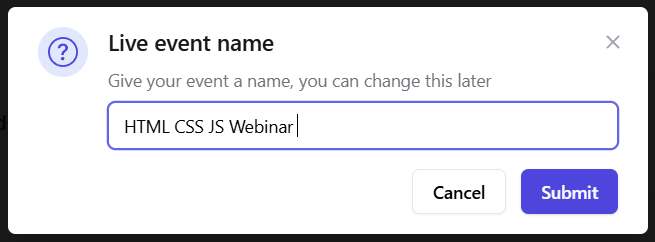
Give your public event a clear and engaging title.
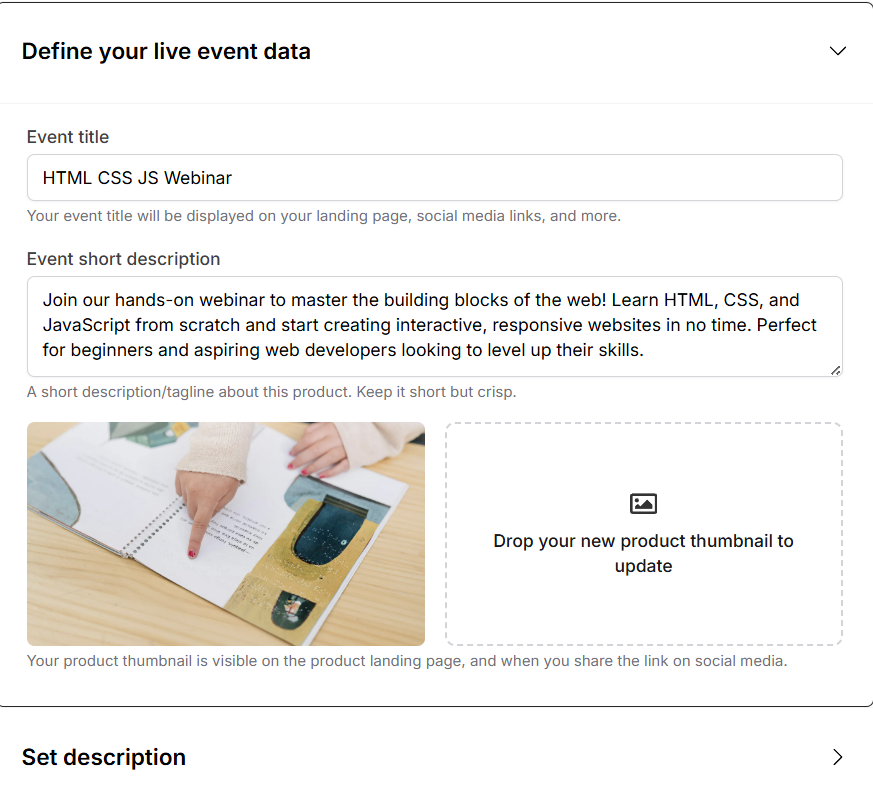
Head over to the **Landing Page** section in your public event sidebar and start customizing your event’s basic details.
Add the following information:
* **Title**
* **Short Description**
* **Thumbnail**
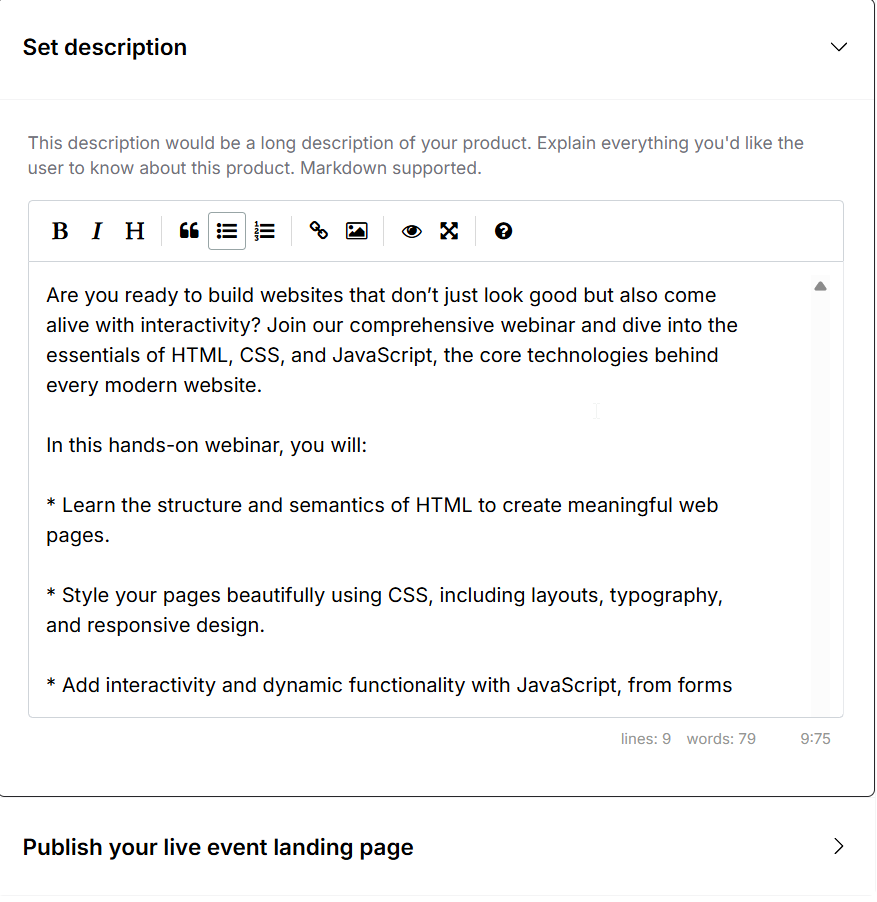
Use the **Public Event Description** editor to add detailed content about your session. This
section supports **rich text**, so you can include headings, formatted text, hyperlinks, and
lists to make your event page more engaging.
Once everything looks perfect, hit **Publish**.
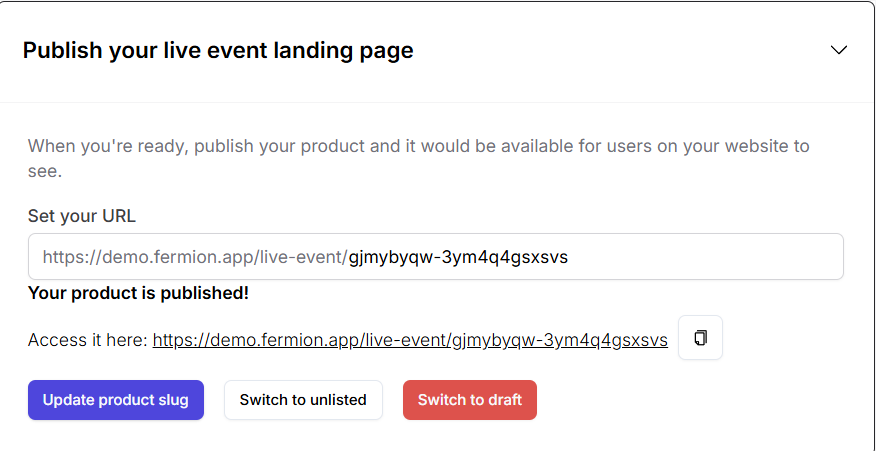
Your public event will now be live, and you can **copy the event link** to share the landing page of the live event. On top of that, you can also set a custom slug for your public event.
***
## Standalone Invites
Stand-alone invites allow you to share access to your Public Events without requiring students to register for a full course or cohort. They are ideal for special webinars, bootcamps, workshops, guest sessions, or promotional live events.
With stand-alone invites, you can **control access**, **track participation**, and easily **revoke or reactivate** invites as needed. This provides flexibility for both organizers and attendees while keeping your events secure and manageable.
***
## Create a stand-alone invite for public events
Use stand-alone invites to give participants access to a public live event through a unique link with the help of the following steps:
Before creating a public event and invites, make sure the **Live Sessions** feature is enabled in your account. Learn how to [**Manage Features**](/onboarding/account-setup#step-2%3A-manage-features)
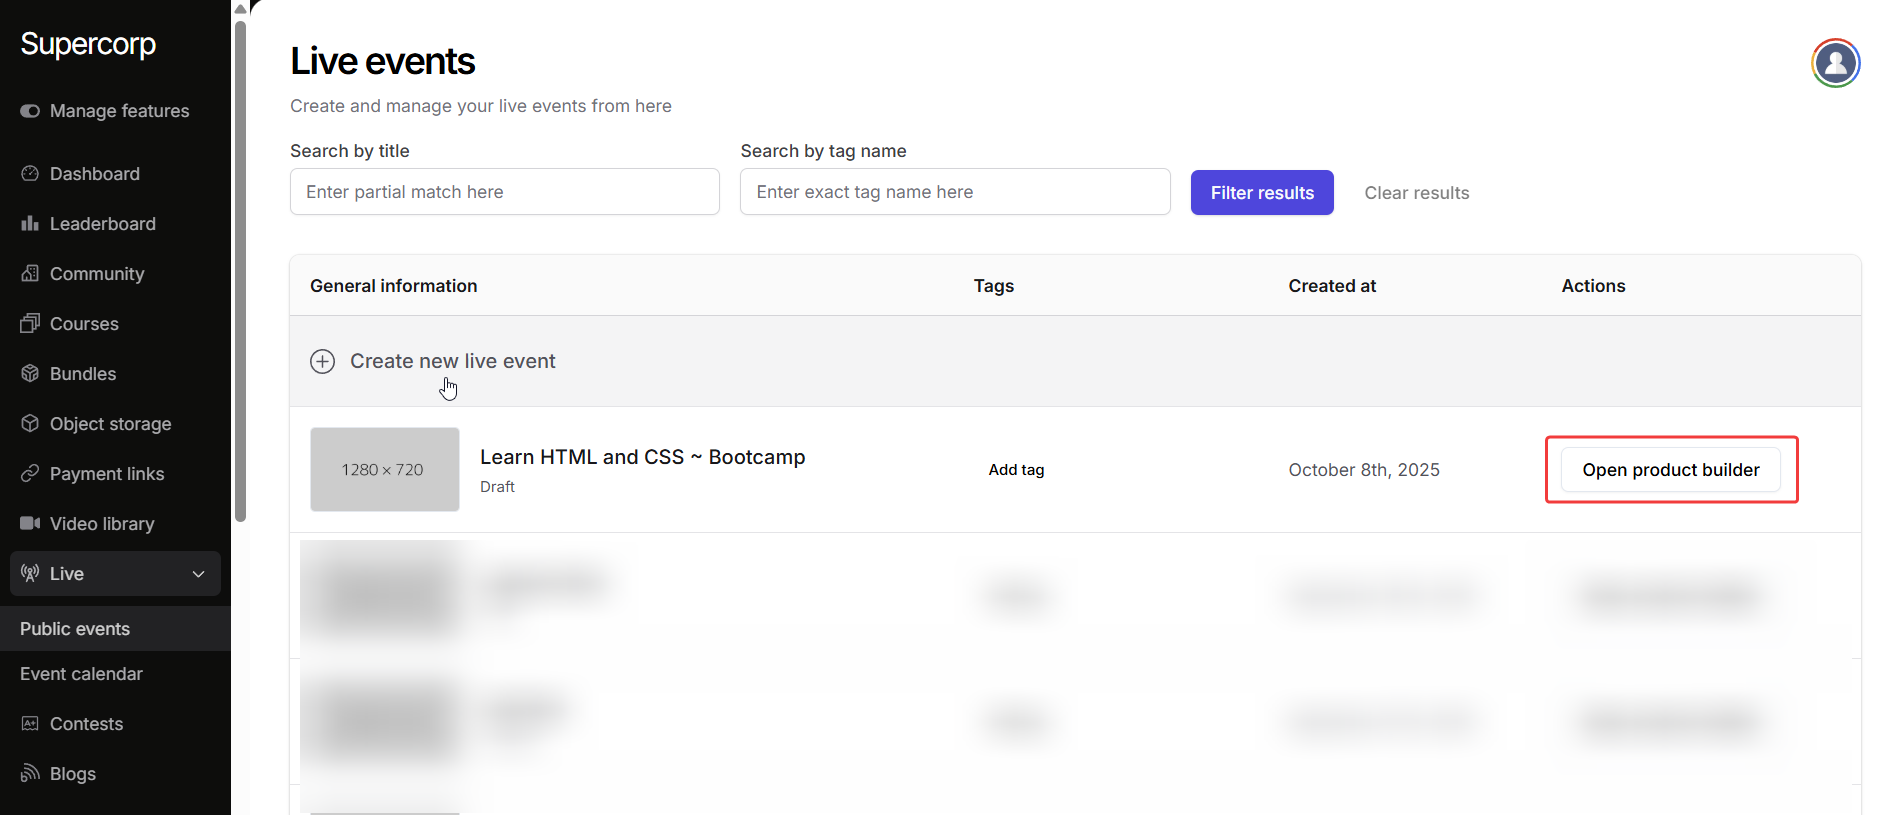
1. Navigate to **Live → Public Event** in your dashboard.
2. Click on **Create New Event** to start a public live session. You can also create invites for previously created live events by clicking **Open product builder** . Learn more about creating [Public Events](/live-classes/public-event)
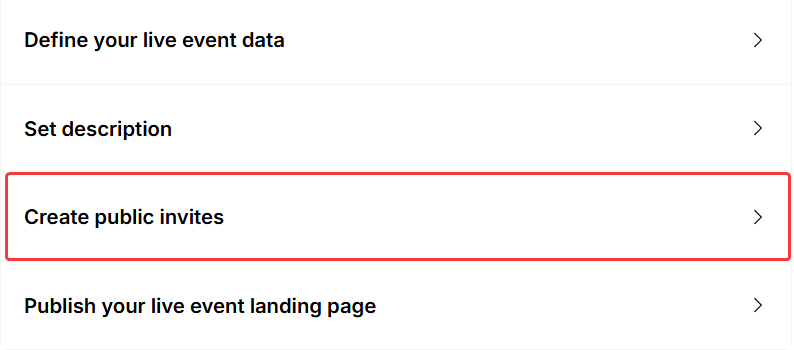
1. Click on **Create public invites** in the landing page builder
2. Click on **Create new invite** to create a new invite ID and a public link.
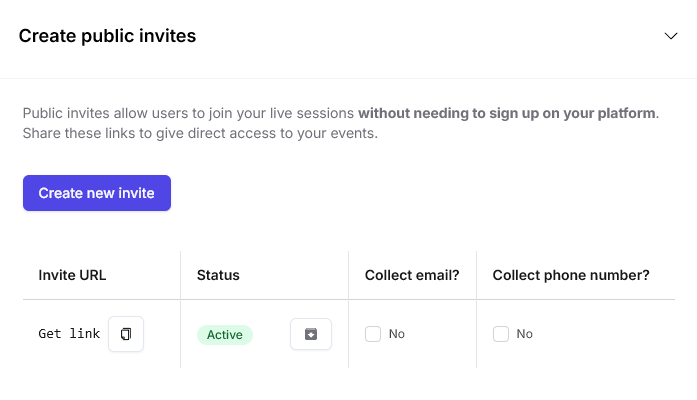
Once your invite is created, you'll see it listed below the create new invite button, showing key options for managing access.
* Click **Get link** to copy the unique invite URL and share it with participants.
* The **Status** column displays the current state (e.g., **Active**).
* To temporarily block access, click the status menu and select **Revoke Invite**.
* To allow access again, select **Reactivate Invite** in the same menu.
* Use the checkboxes to choose whether to collect participants' email addresses or phone numbers when they join using your invite.
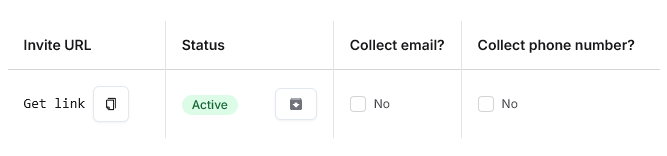
And that's it! You can now share the invite link with your audience and manage access and data collection preferences directly from this table.
Stand-alone invites make it simple to share access to your public [live events]() with a controlled audience. You can create, share, revoke, and reactivate invites easily, ensuring a smooth experience for both organizers and participants.
***
## Session management
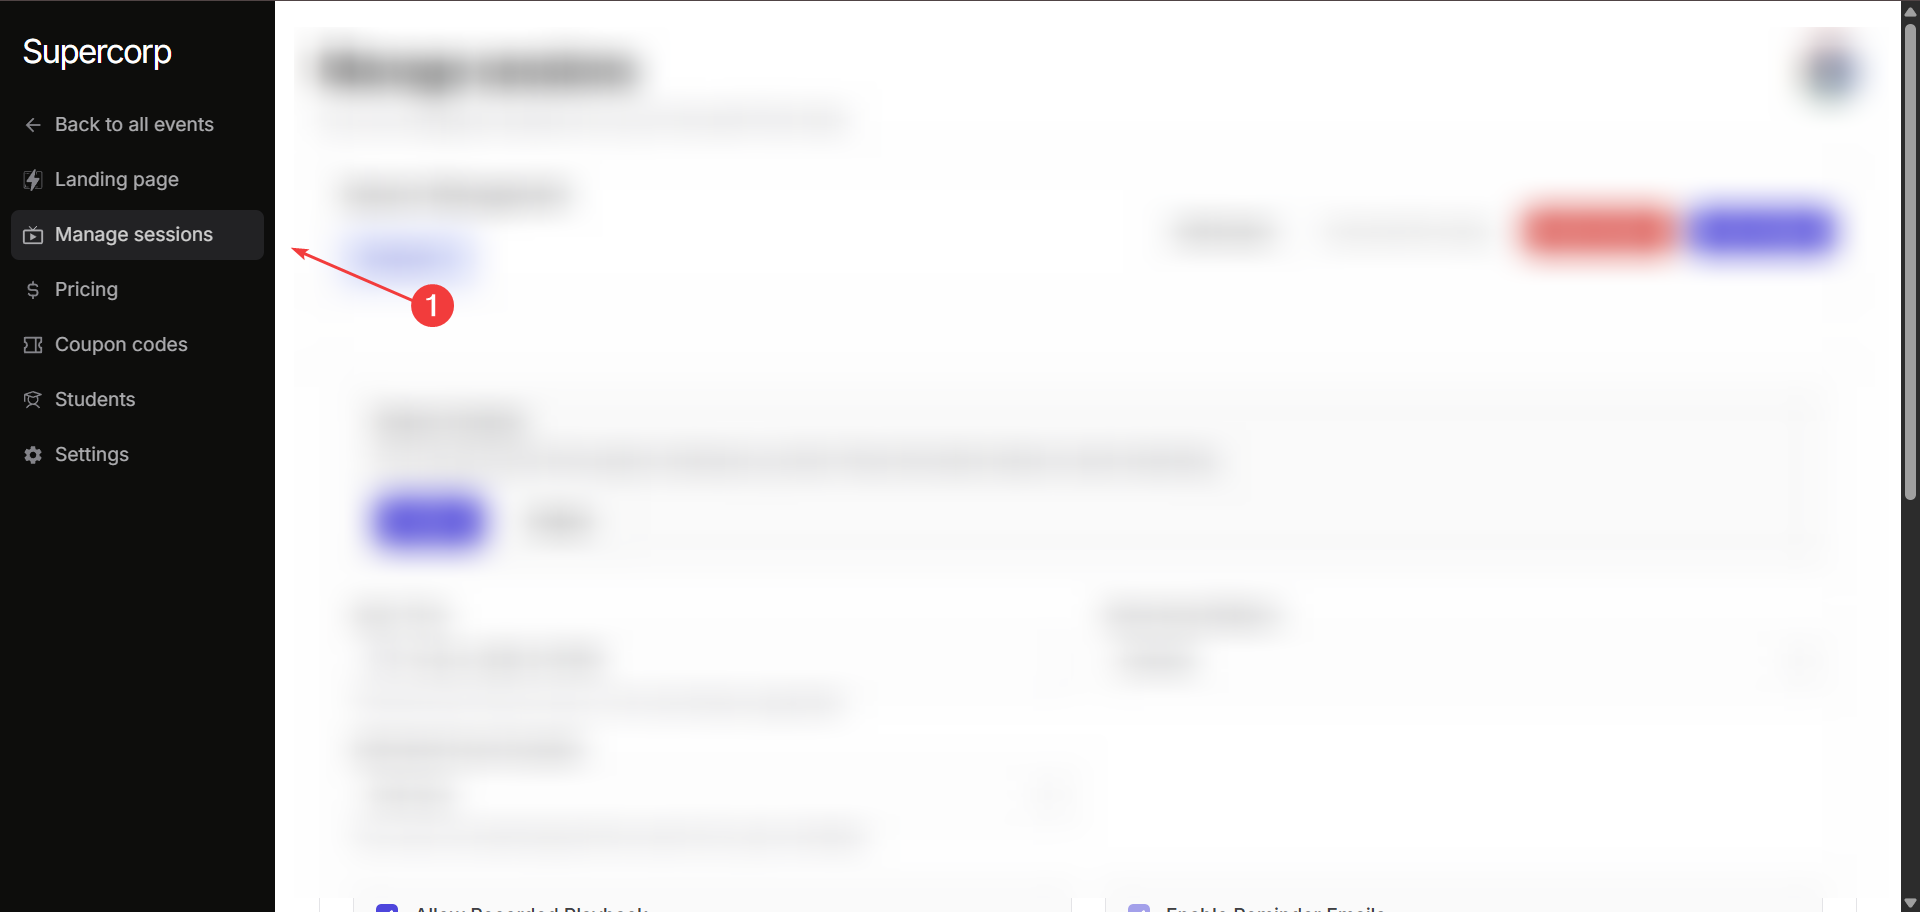
Manage and customize your public event sessions from the **Manage sessions** tab. Here you can configure streaming preferences, event timing, playback permissions, and participant notifications to ensure a seamless viewing experience.
Head over to the **Manage sessions** tab in your product builder to access settings of the public event.
### Go live
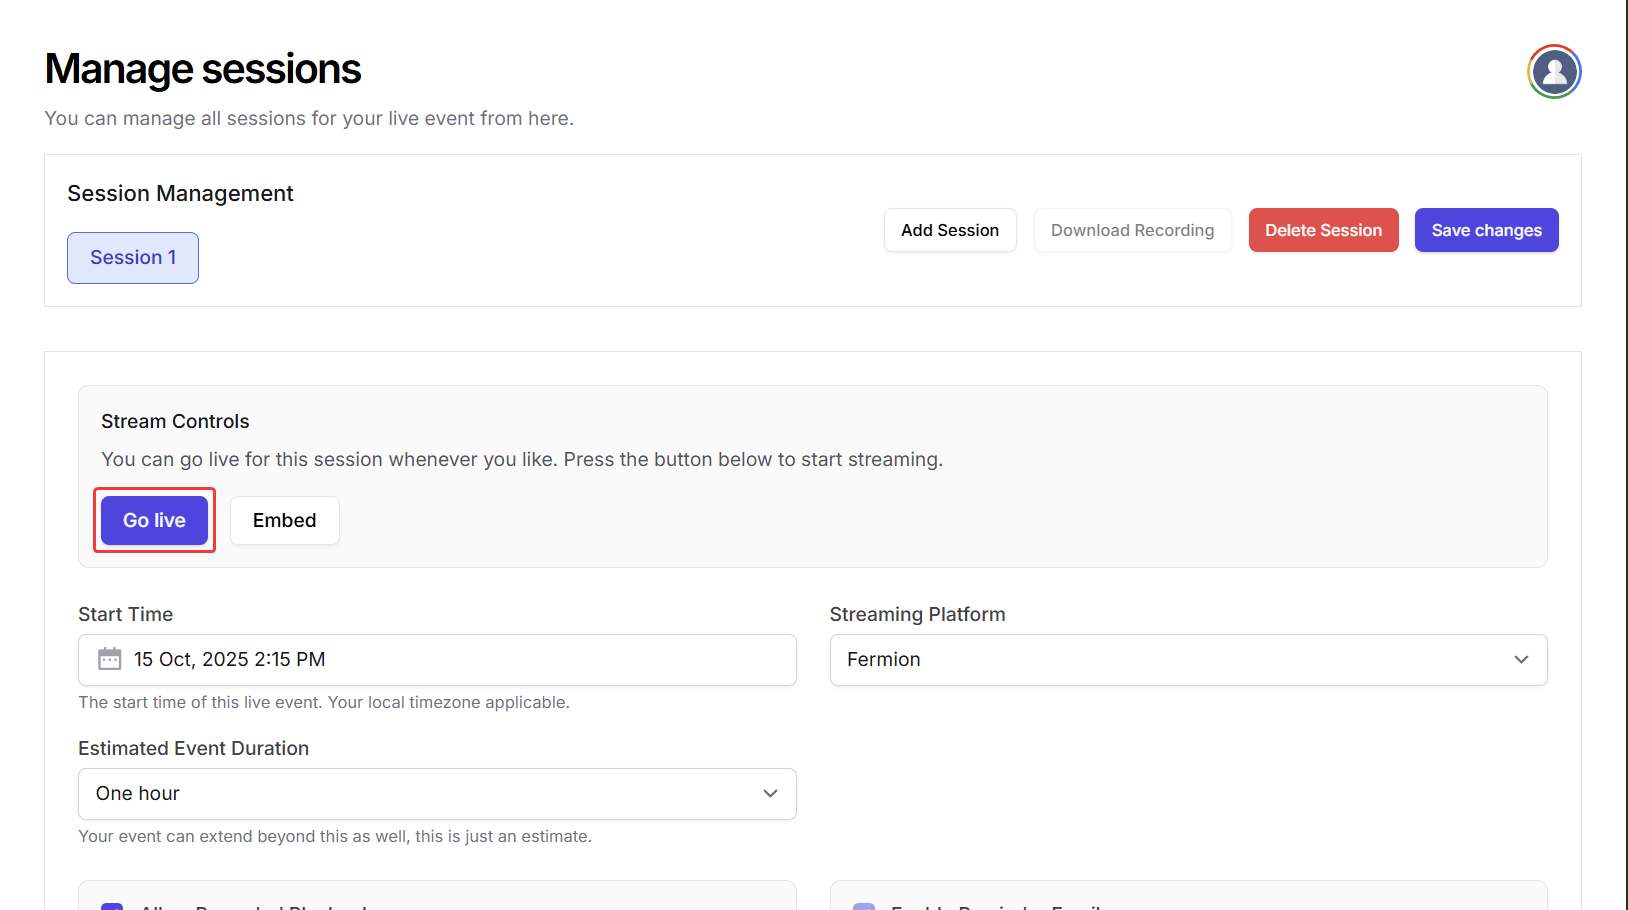
You can use the **Manage sessions** tab to go live with your public event. Click on the **Go live** button in Stream controls to start the live session
### **Start time**
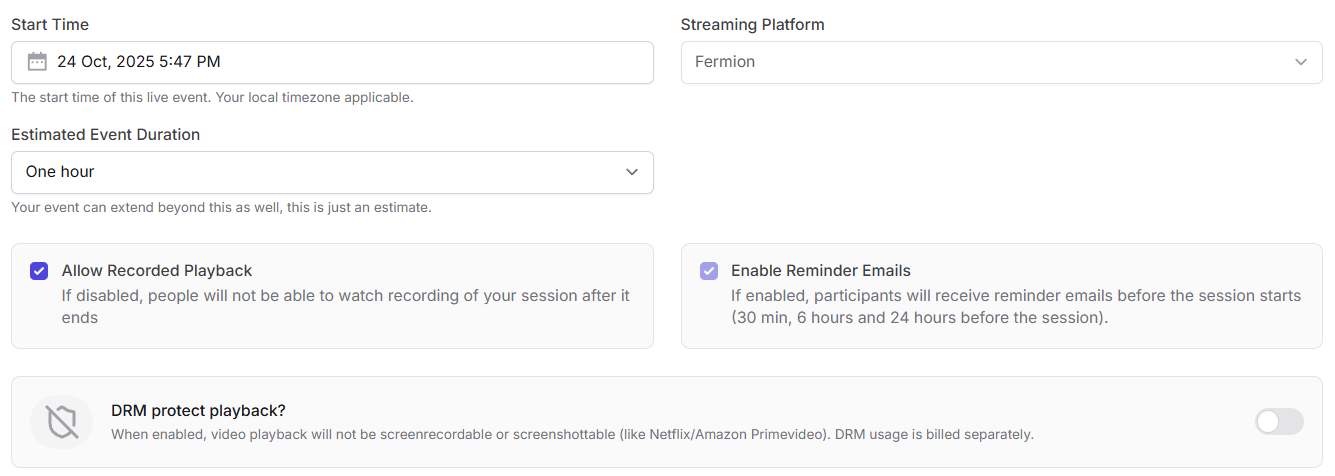
Displays the scheduled start time for your live session.
Example: `24 Oct, 2025 – 5:47 PM (Your local timezone)`
### **Estimated event duration**
Set an approximate duration for your session (e.g., one hour). Your session can continue beyond the estimated time without any interruption.
### **Allow recorded playback**
If enabled, participants can rewatch the session recording after it ends. If disabled, playback will be unavailable once the live event concludes. Learn more about [auto-recording](/live-classes/recording-and-captions).
### **Enable reminder emails**
Send automatic reminders to registered participants at key intervals before the event begins:
* 24 hours before the event
* 6 hours before the event
* 30 minutes before the event
This ensures participants don’t miss your live session.
### **DRM protected playback**
When enabled, playback is secured with DRM protection: preventing screen recording or screenshots (similar to Netflix or Amazon Prime Video). Learn more about [DRM protection](/live-classes/drm-and-watermarking).
{' '}
Please note that DRM usage is billed separately. Head over to [Fermion Pricing](https://fermion.app/pricing)
for more information regarding DRM playbacks
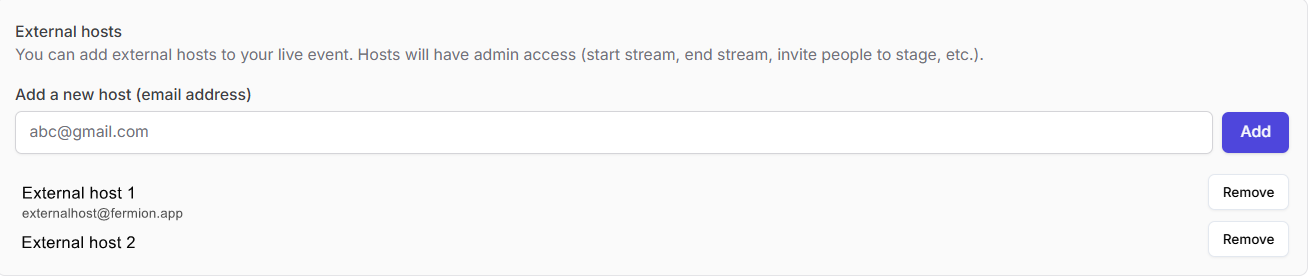
### External hosts
You can invite additional hosts to help manage your live event.
Hosts have administrative privileges : including starting or ending the stream, inviting speakers to stage, and moderating participants.
To **add an external host**, perform the following steps:
1. Enter the host’s email address in the **Add a new host** field.
2. Click **Add** to give the user with this email address host privileges.
## Pricing & Coupon Codes
Pricing for public events works **exactly like pricing for other product types** (such as [Courses](/setting-up-course/prerequisites) or [eBooks](/digital-products/introduction)).
You can set fixed prices, discounted prices, and manage regional pricing if applicable.
[Learn how to set up pricing](/setup-pricing/fixed-pricing-plan)
You can also apply coupon codes to public events, similar to other products.
This allows you to offer limited-time deals or special access promotions.
[Learn how to create coupon codes](/setup-pricing/add-coupon-codes)
Coupons and pricing logic remain consistent across all product types for a unified experience.
***
## Enrolling students
Students can purchase access to **public events** from the landing page.
As an admin, you can also **manually enroll students** into a public event, for example, for corporate access or complimentary offers.
Head over to the **Students** section in your product builder to manually import users
[Learn how to manually enroll students](/digital-products/enroll-students)
***
## Management settings
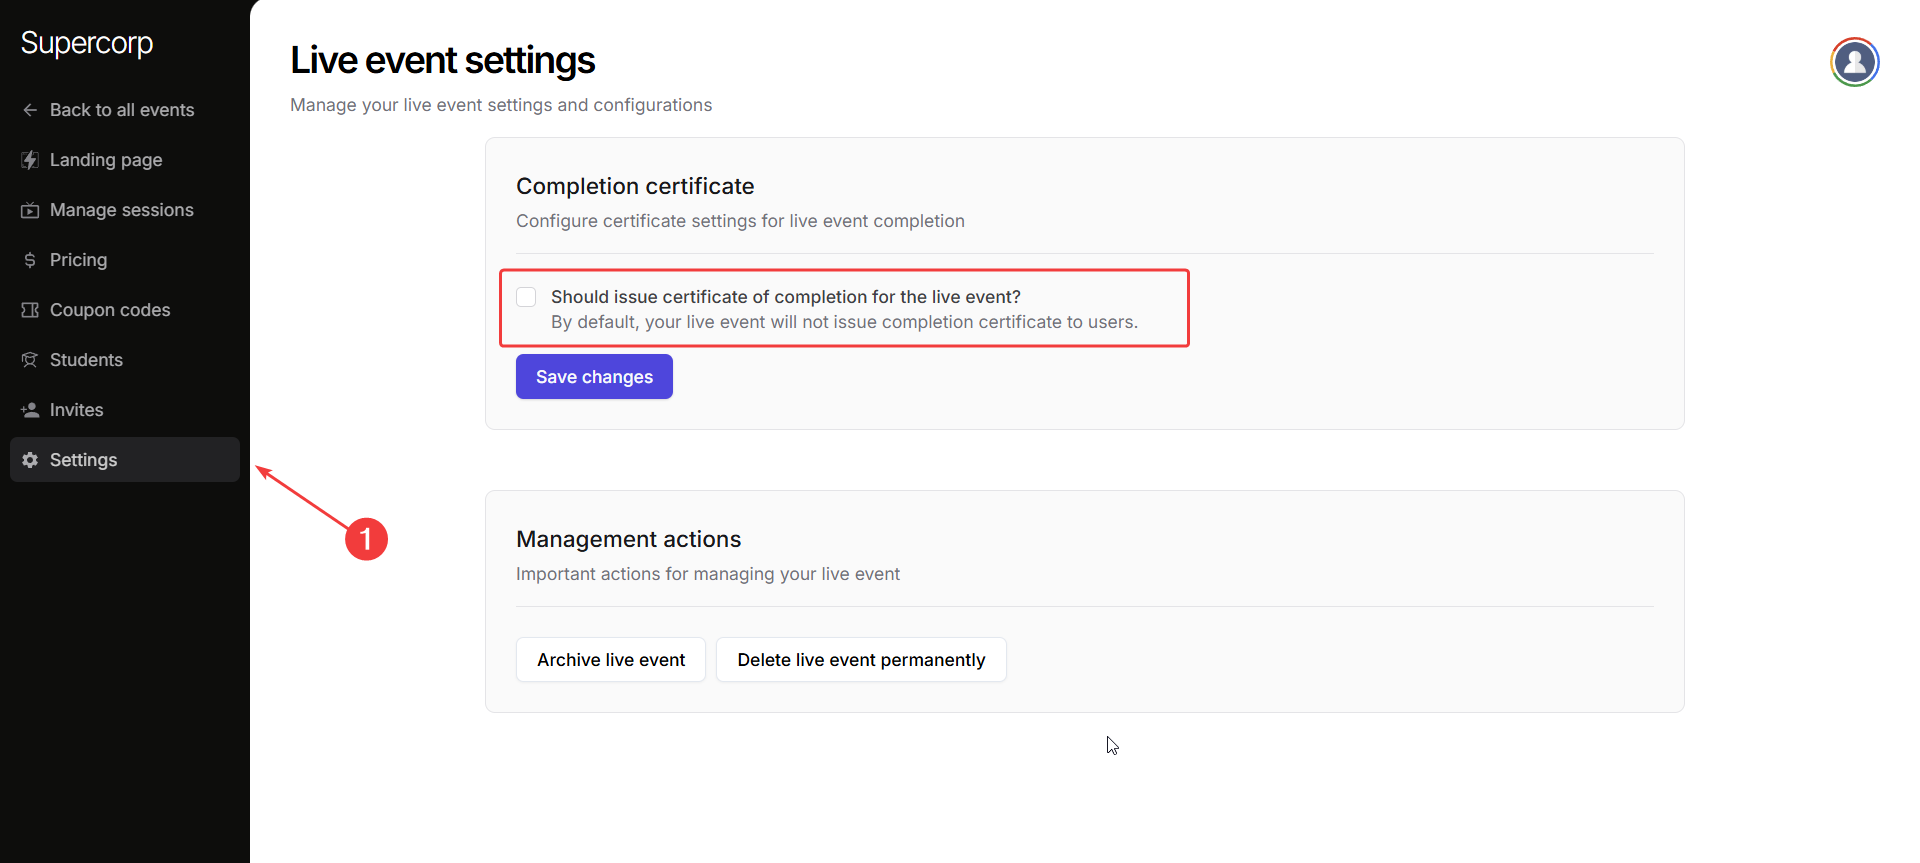
Manage how your public live event behaves after setup, including certificates to administrative actions. Head over to the **Settings** tab in your public event sidebar to access these settings.
### Completion certificate
Control whether attendees receive a **certificate of completion** after the live event.
By default, certificates are **disabled**. Toggle **“Issue certificate of completion”** to enable, then click **Save Changes** to apply.
### Management actions
Temporarily hide the event without deleting it. Archived events can be restored later if you
wish to make them available again.
Completely remove the event and all its data from your account. Use this only when you’re sure
the event is no longer needed.
This action **cannot be undone**! Once deleted, the event and all related data are
permanently removed.